The hardware enthusiast's corner
Message boards :
Number crunching :
The hardware enthusiast's corner
Message board moderation
Previous · 1 . . . 7 · 8 · 9 · 10 · 11 · 12 · 13 . . . 16 · Next
| Author | Message |
|---|---|
 ServicEnginIC ServicEnginICSend message Joined: 24 Sep 10 Posts: 595 Credit: 13,083,686,510 RAC: 745,928 Level Scientific publications |
Thank you very much for sharing it. Bringing imagination into practice, many useful actions can be achieved to enhance refrigeration. Particularly, I like very much the kind like the one you are describing. There is much to gain and little to lose... Well... Not exactly... You have lost 10 ºC at your GPU temperature ;-) Well done! |
|
Send message Joined: 4 Aug 14 Posts: 266 Credit: 2,219,935,054 RAC: 0 Level Scientific publications |
I've a discovery to share with anyone who runs a Dell OptiPlex mini-tower. Assessing the issue and implementing a fix. great job. Many thanks for sharing. Now I have to go and have a second (third or fourth) look at my Hosts. |
|
Send message Joined: 8 Aug 19 Posts: 252 Credit: 458,054,251 RAC: 0 Level Scientific publications |
Thanks, guys. I thought about posting a picture, but my finished product isn't as photogenic as those ServicEnginIC has chronicled. 😉 |
|
Send message Joined: 8 Aug 19 Posts: 252 Credit: 458,054,251 RAC: 0 Level Scientific publications |
Incidentally, My single fan GPU cooler runs quieter at 100% speed with the intake mod. Also a bonus. Additionally, the larger diameter end of the CPVC coupler should mate with the fan shroud. This was the best performance for me. |
|
ServicEnginIC Send message Joined: 24 Sep 10 Posts: 595 Credit: 13,083,686,510 RAC: 745,928 Level Scientific publications |
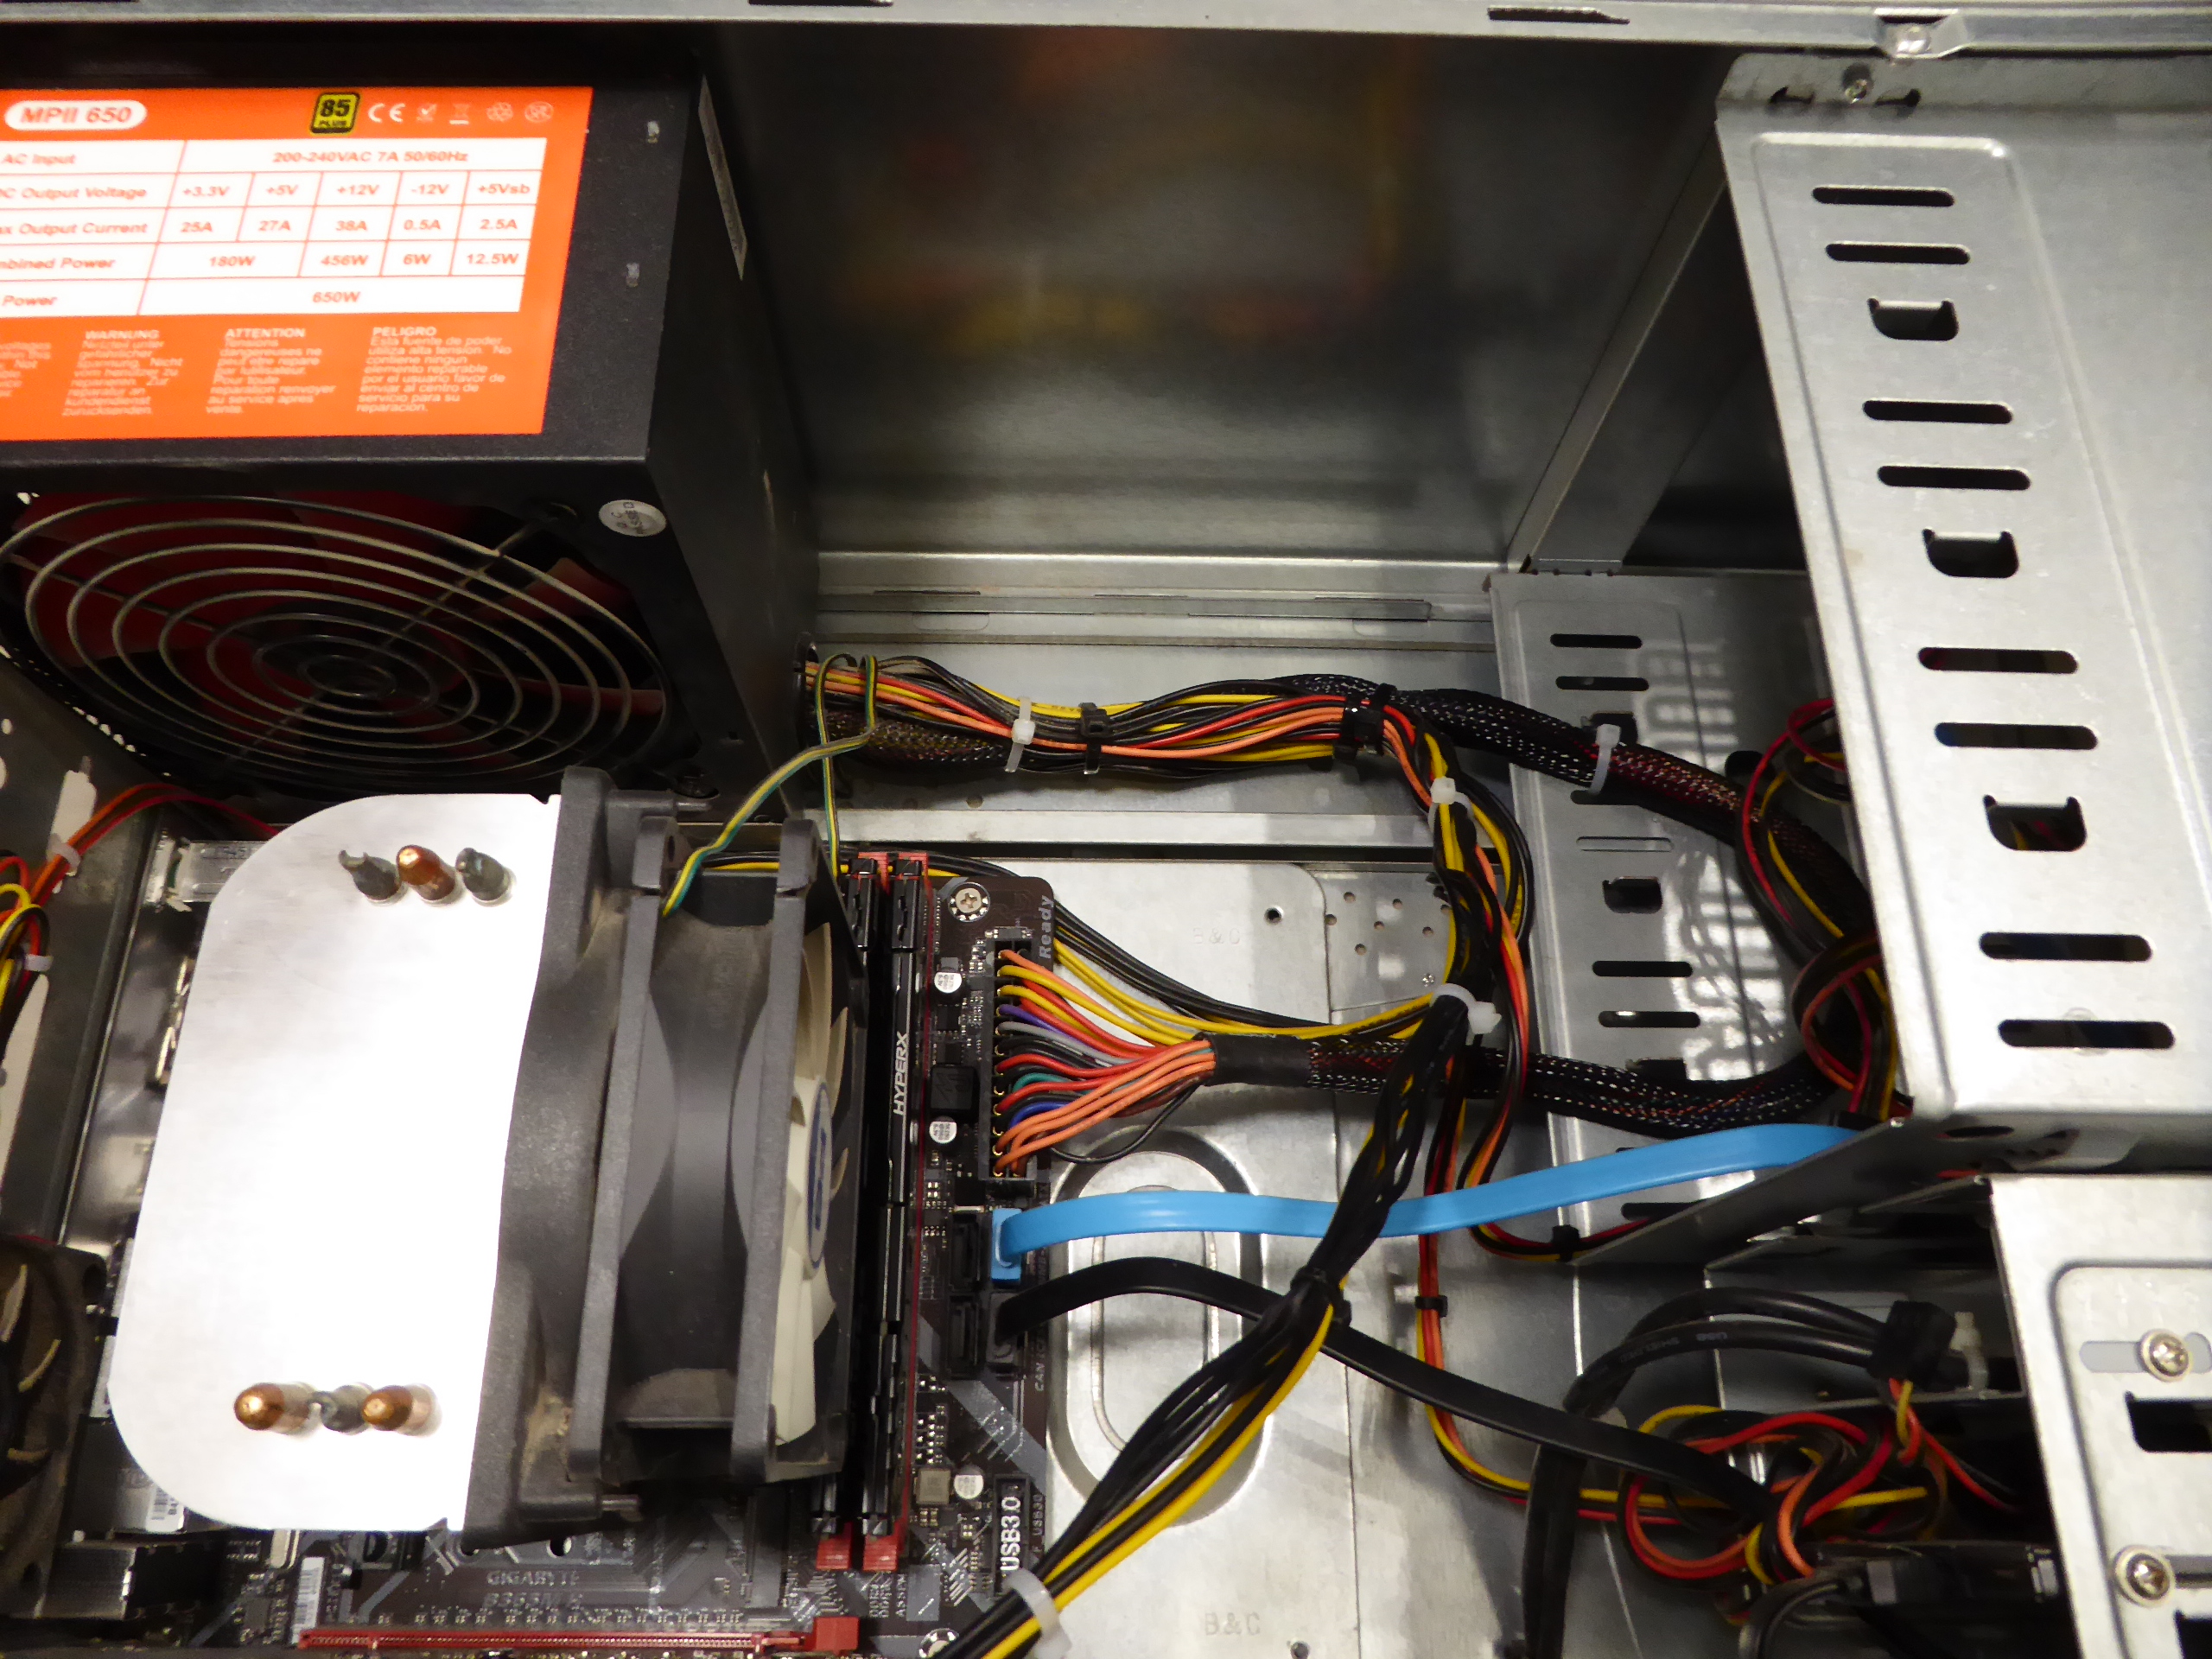
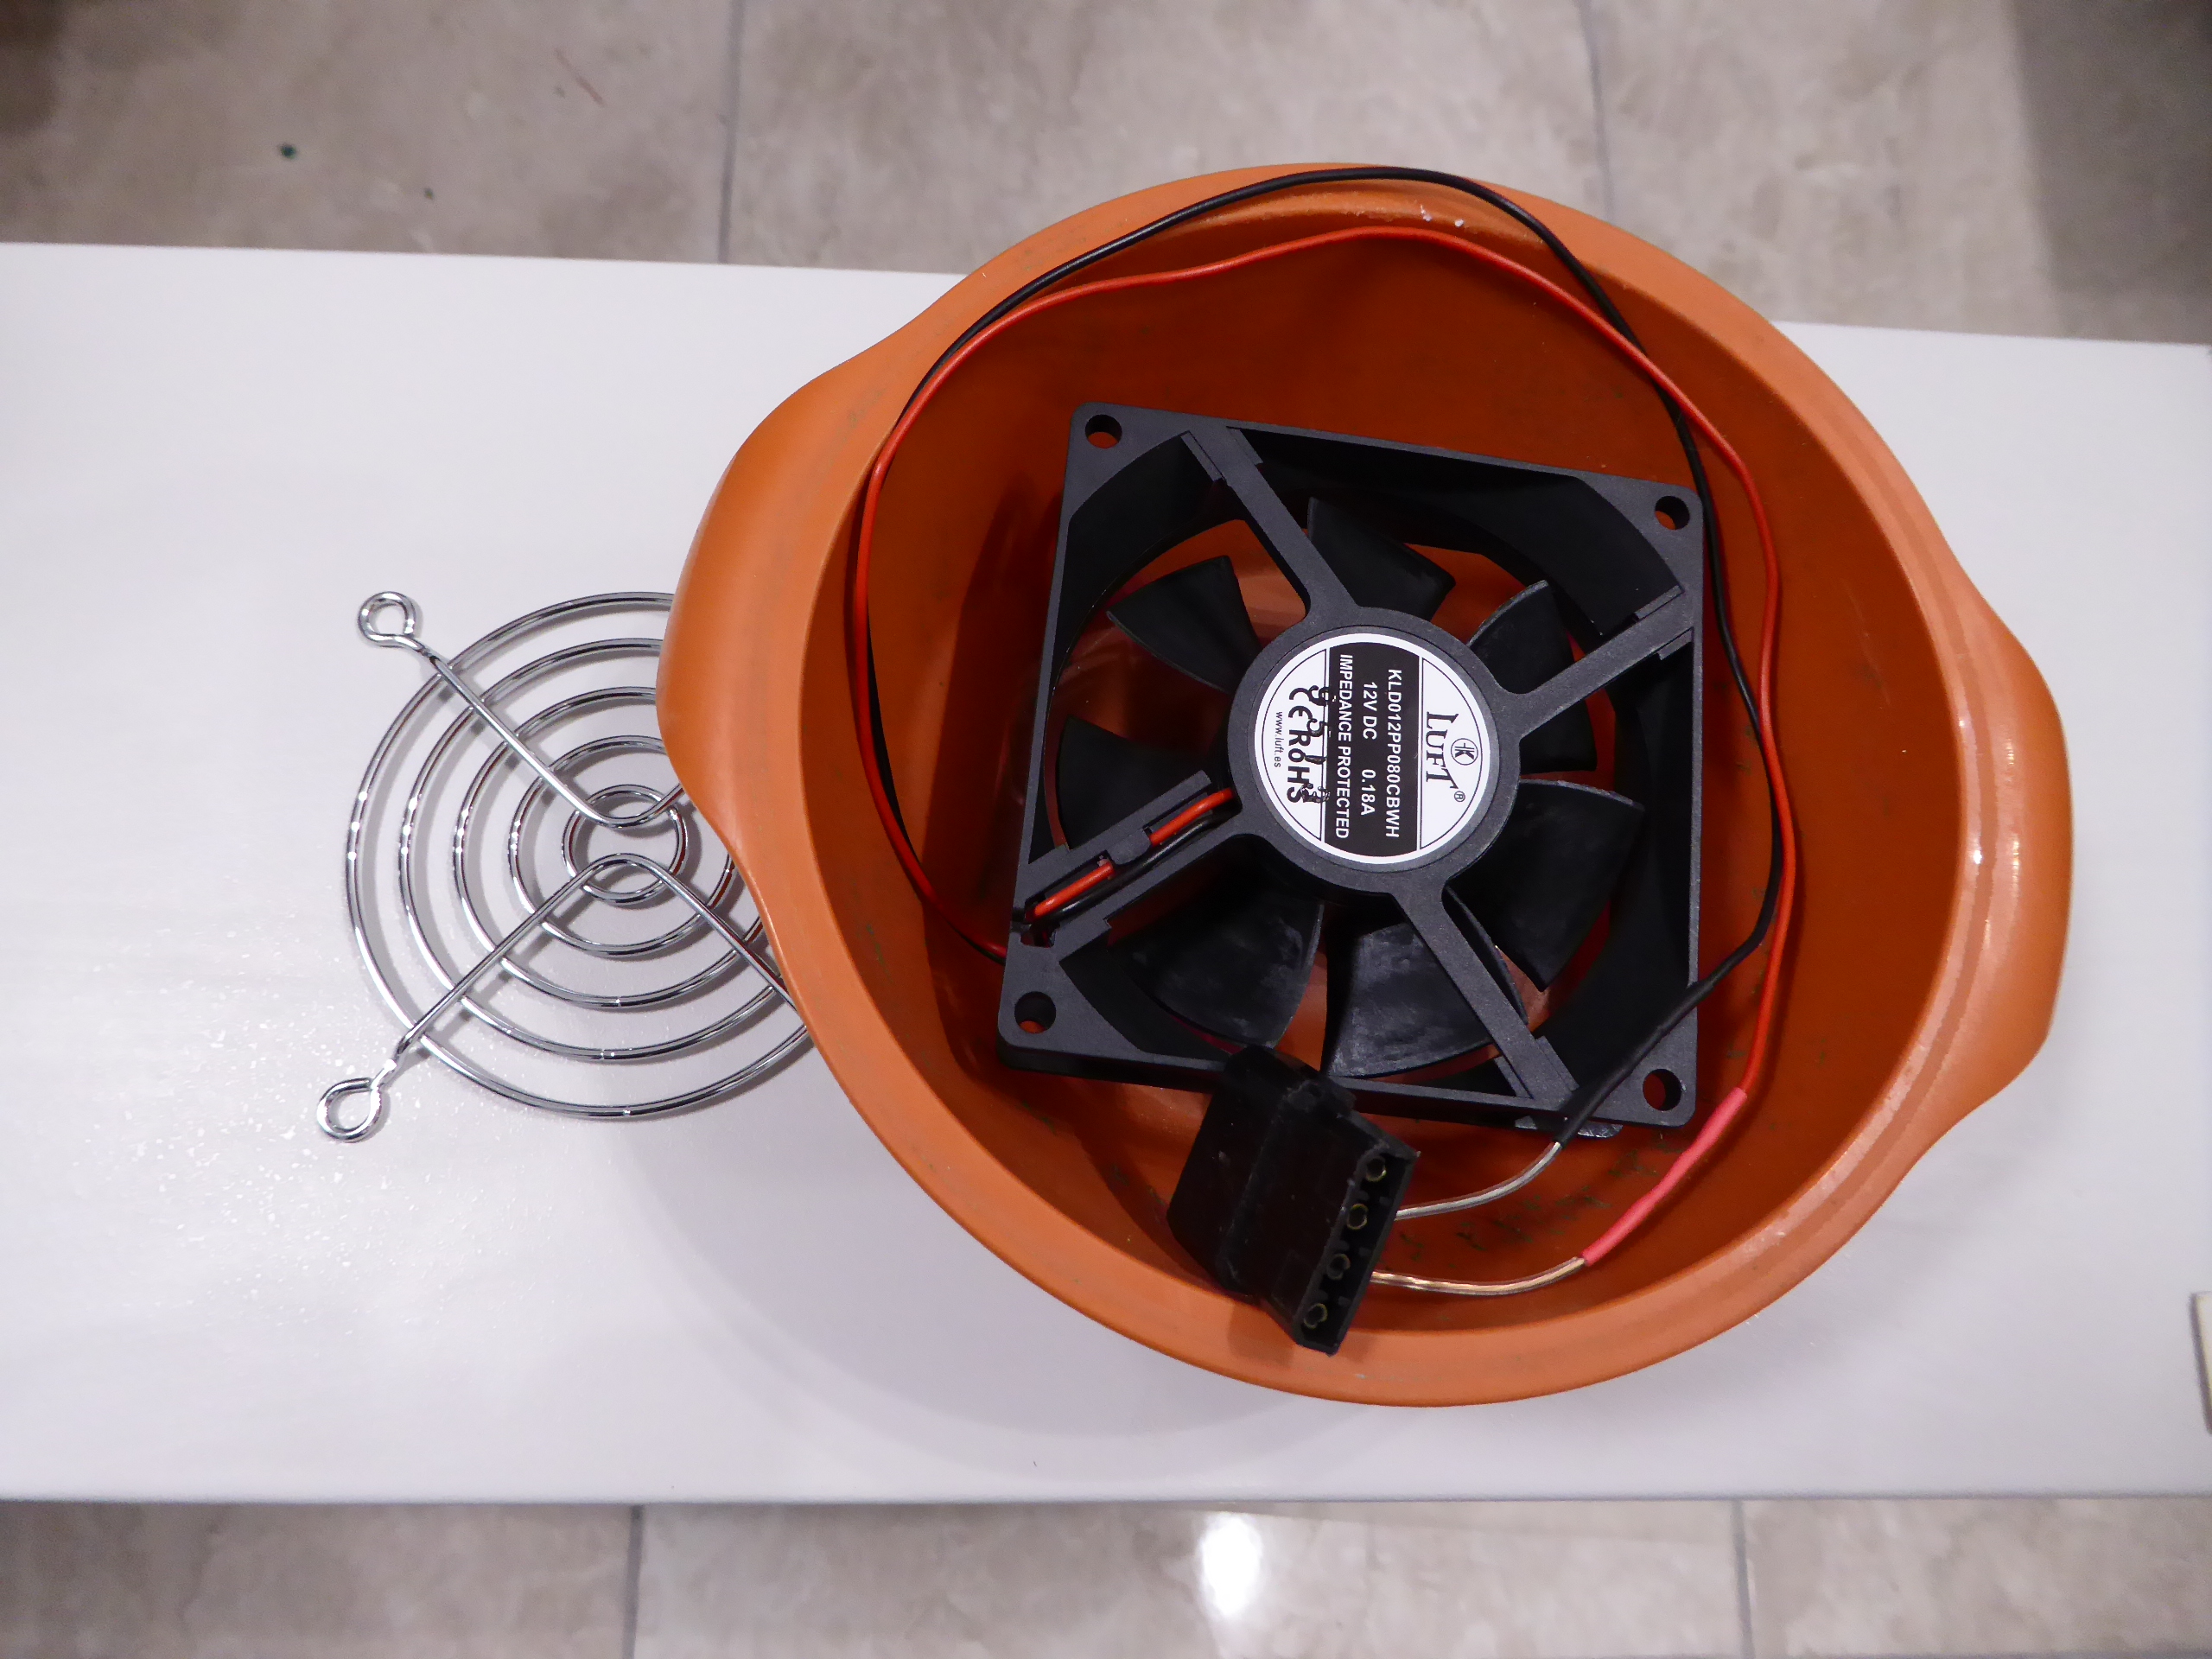
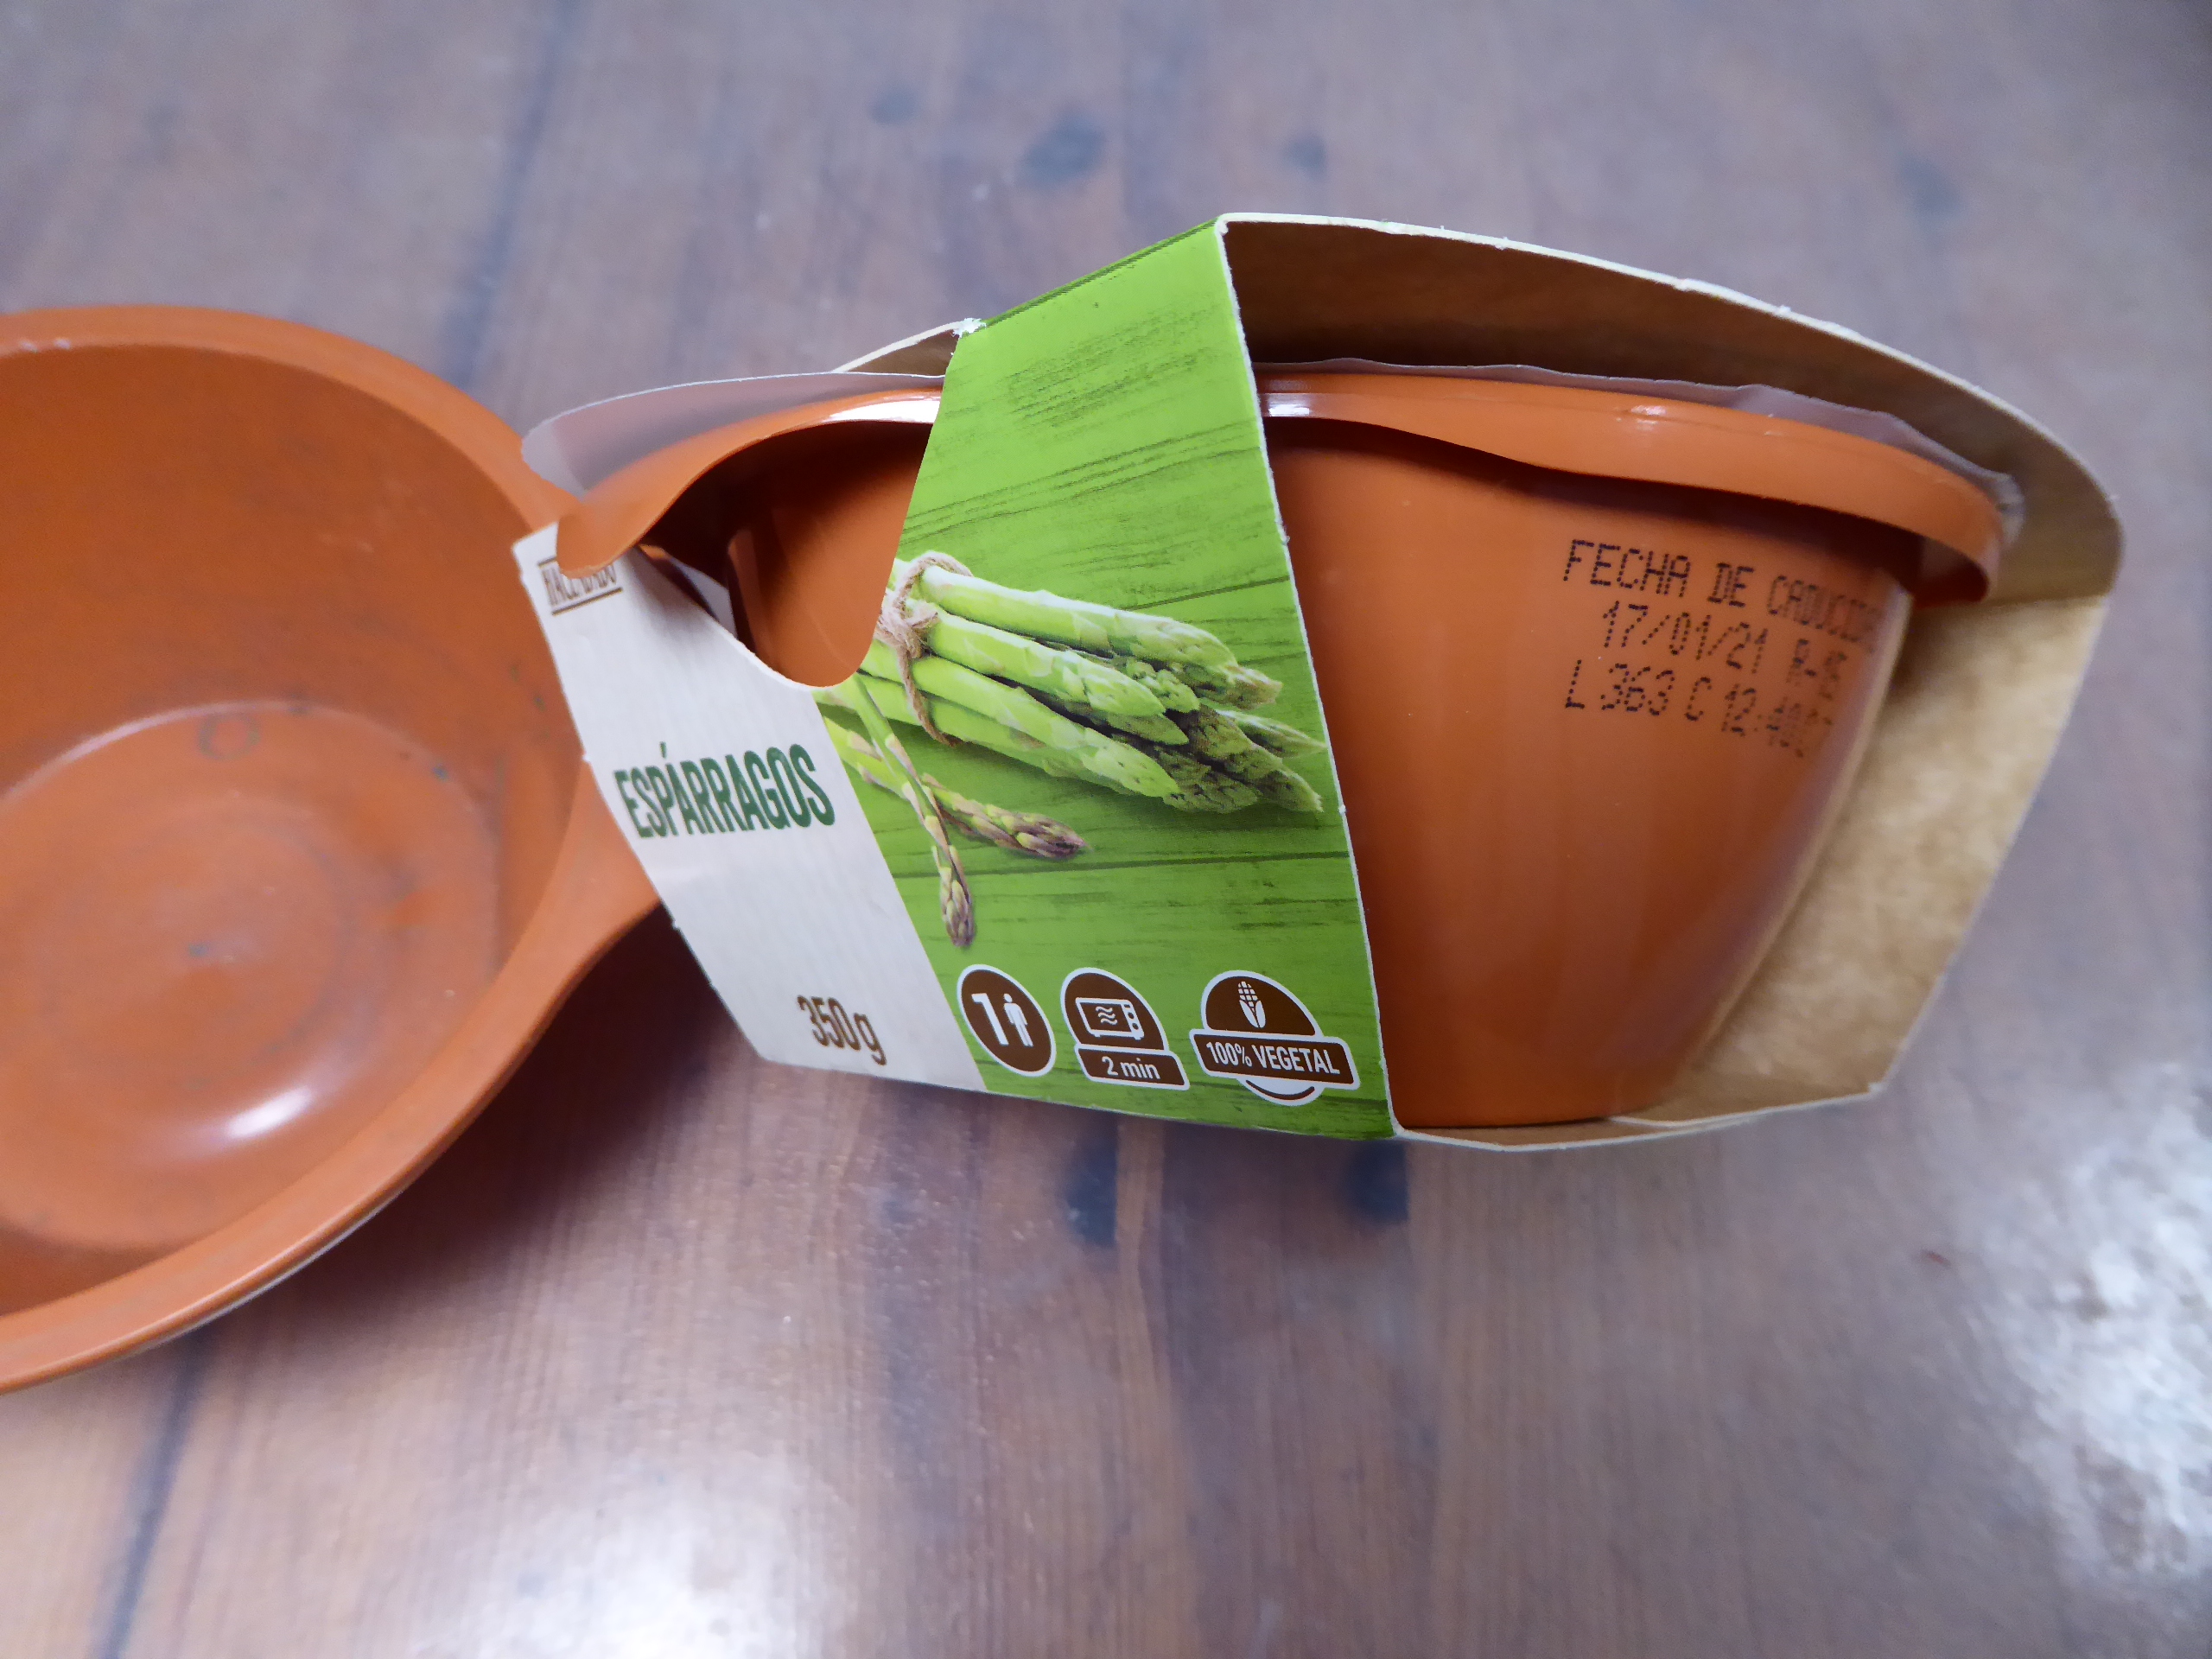
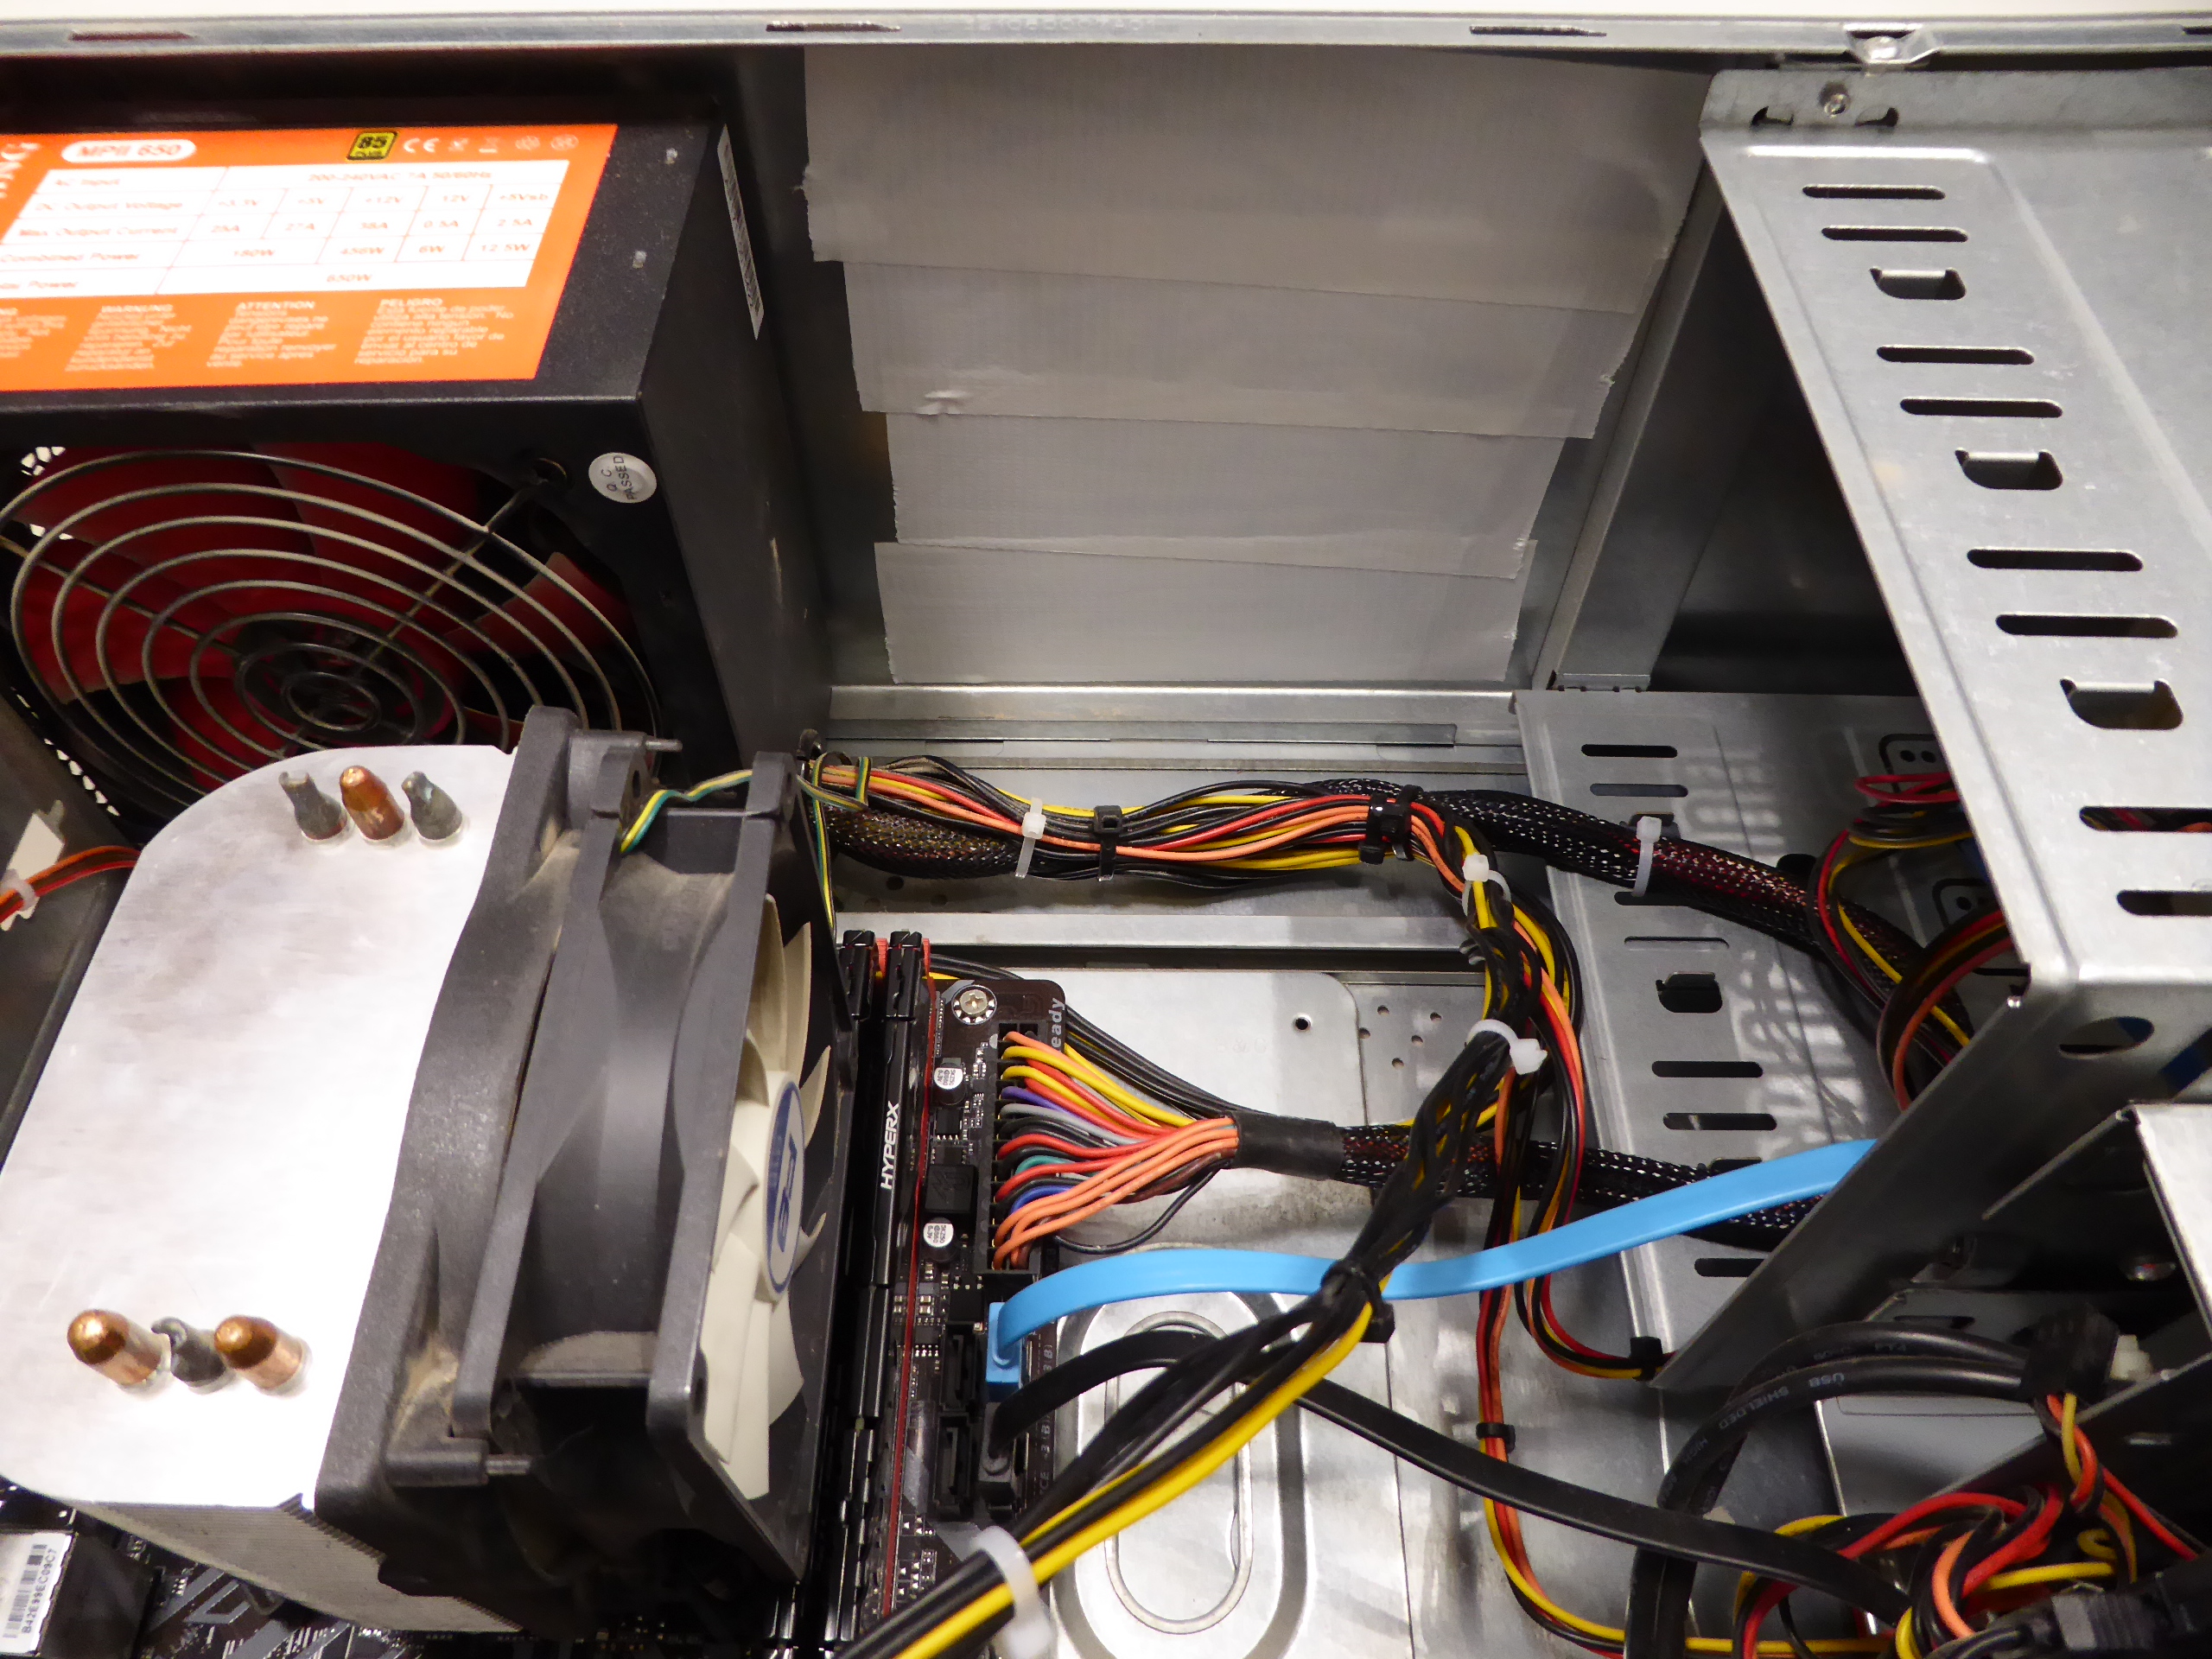
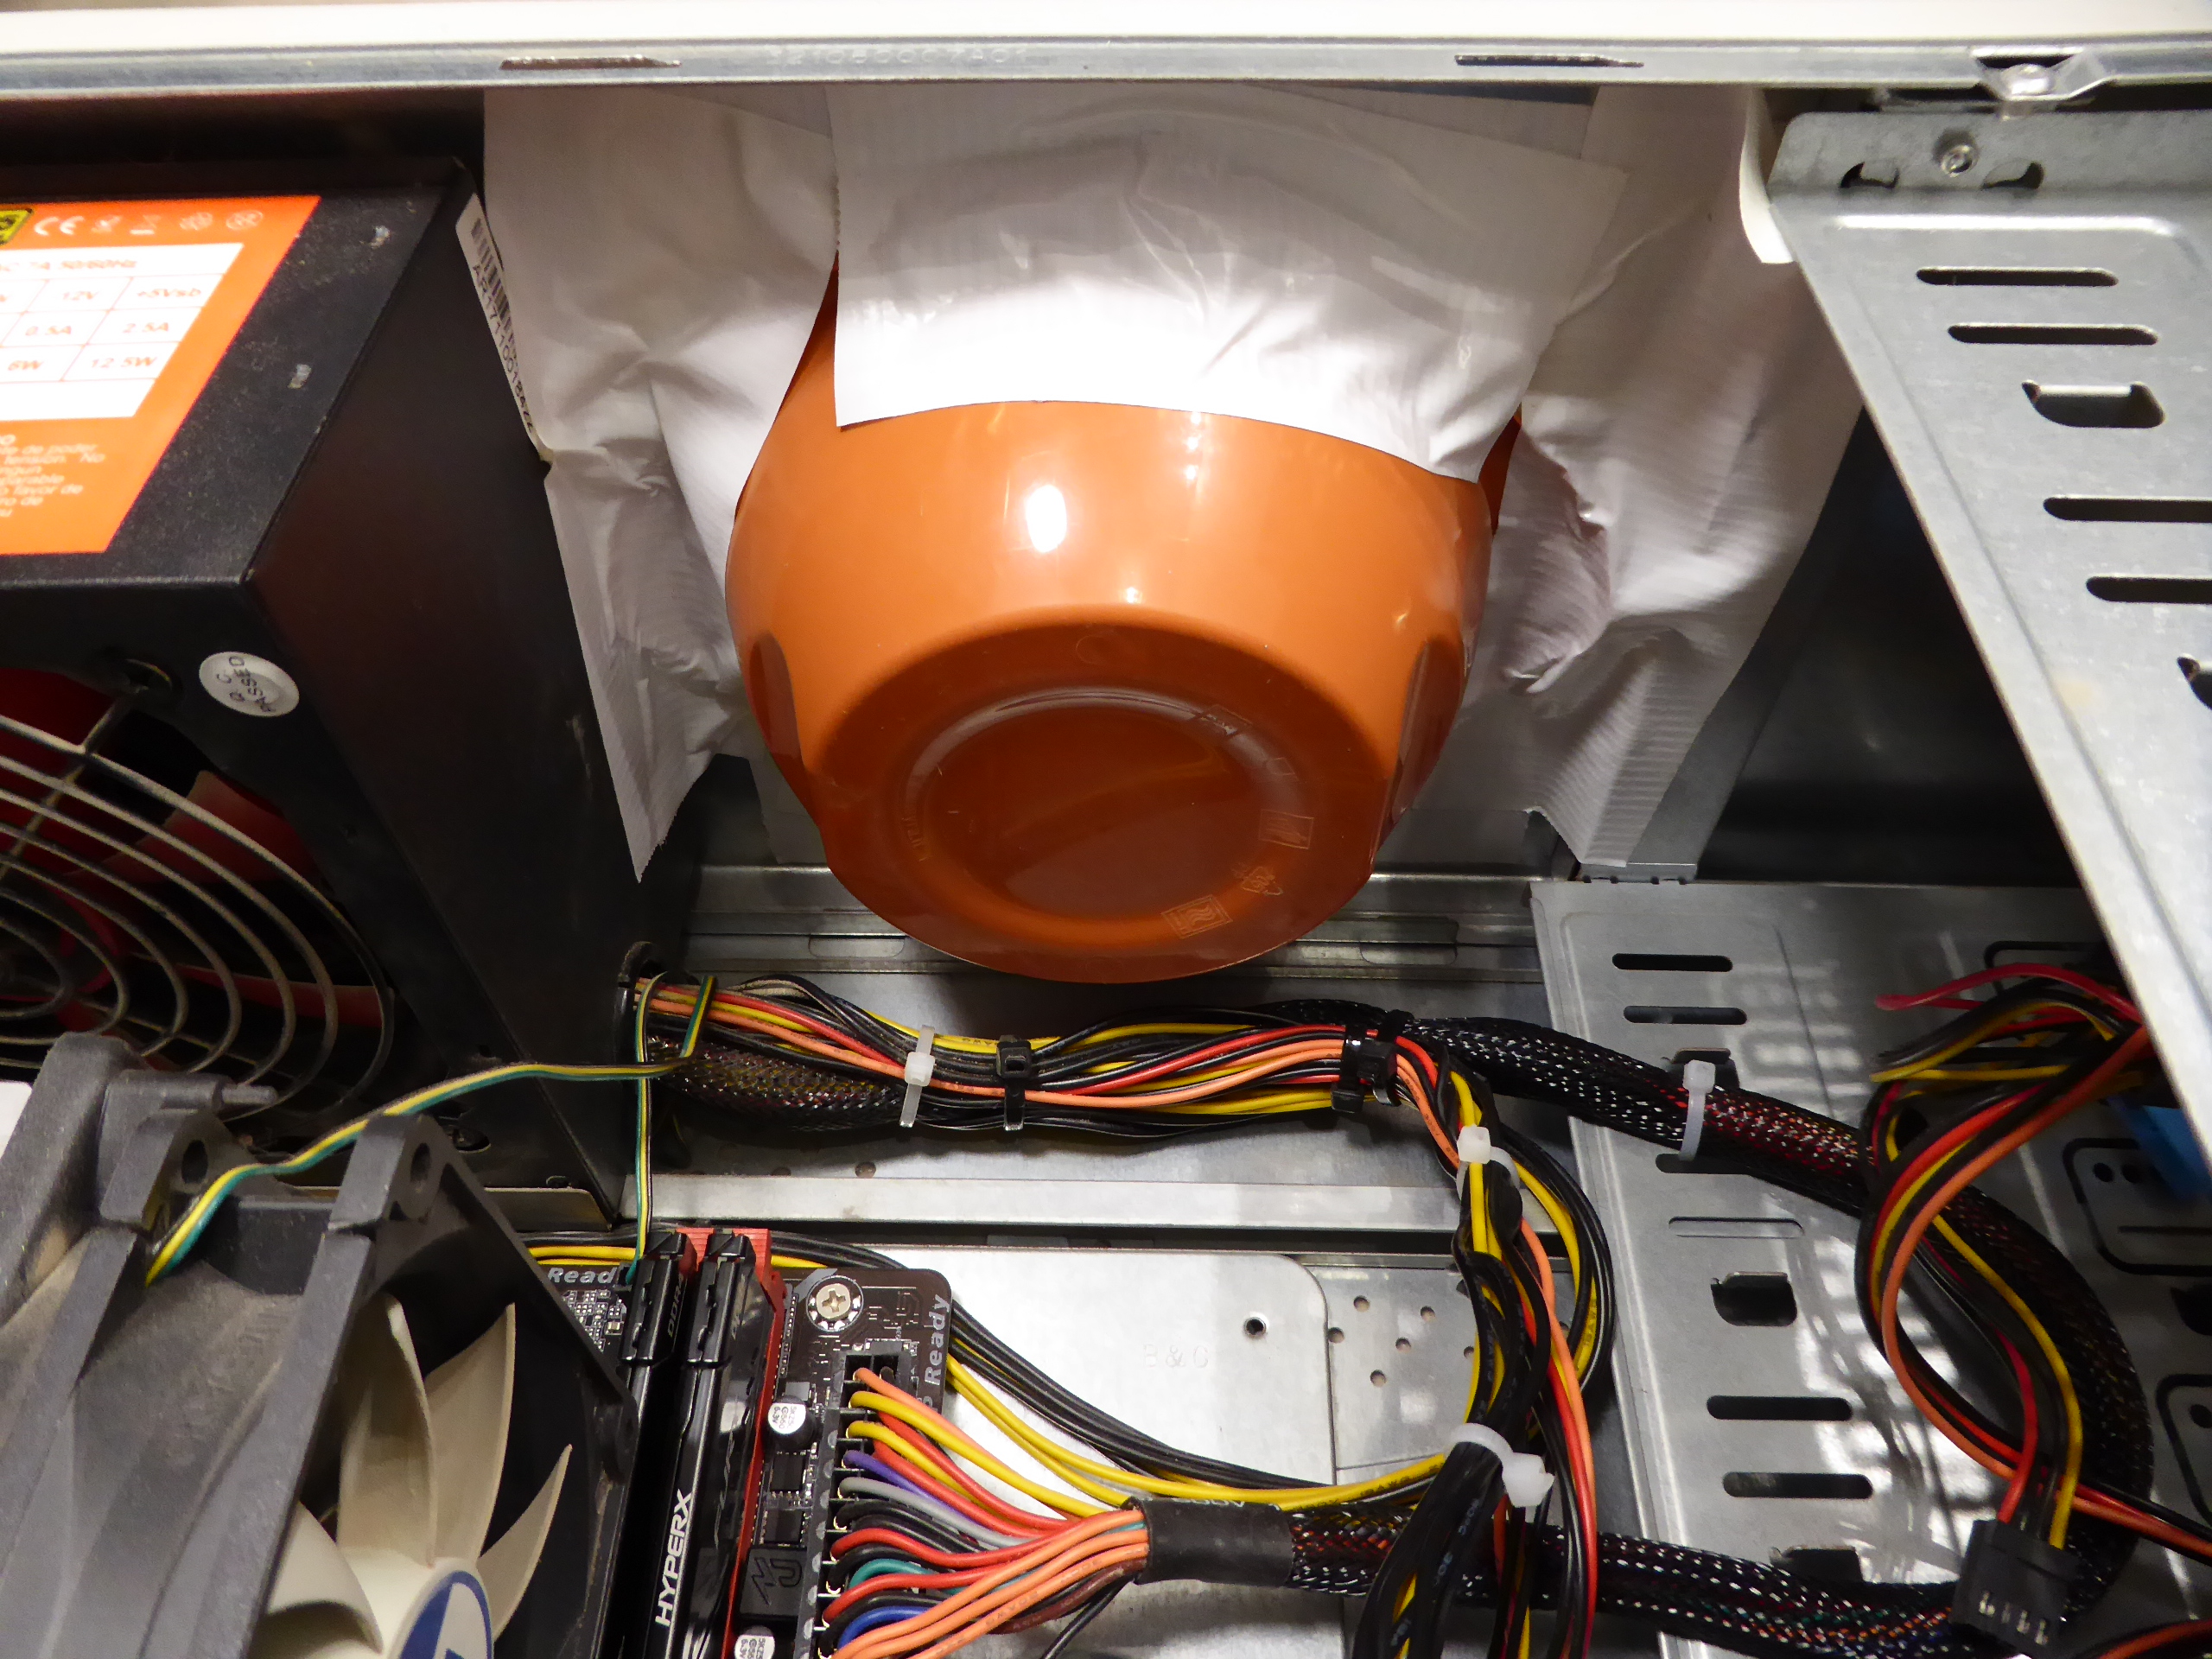
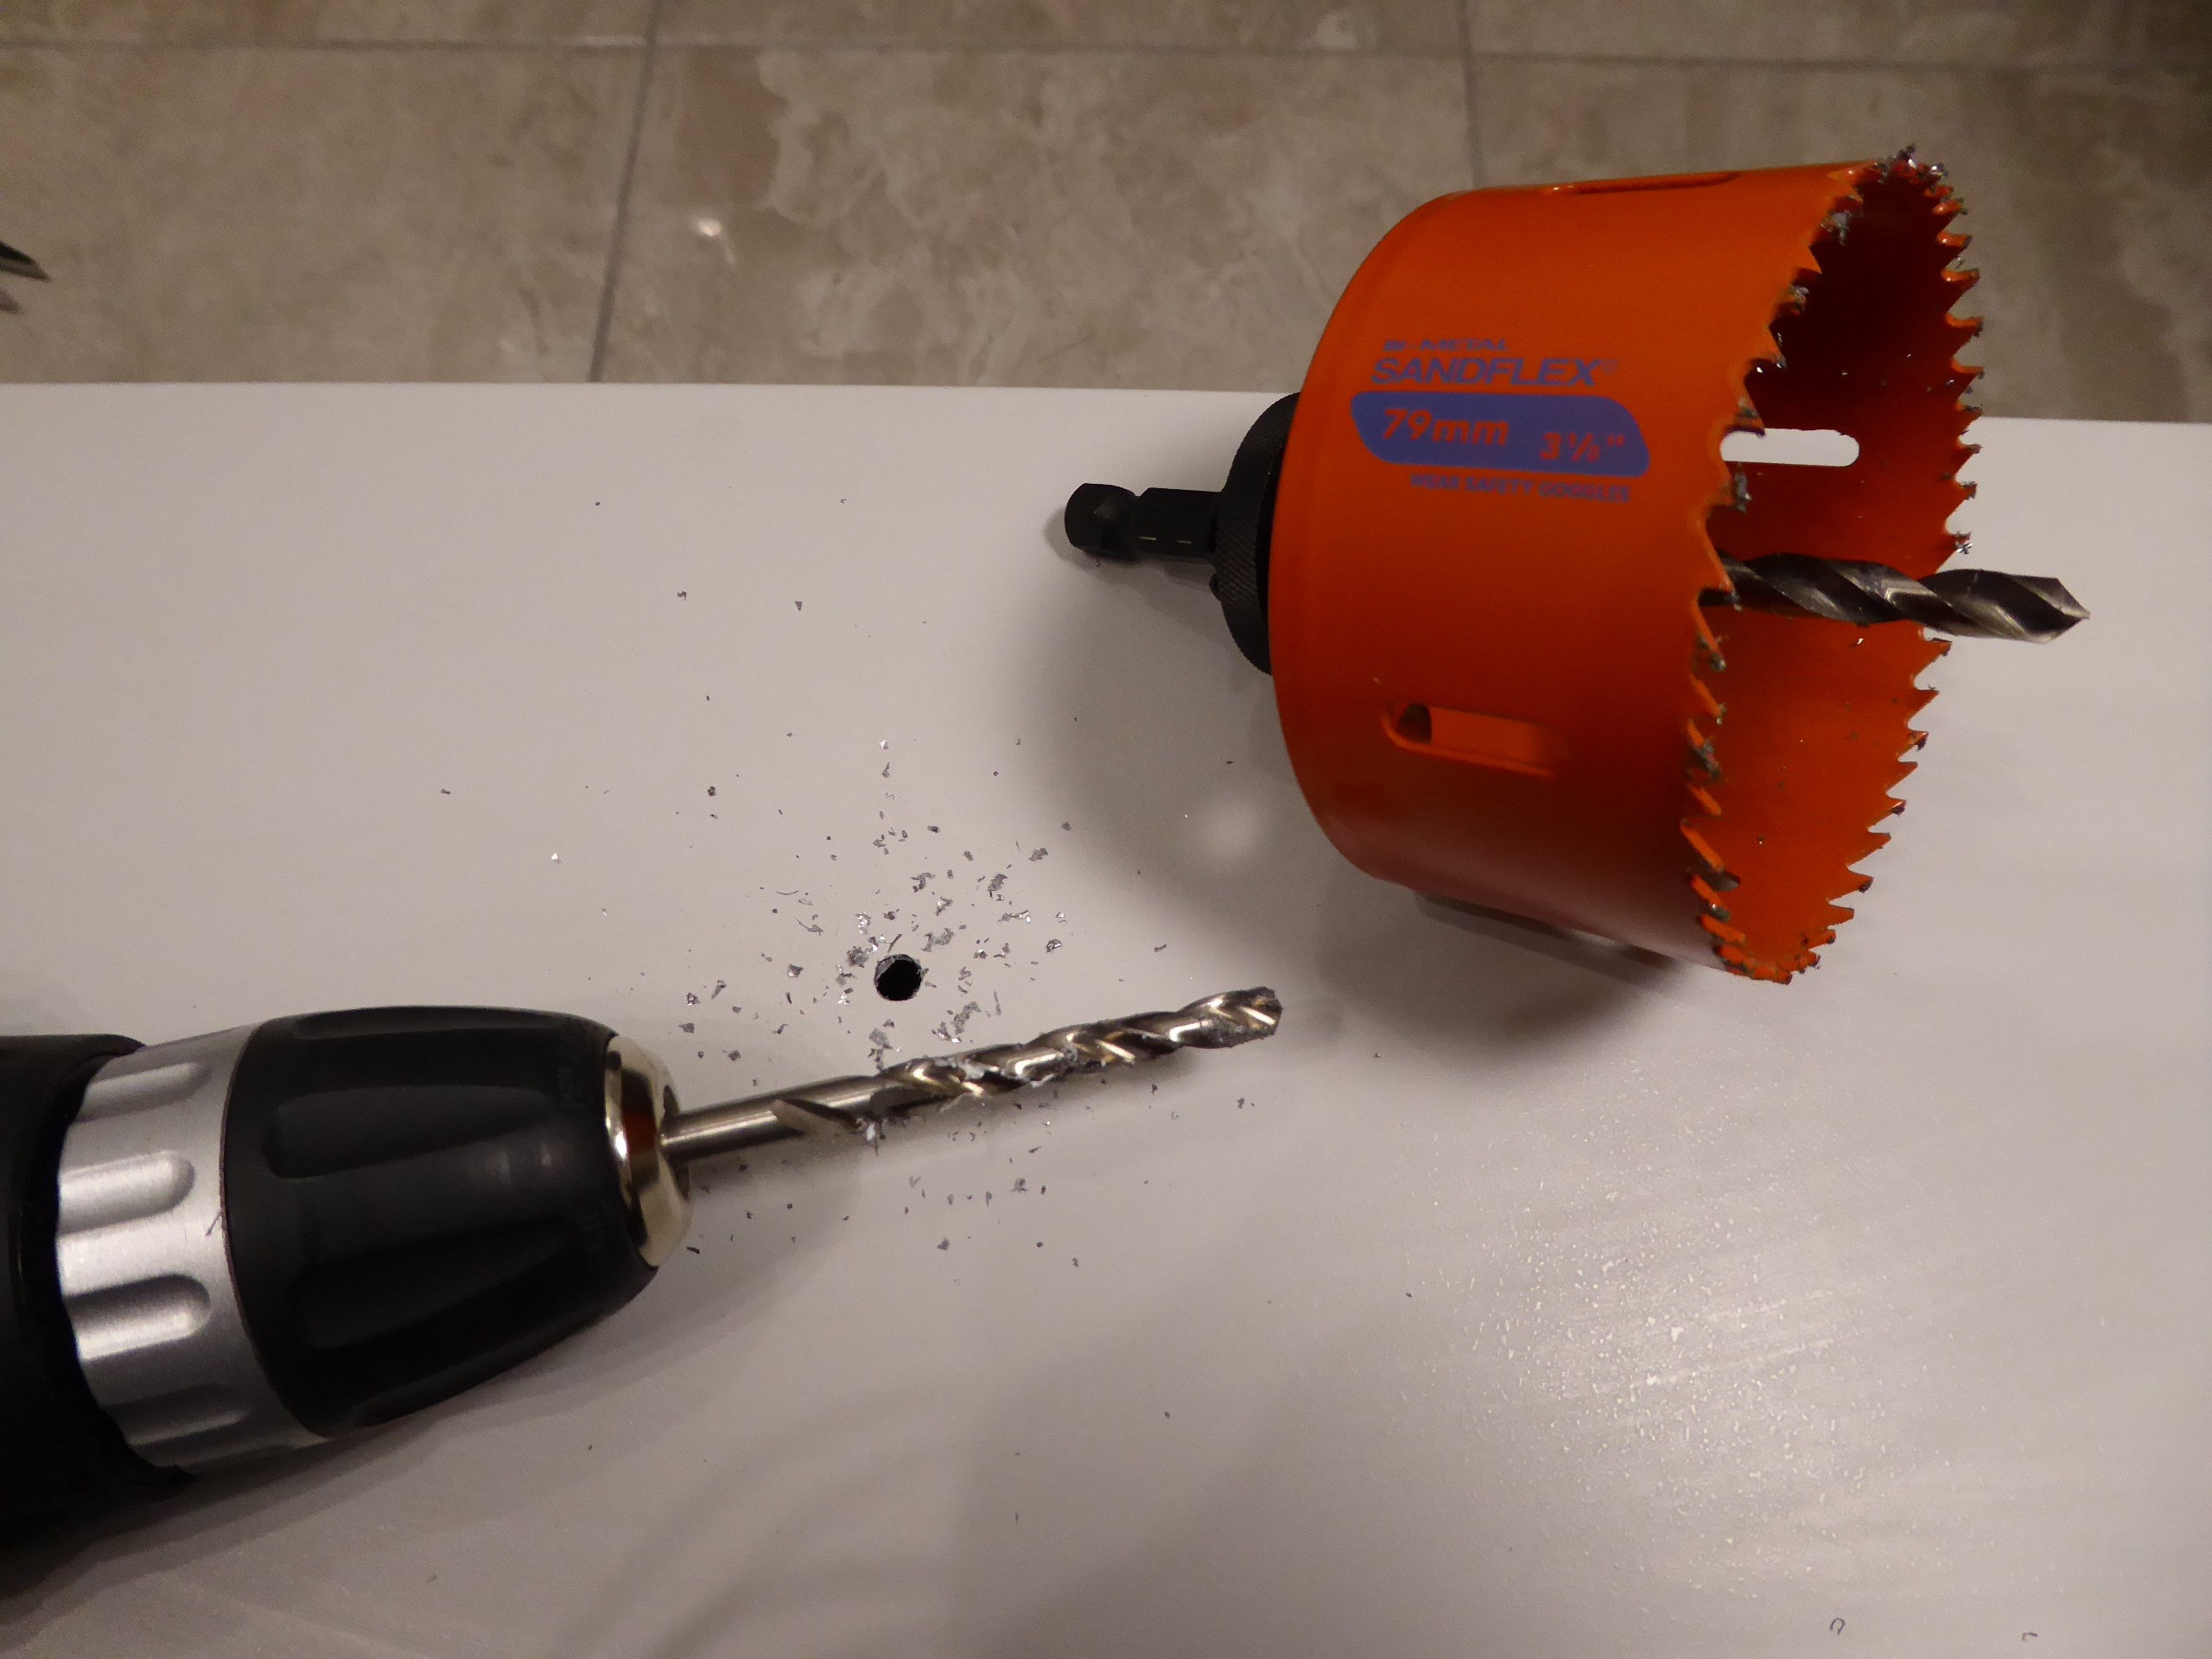
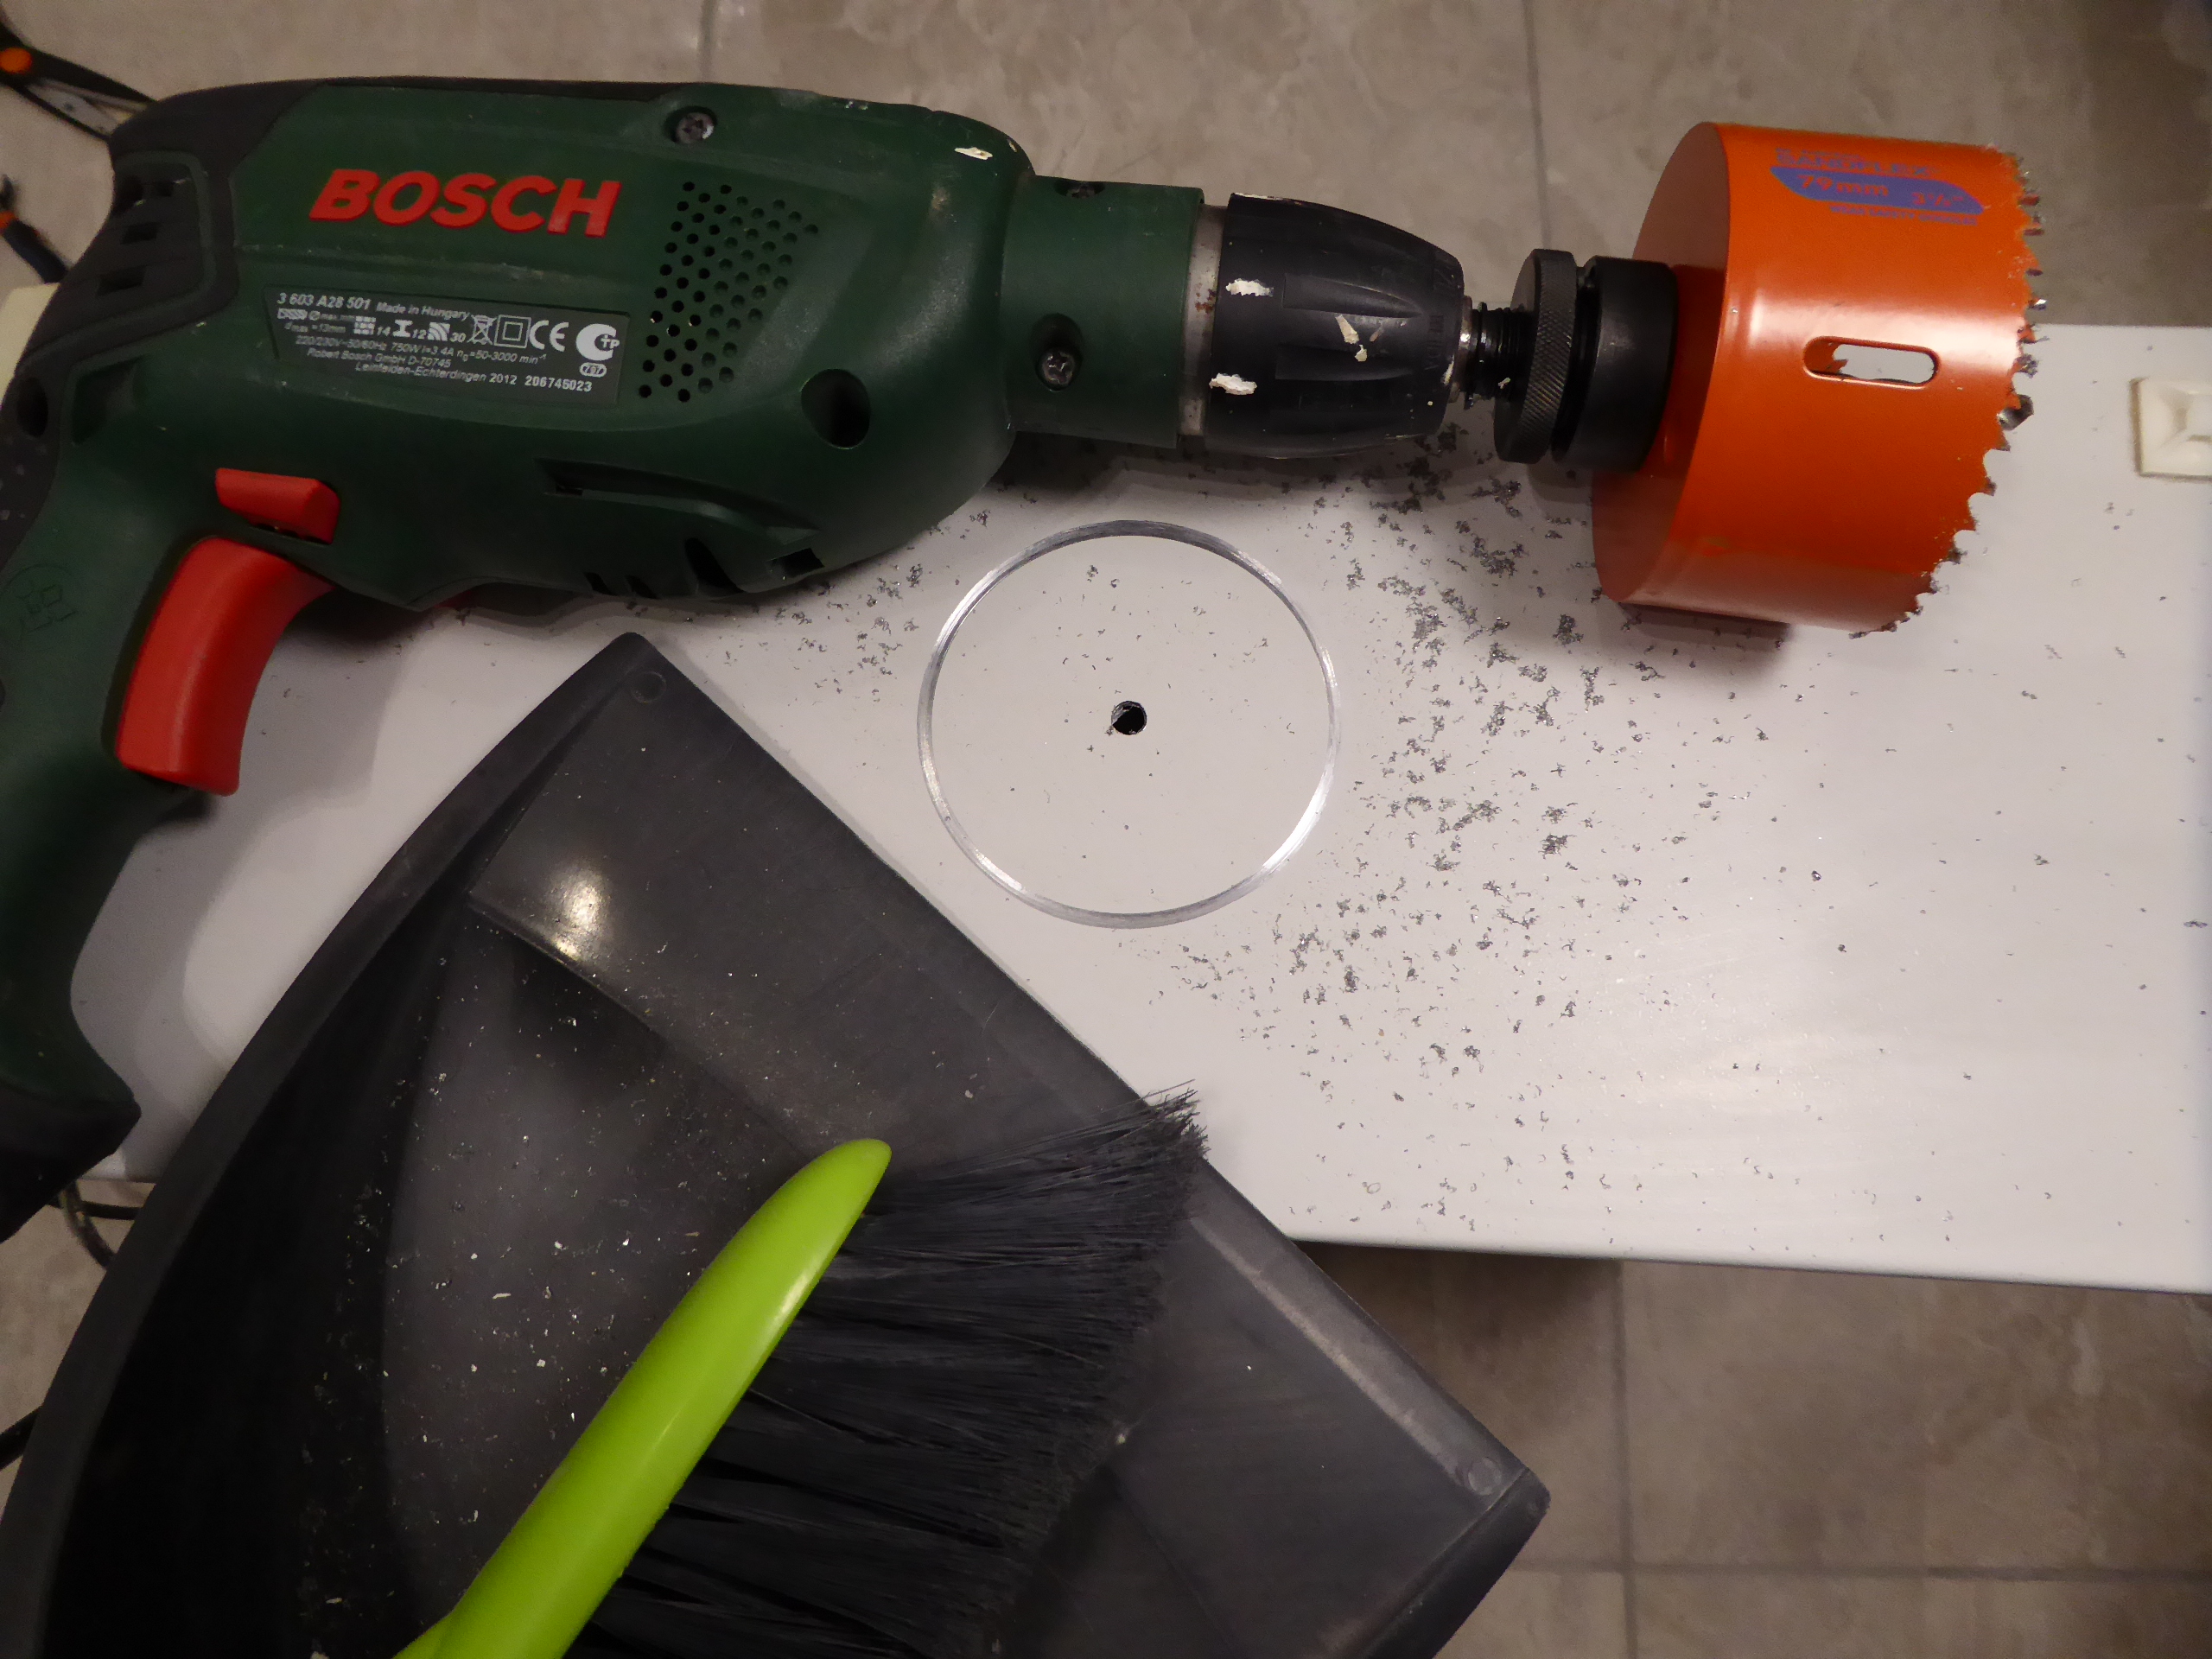
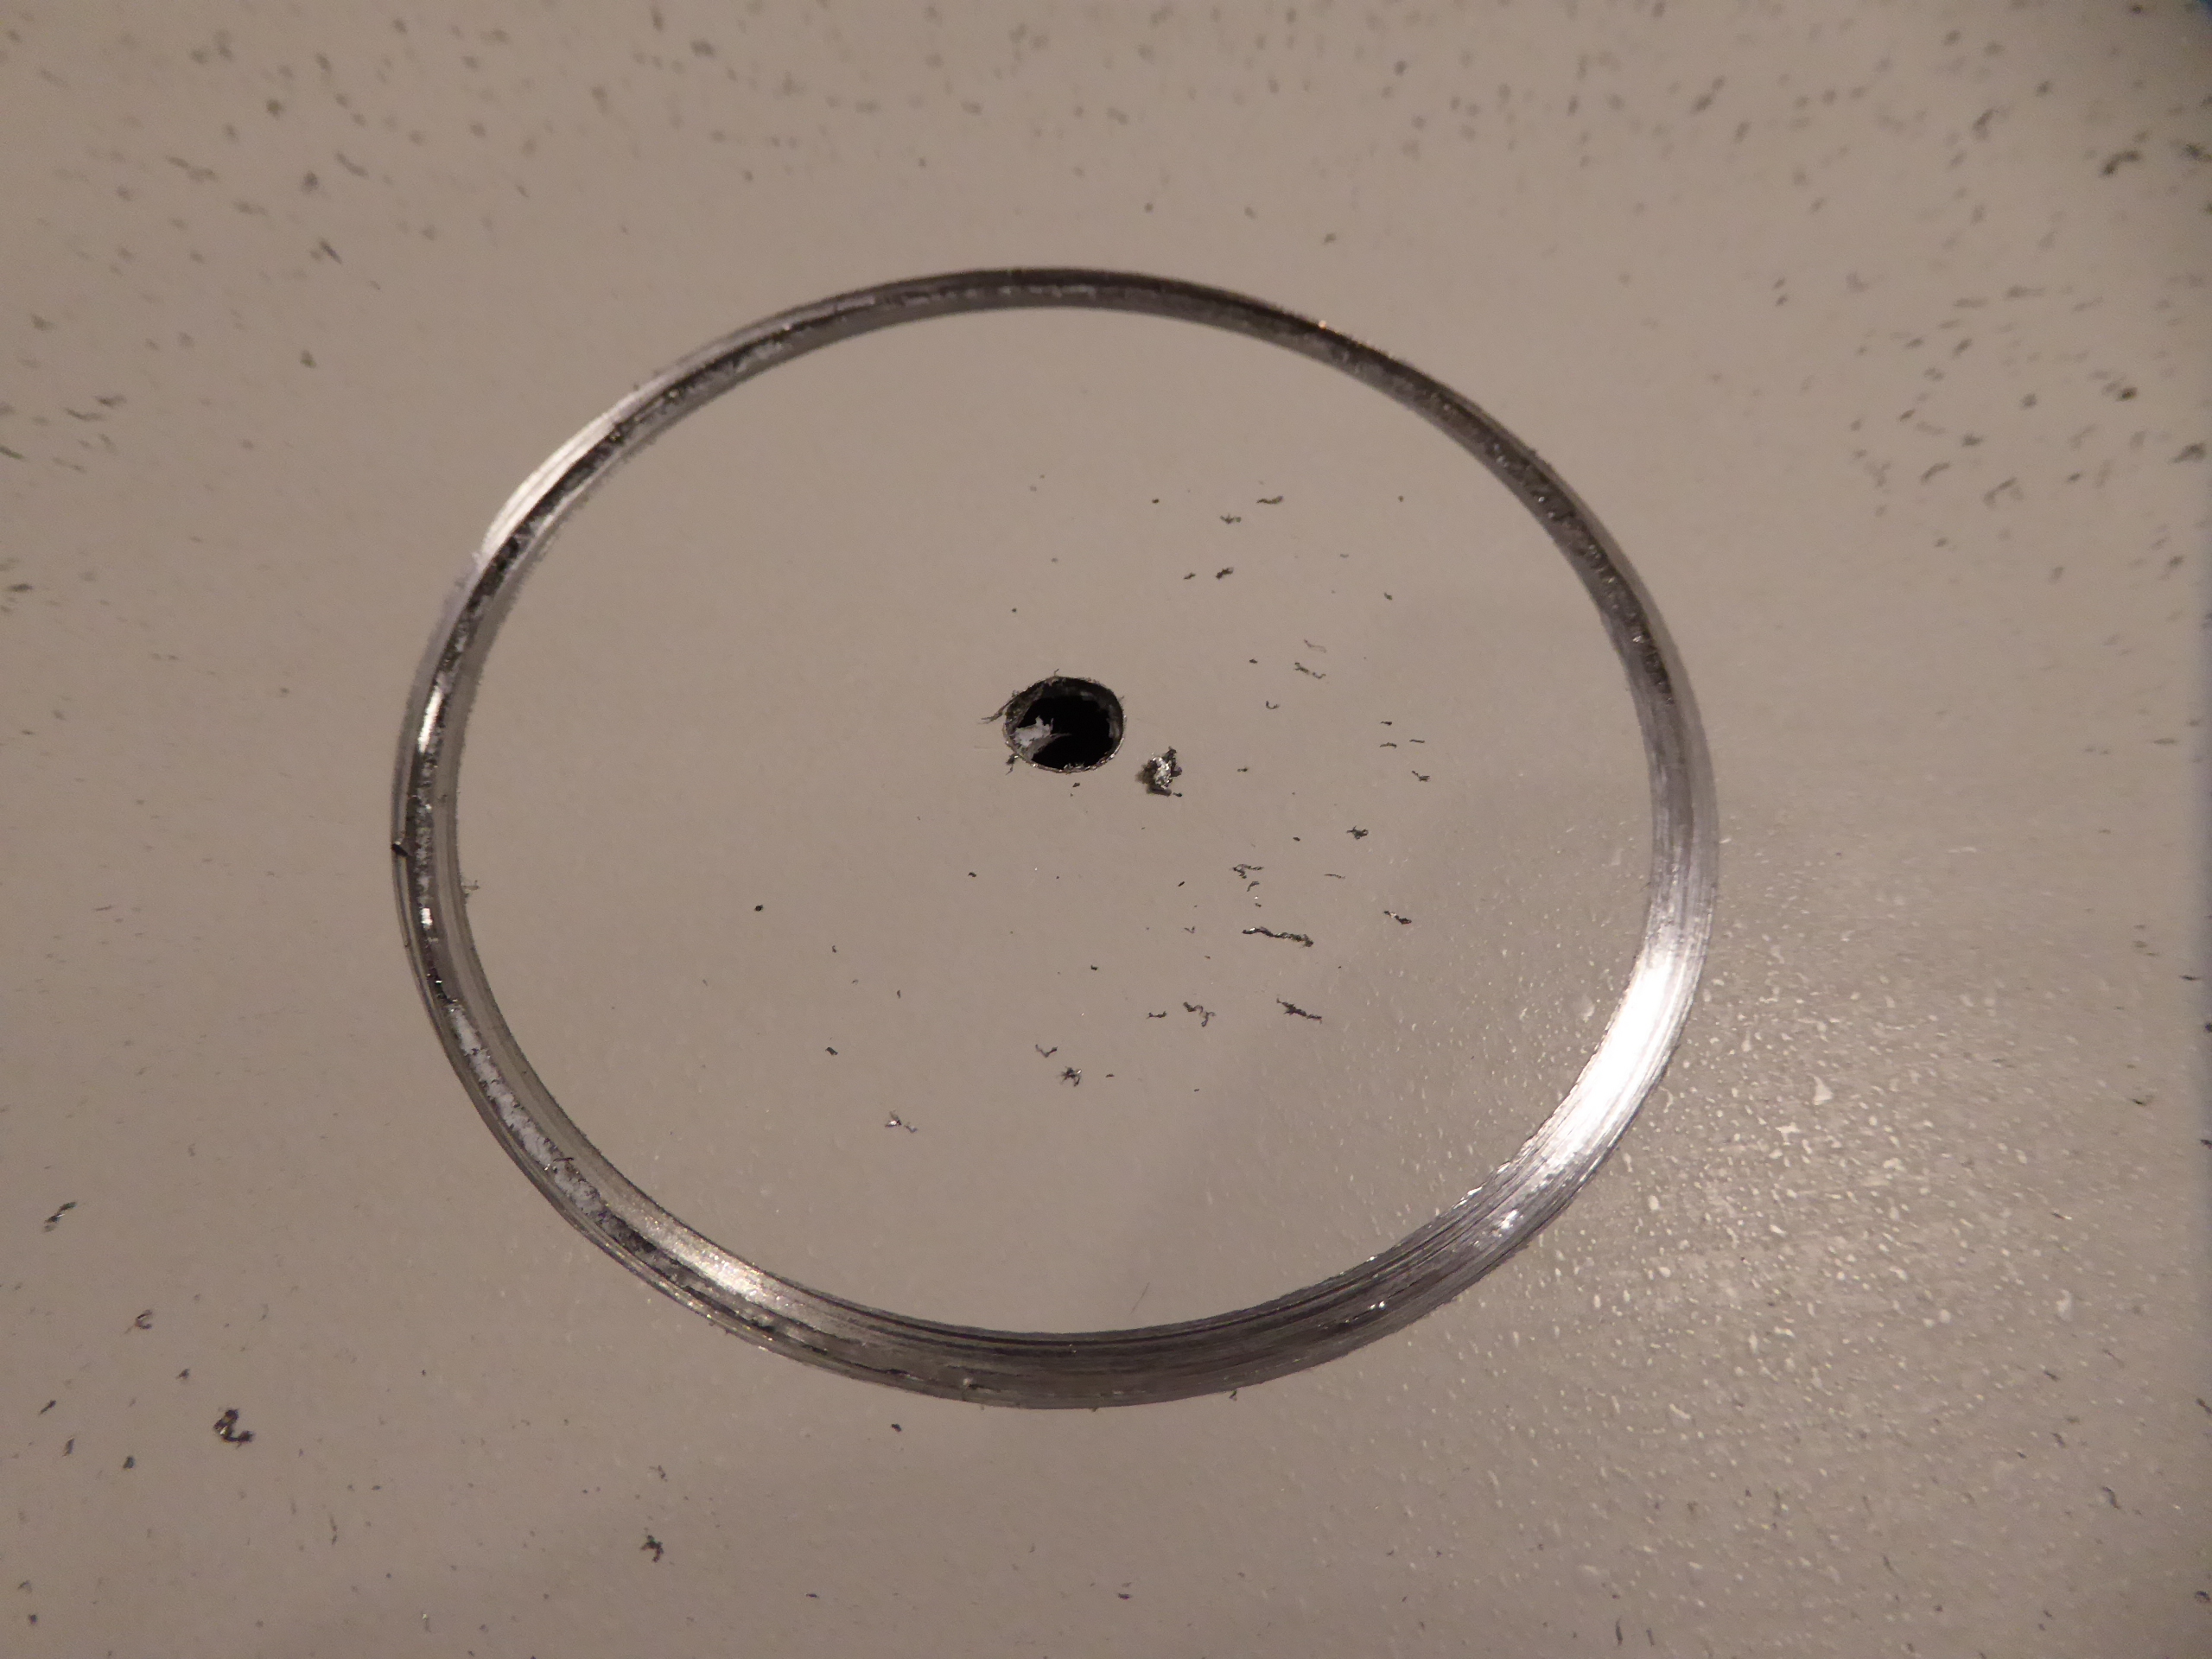
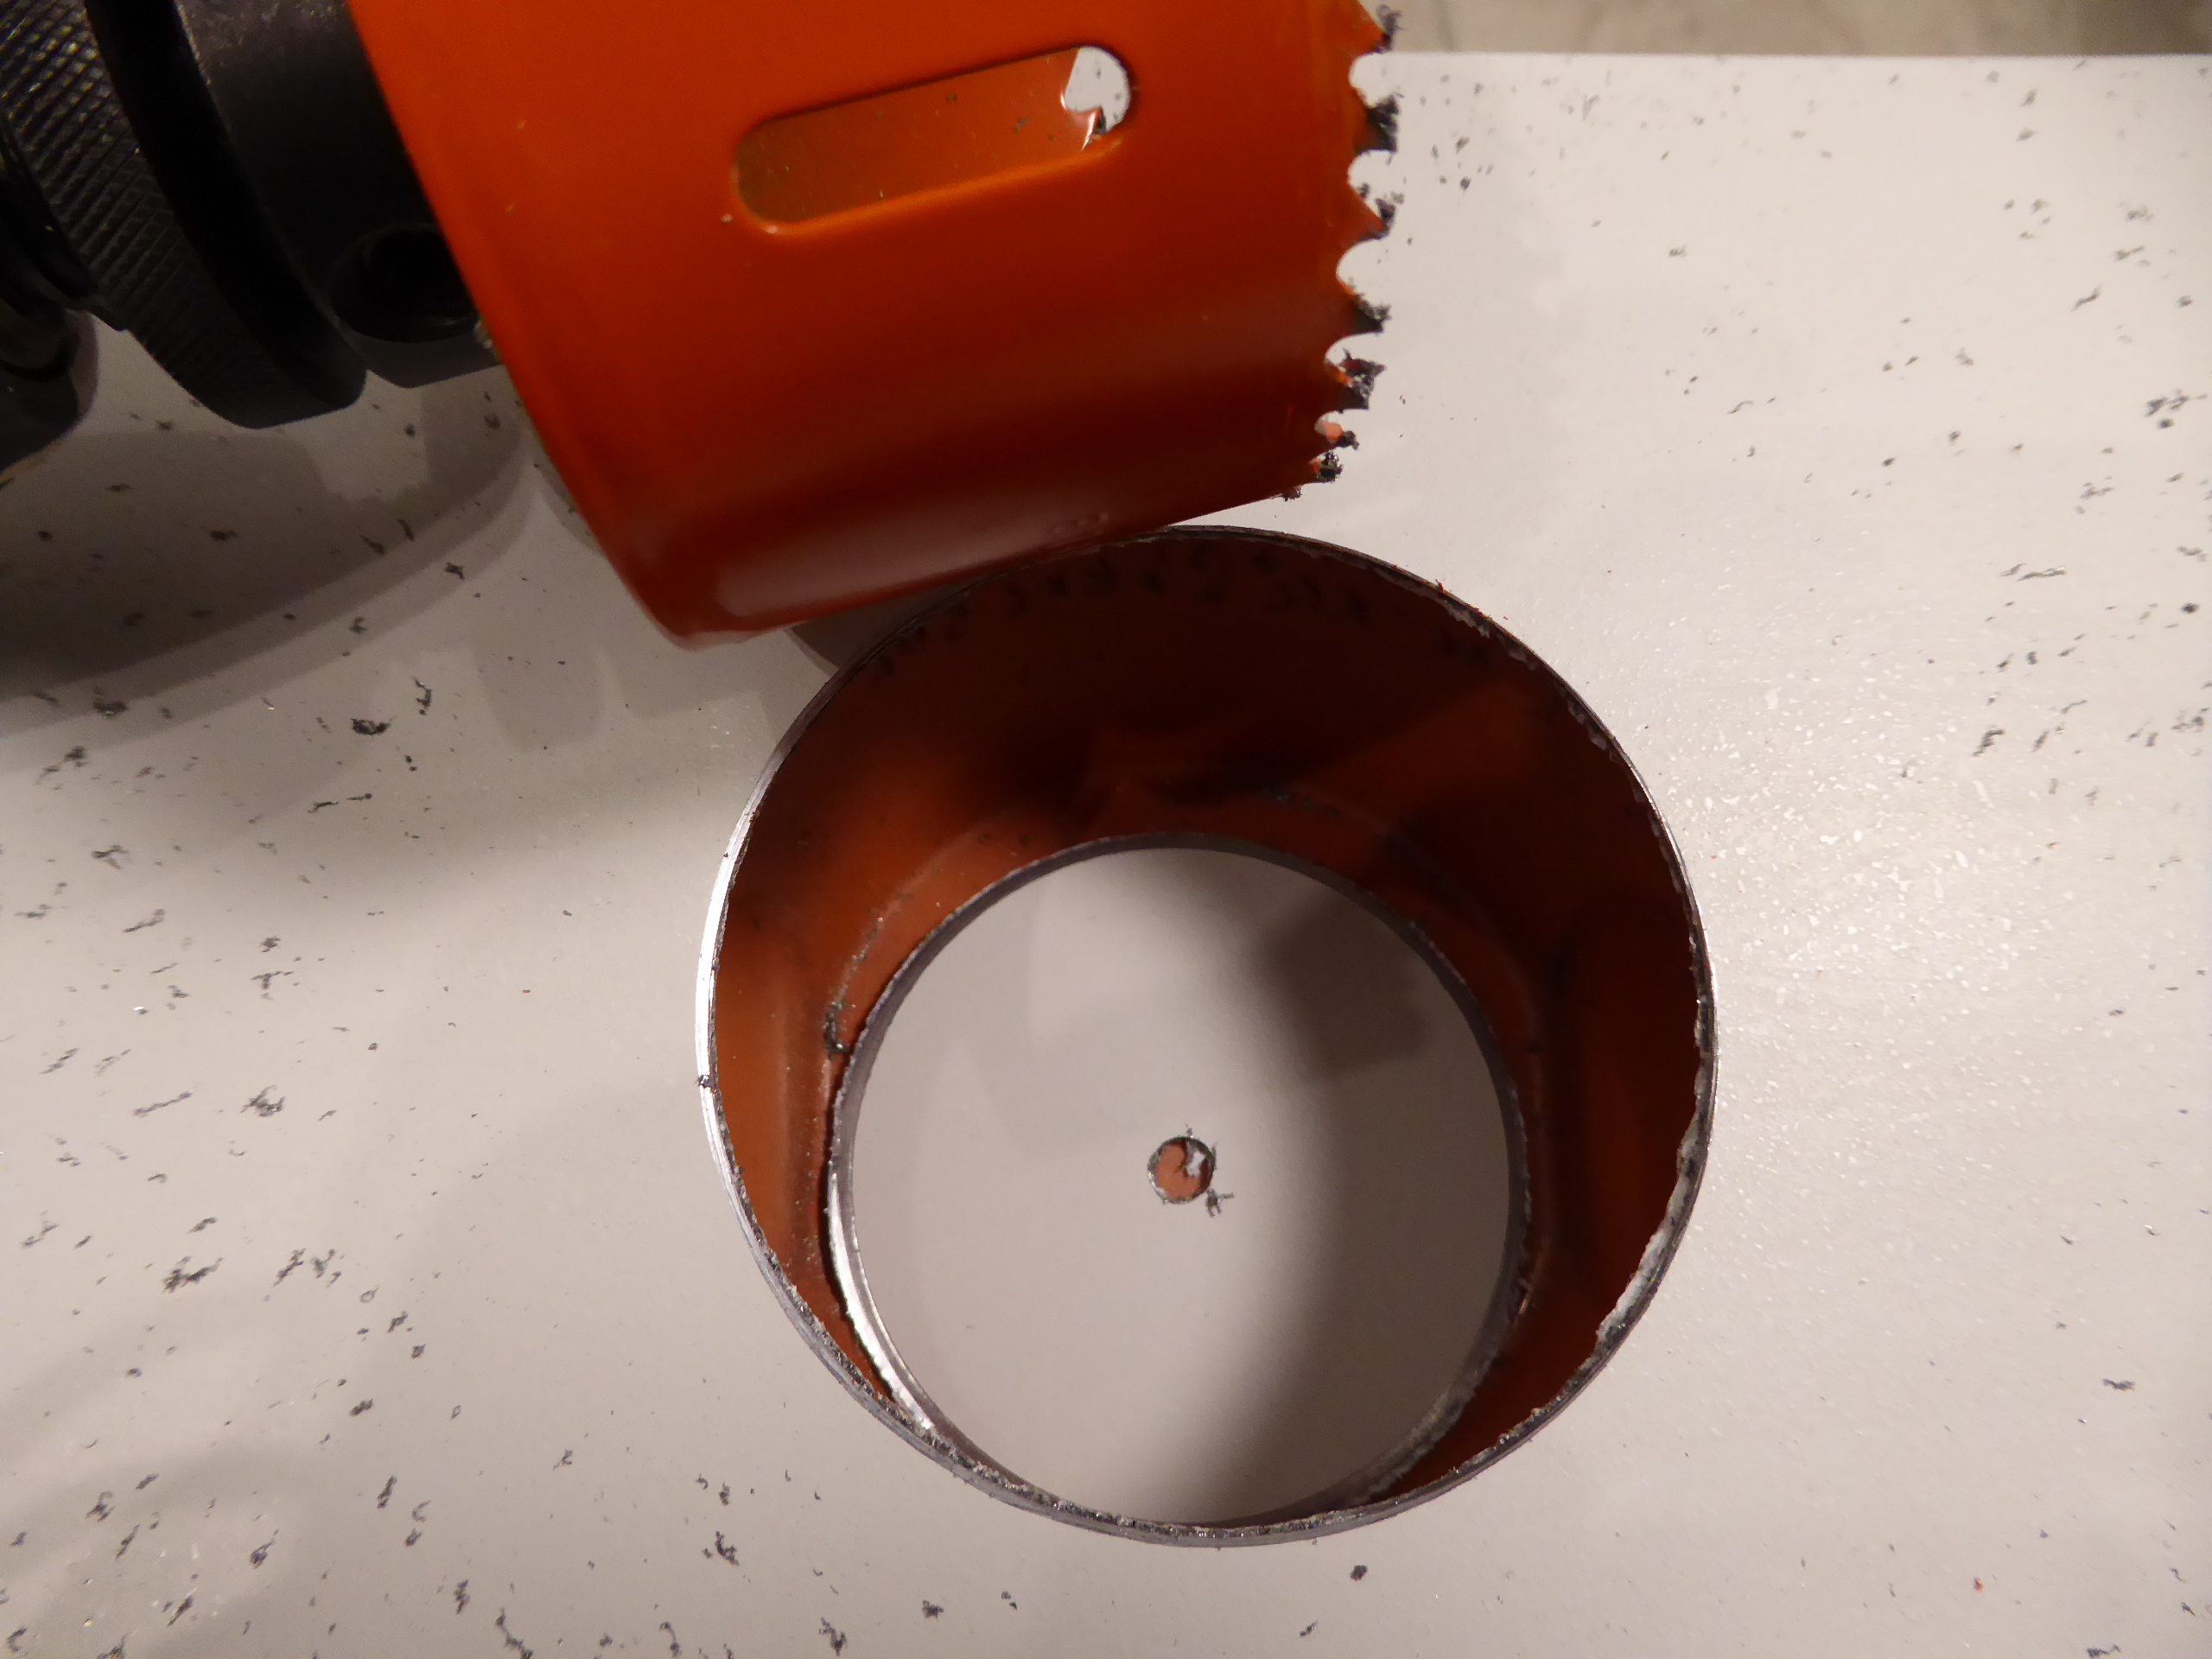
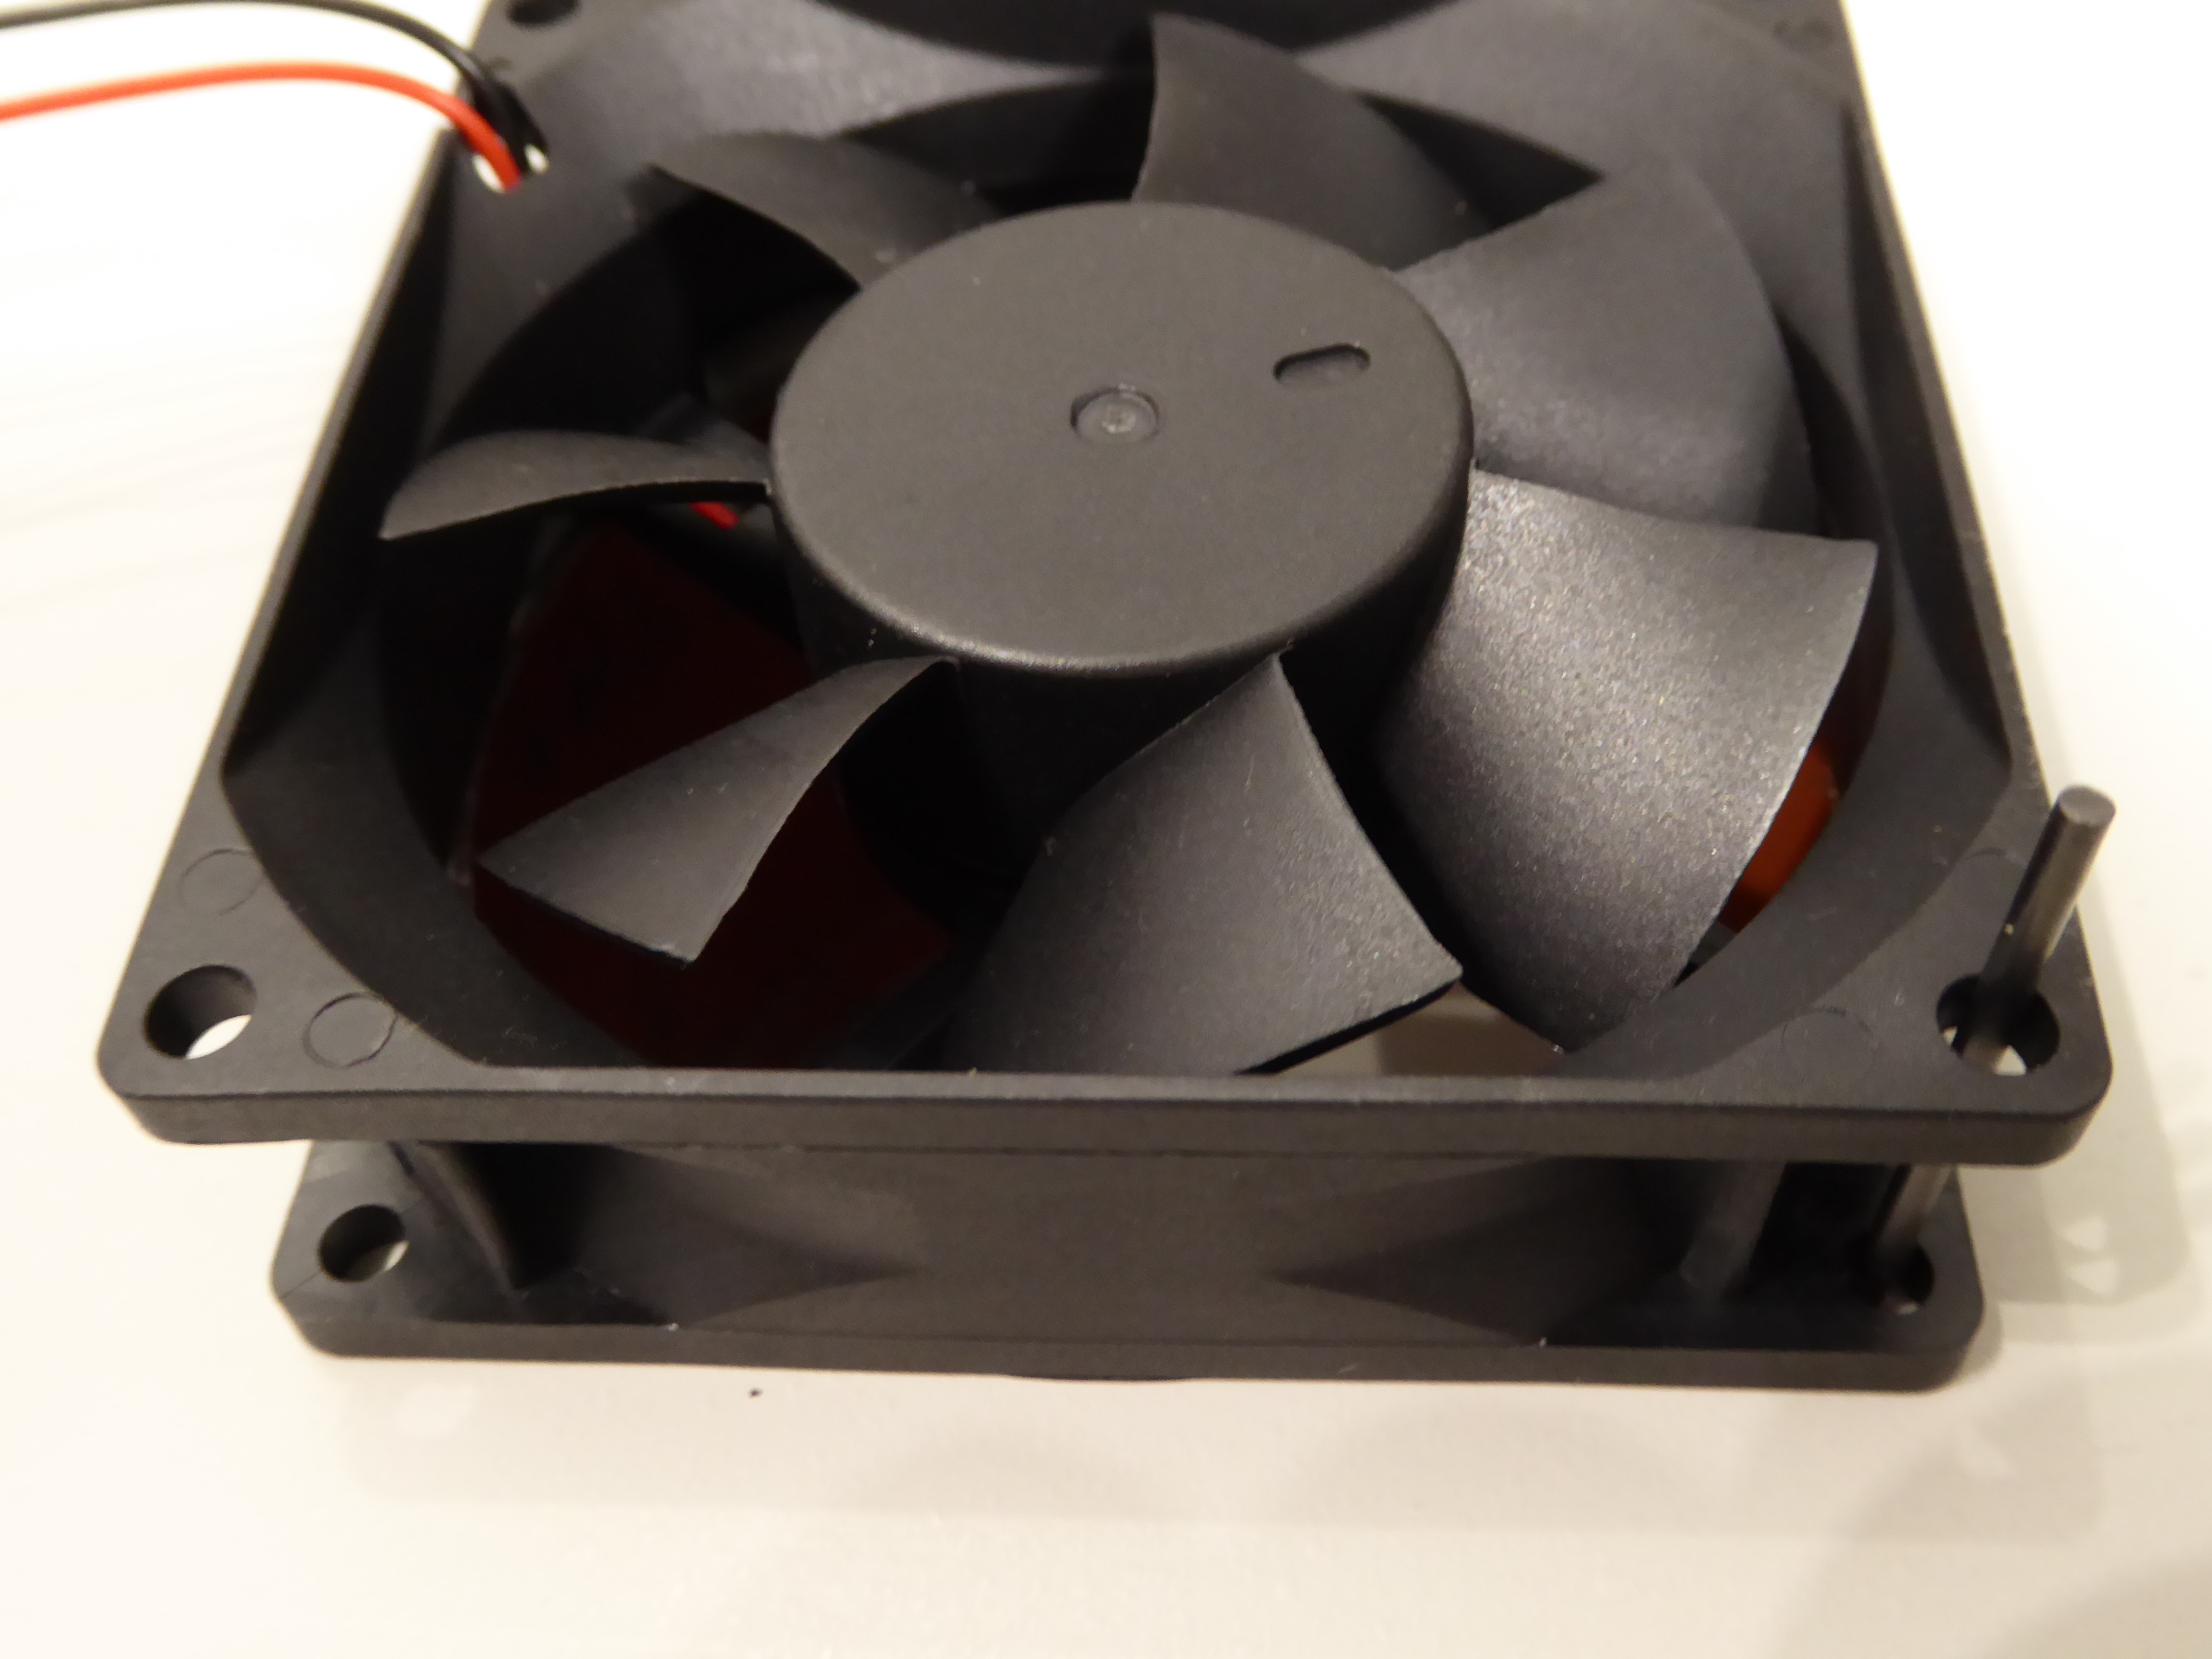
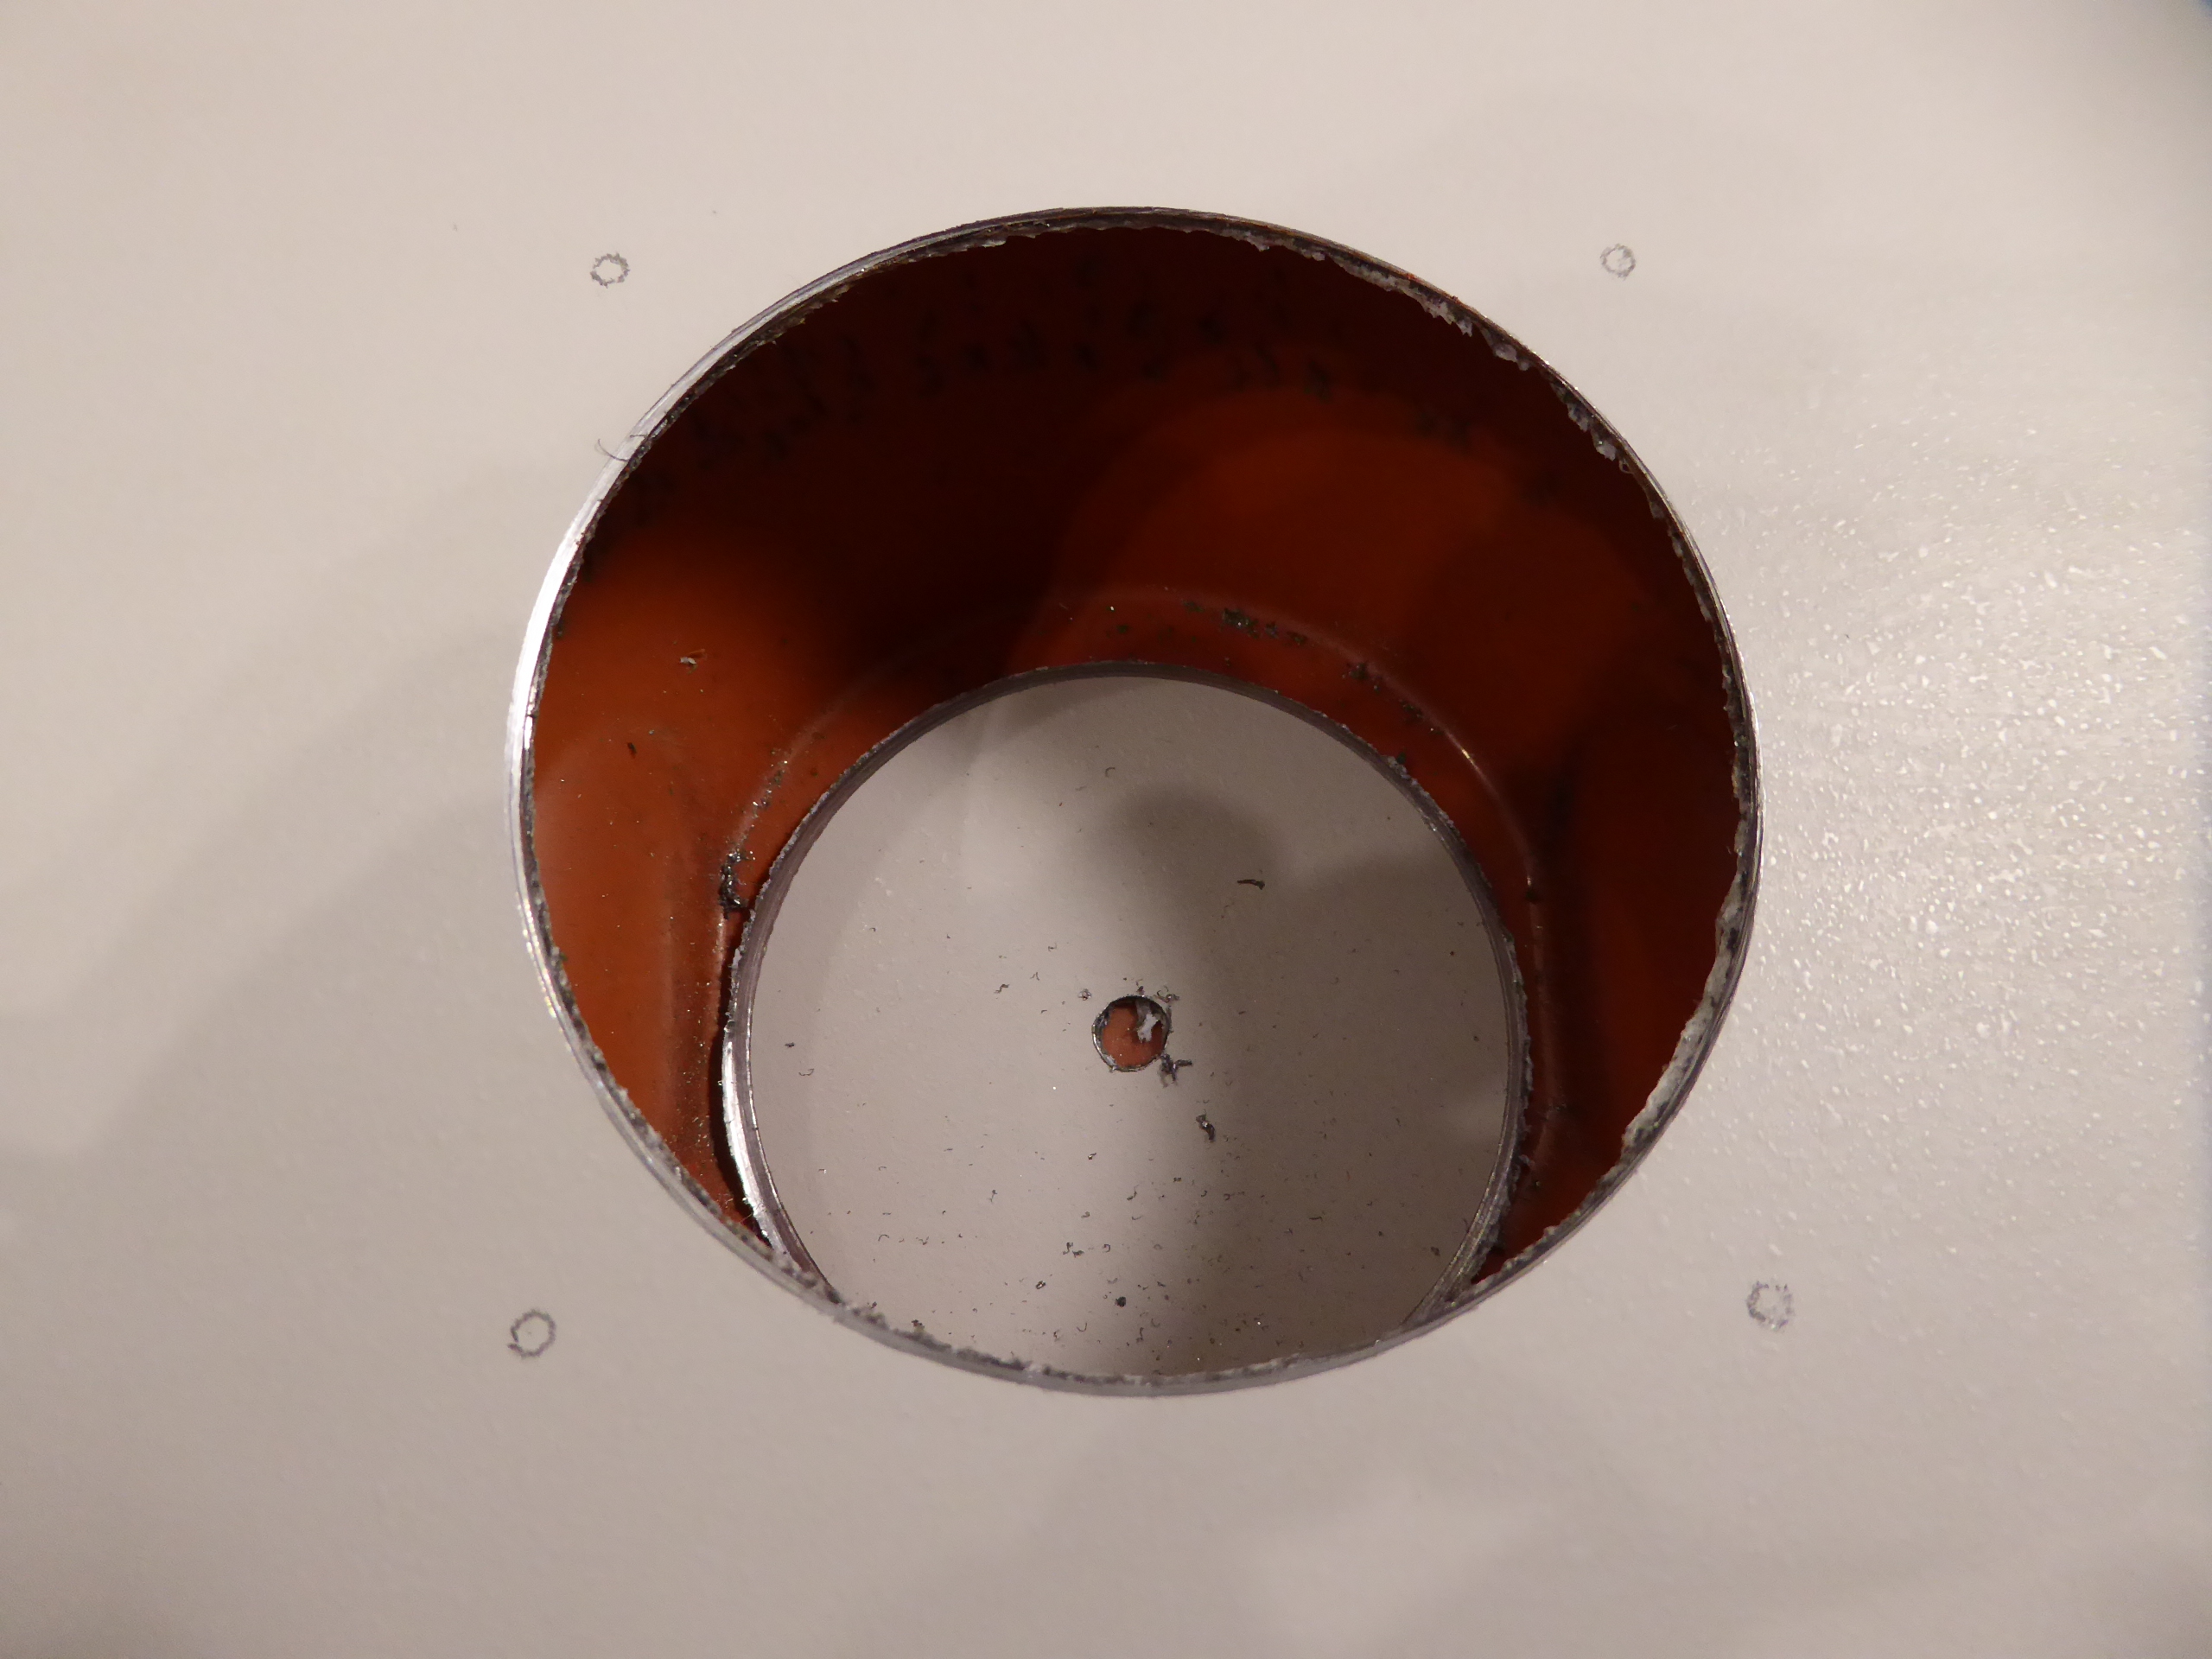
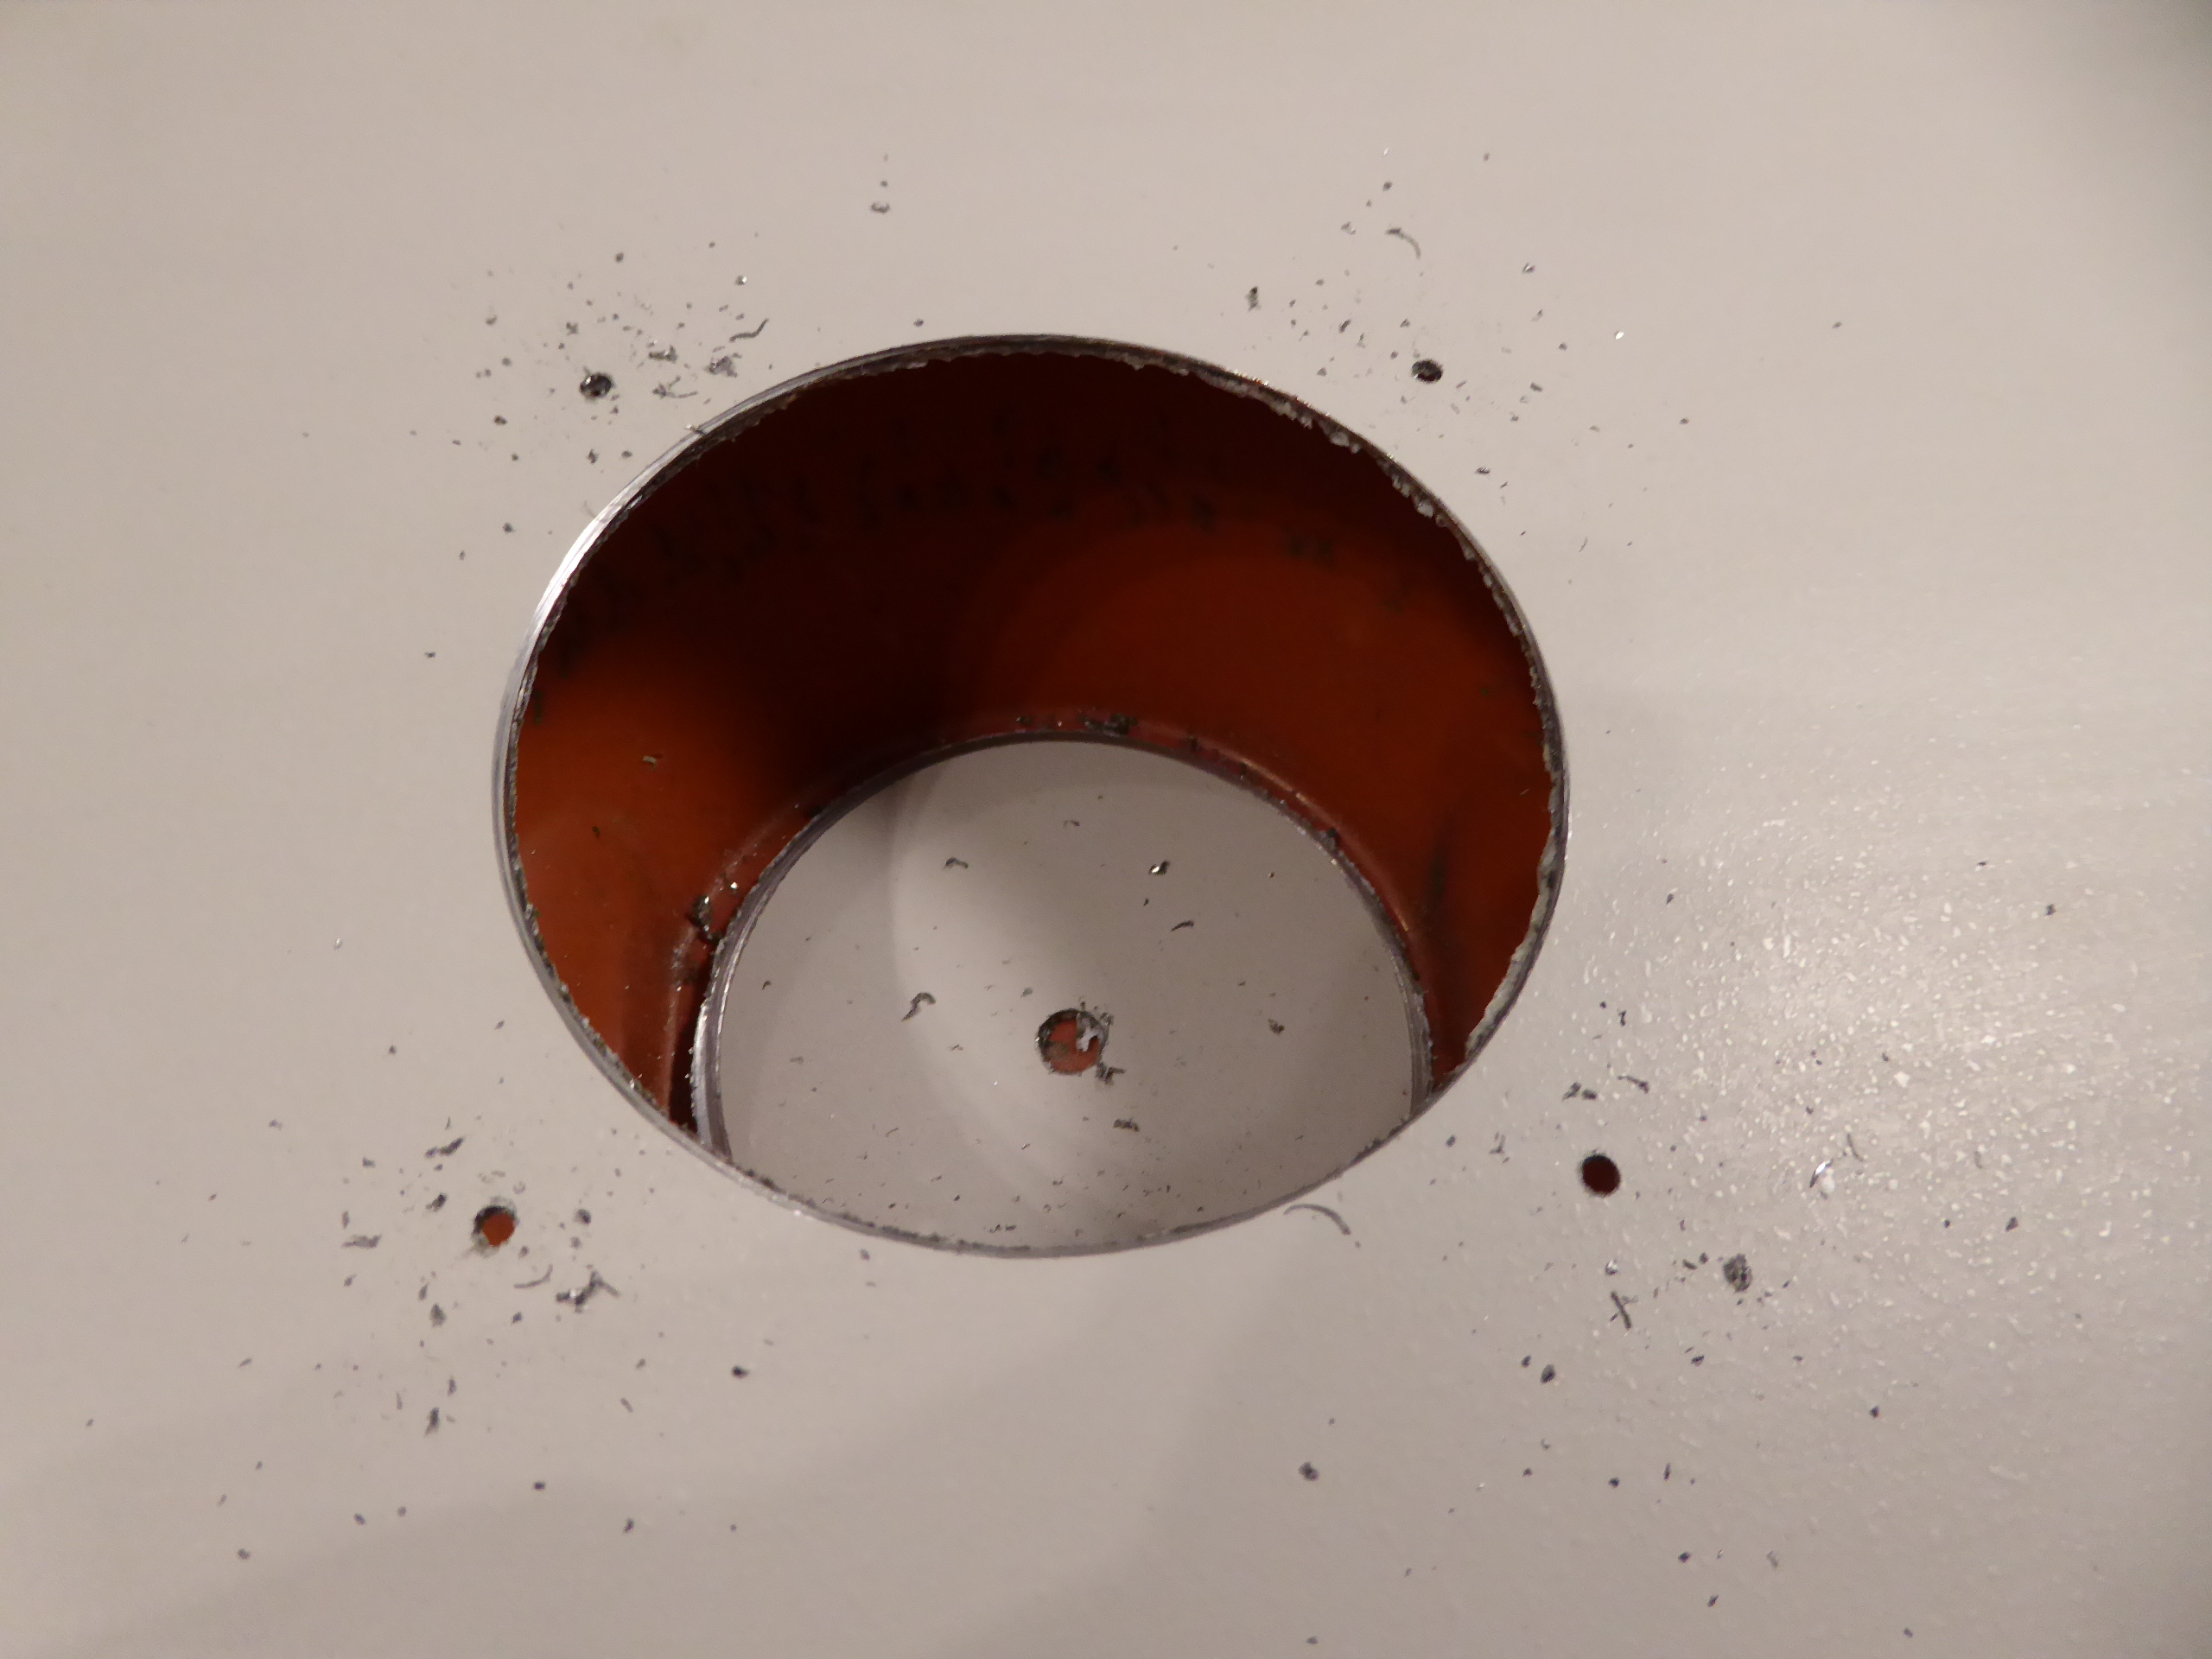
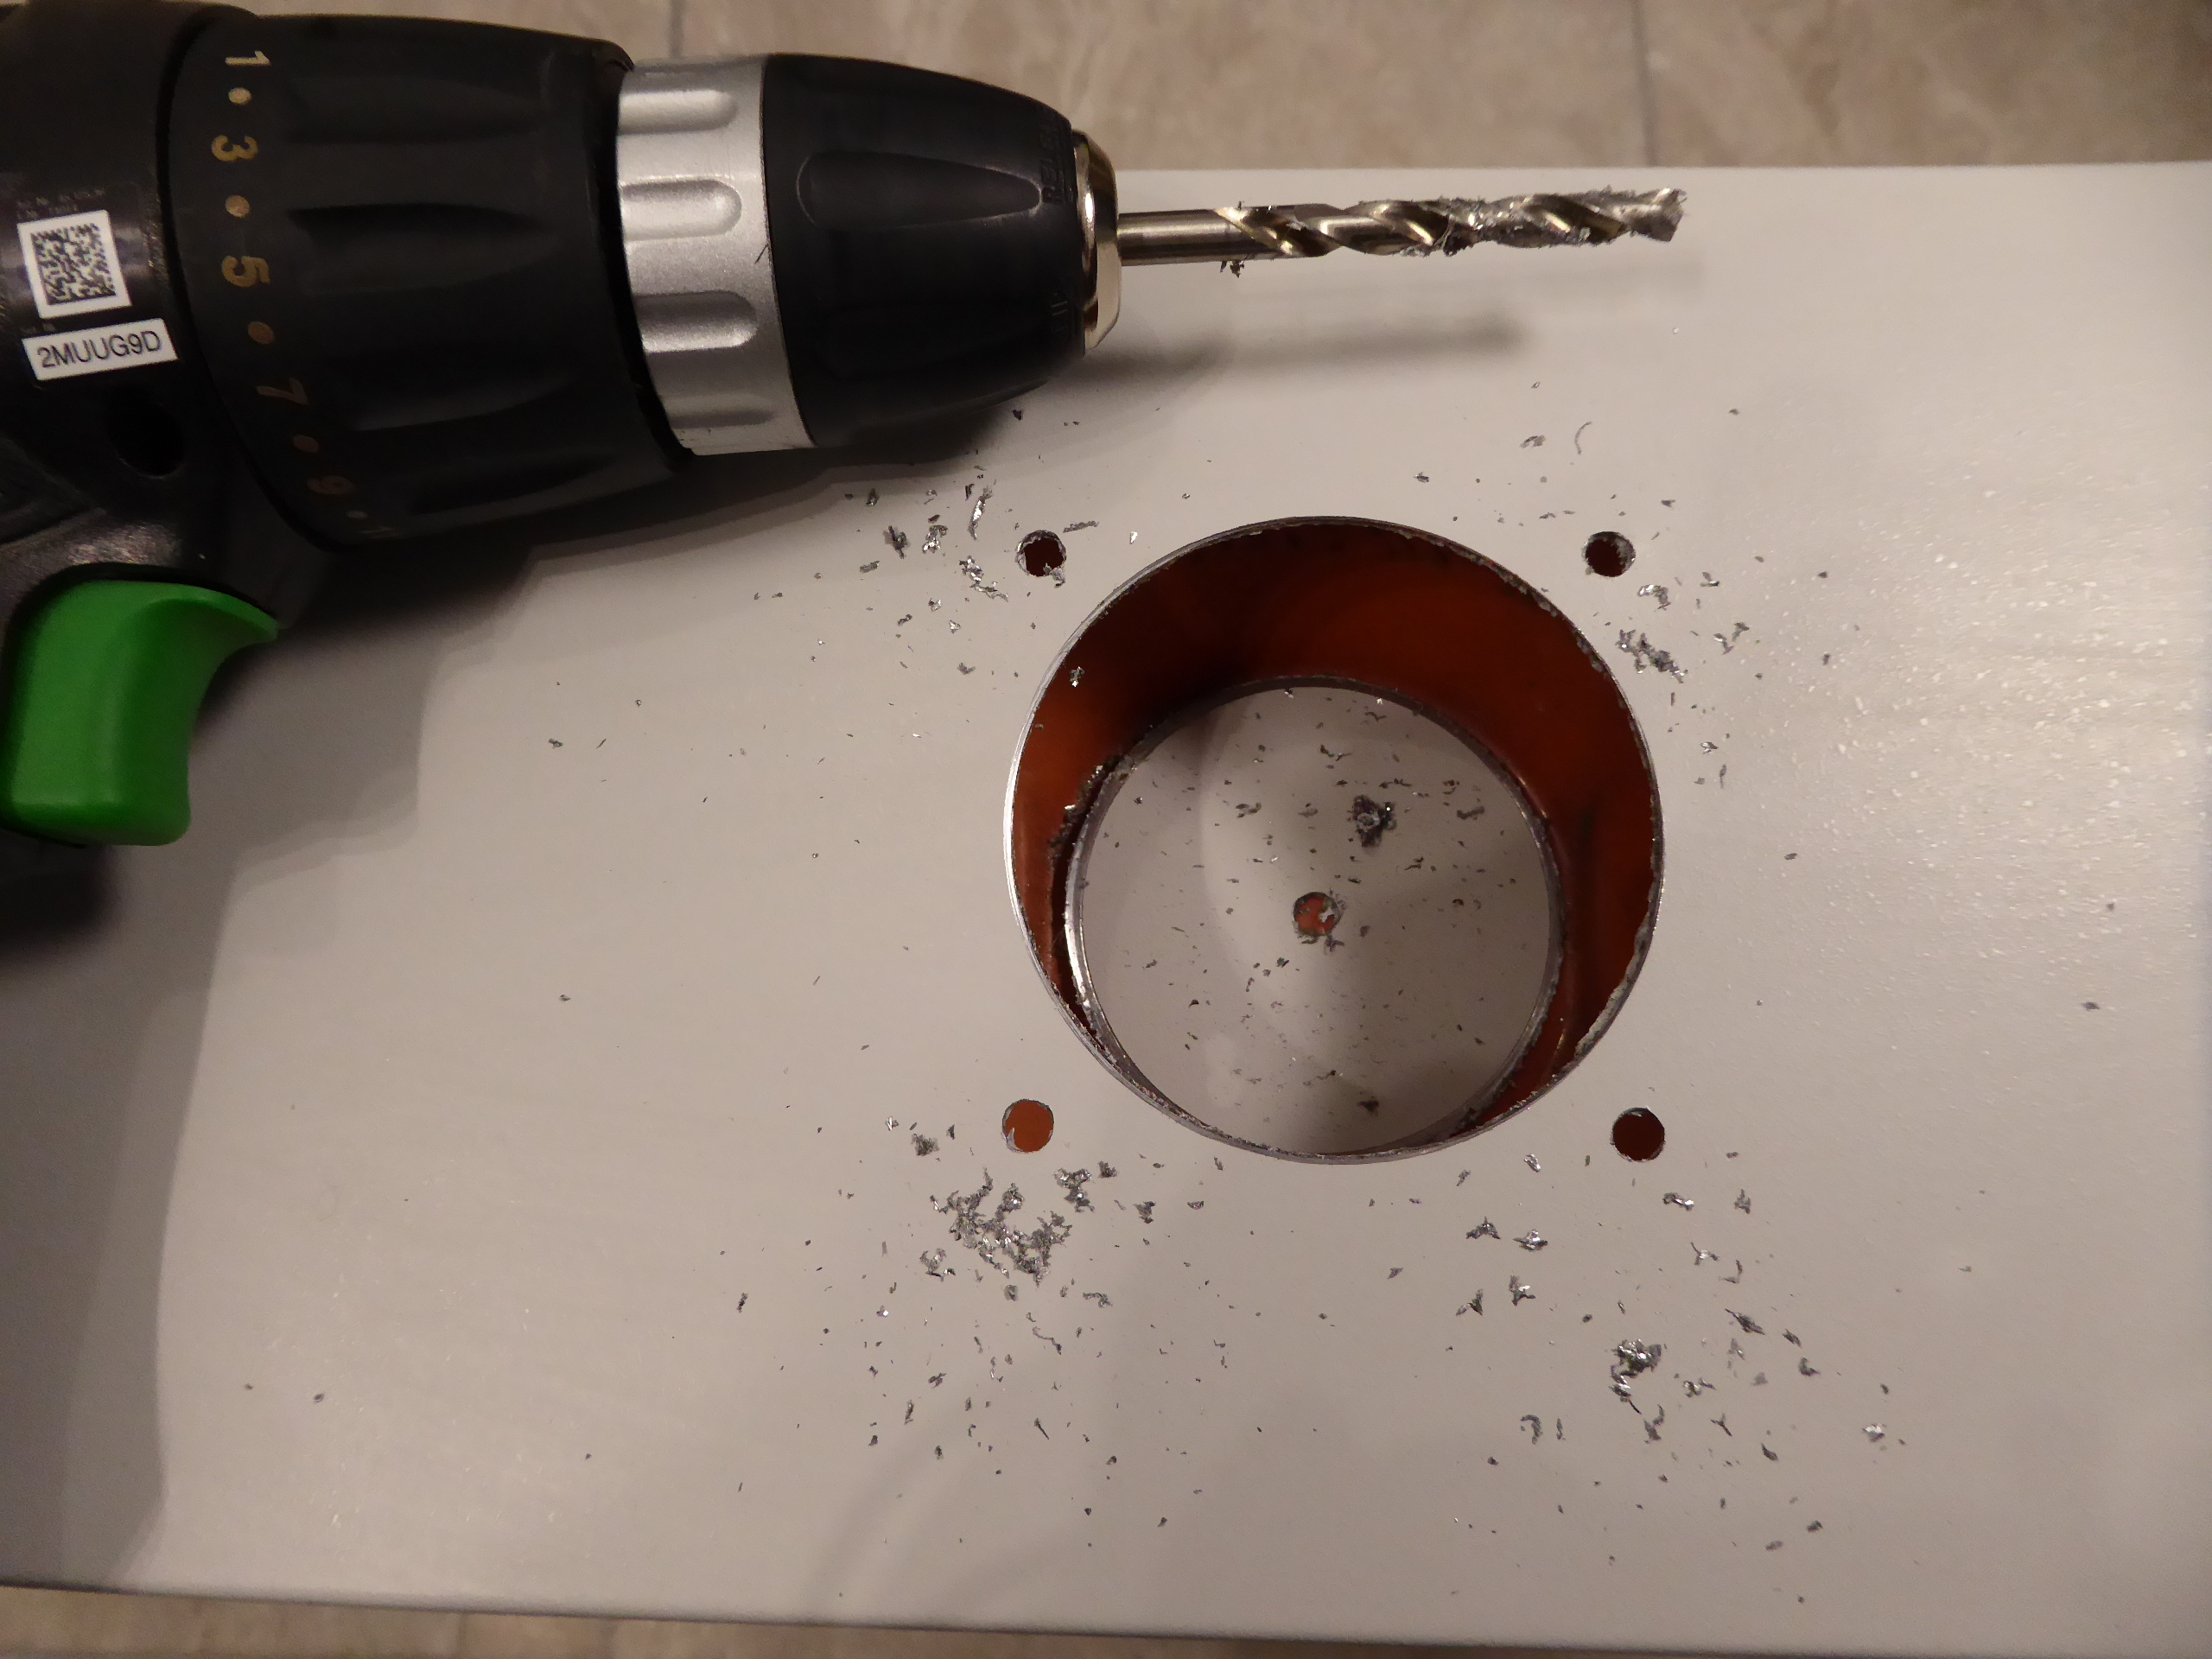
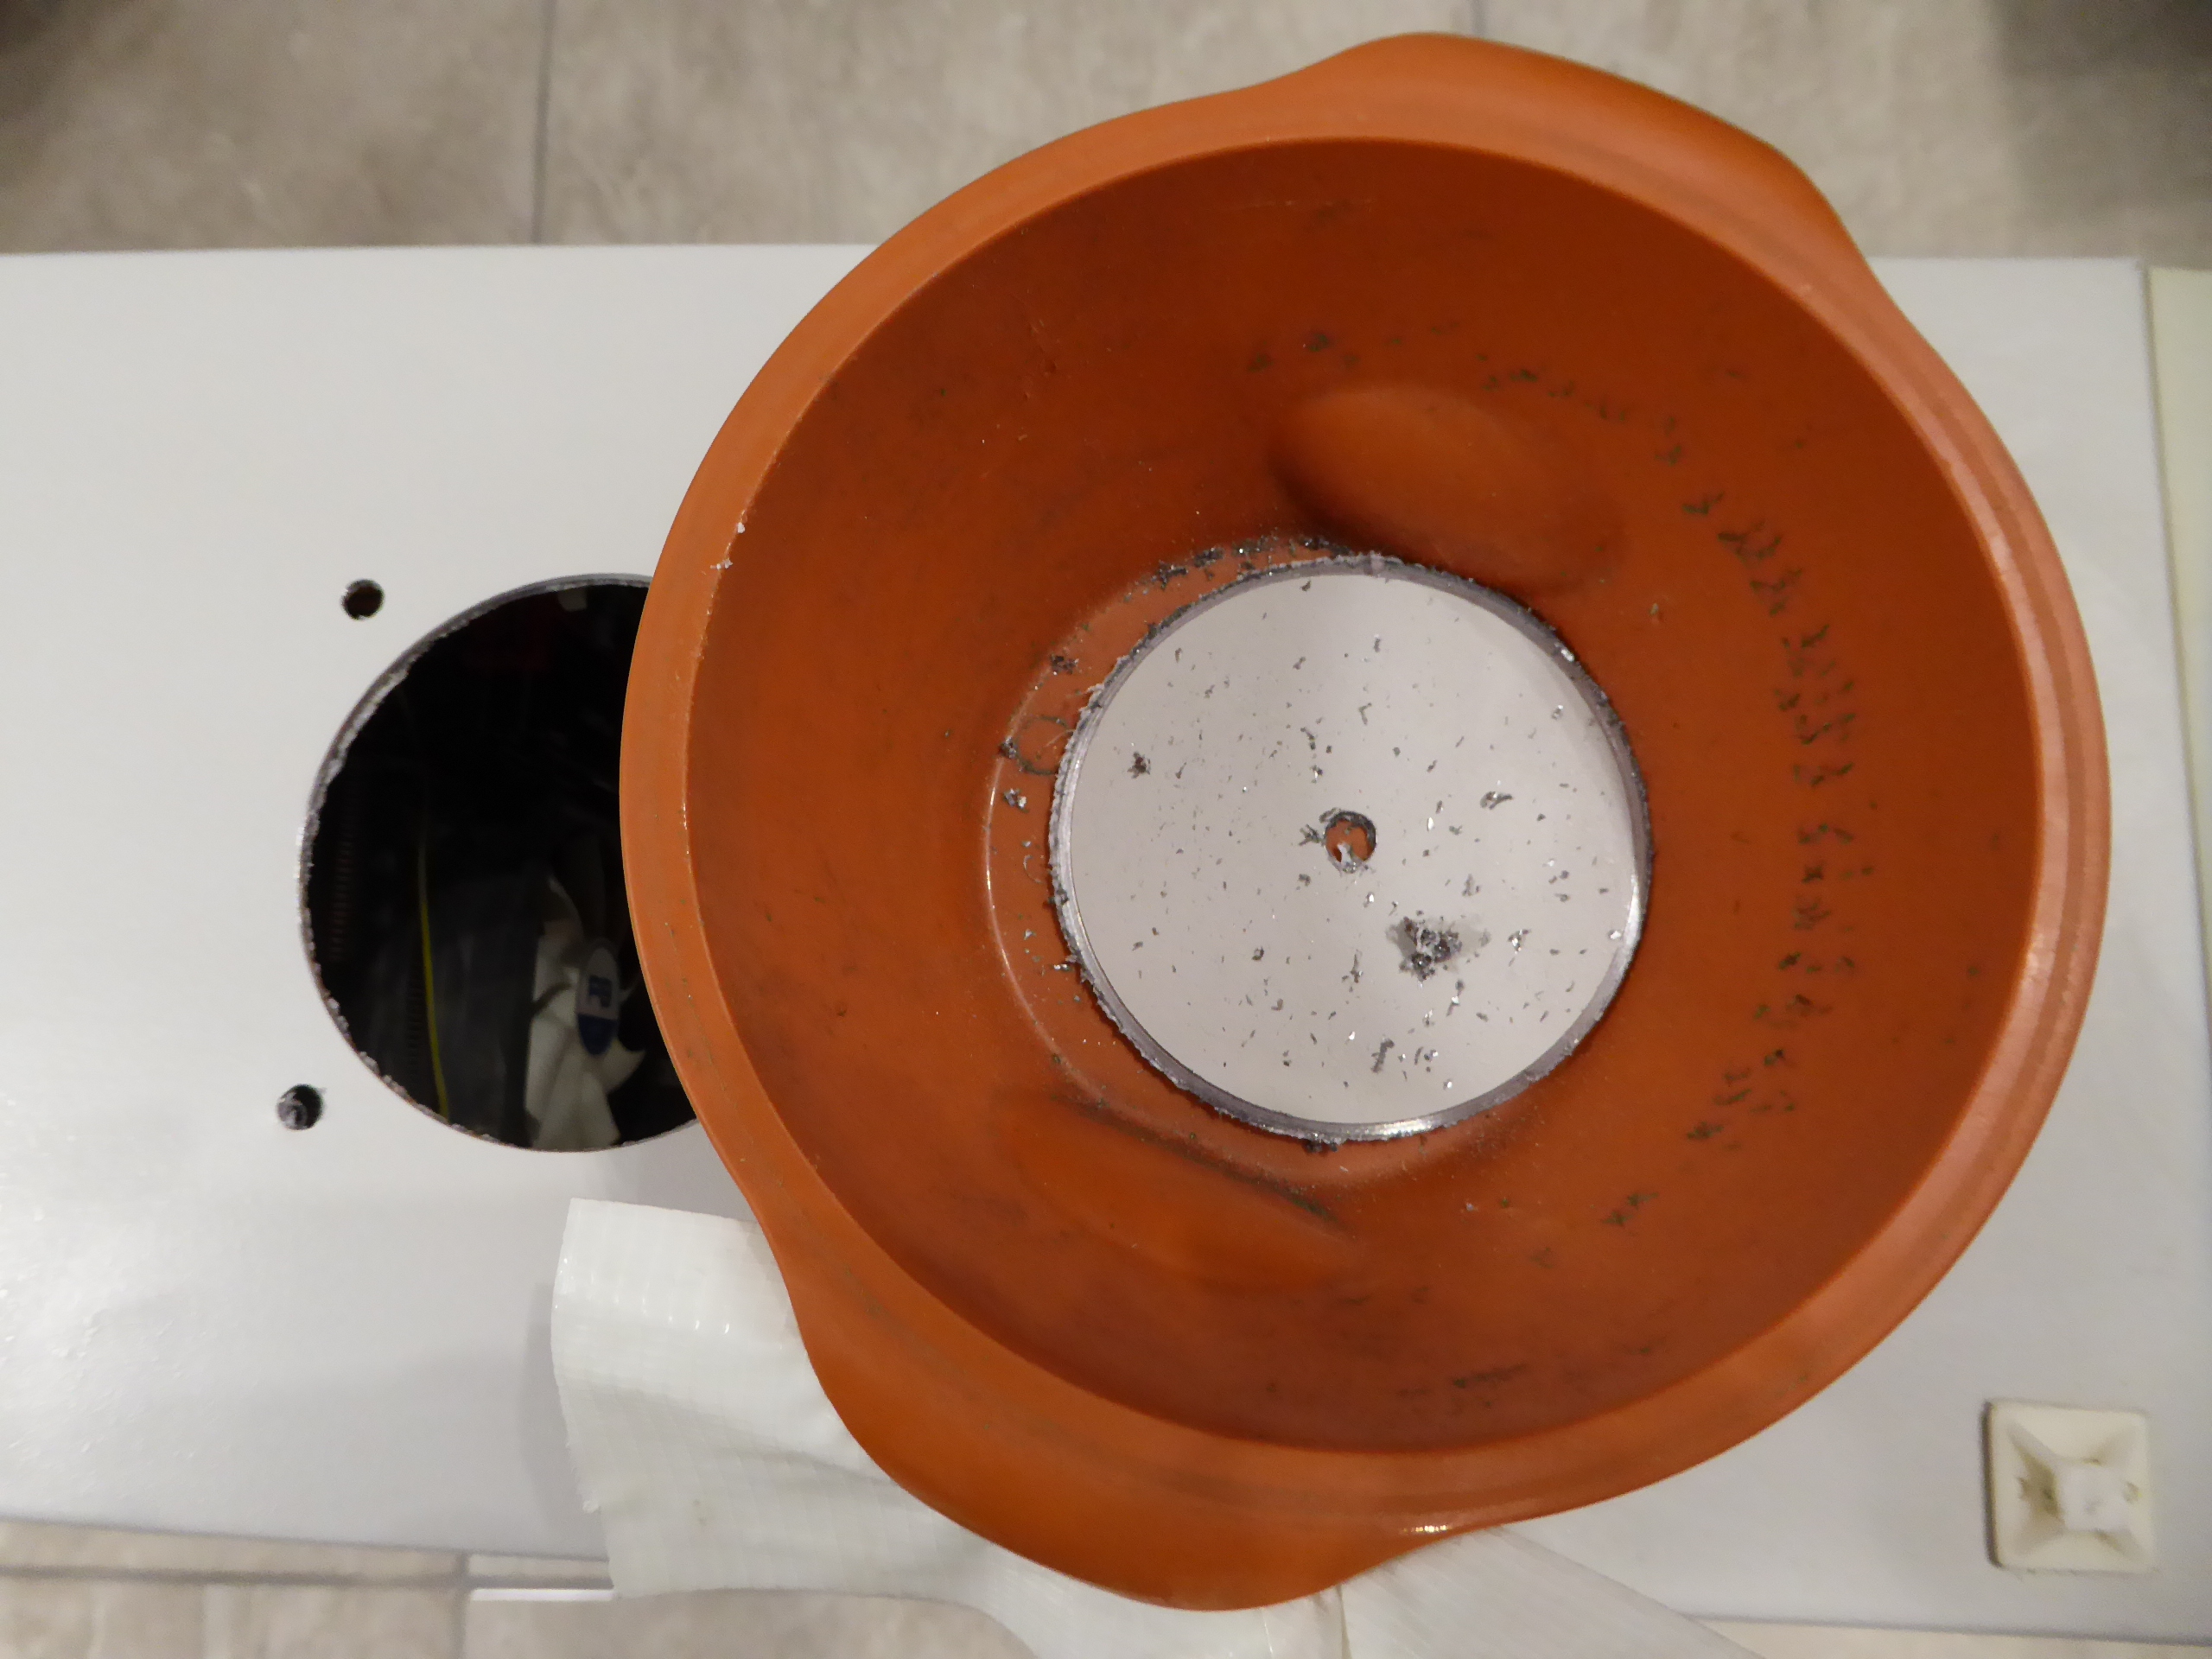
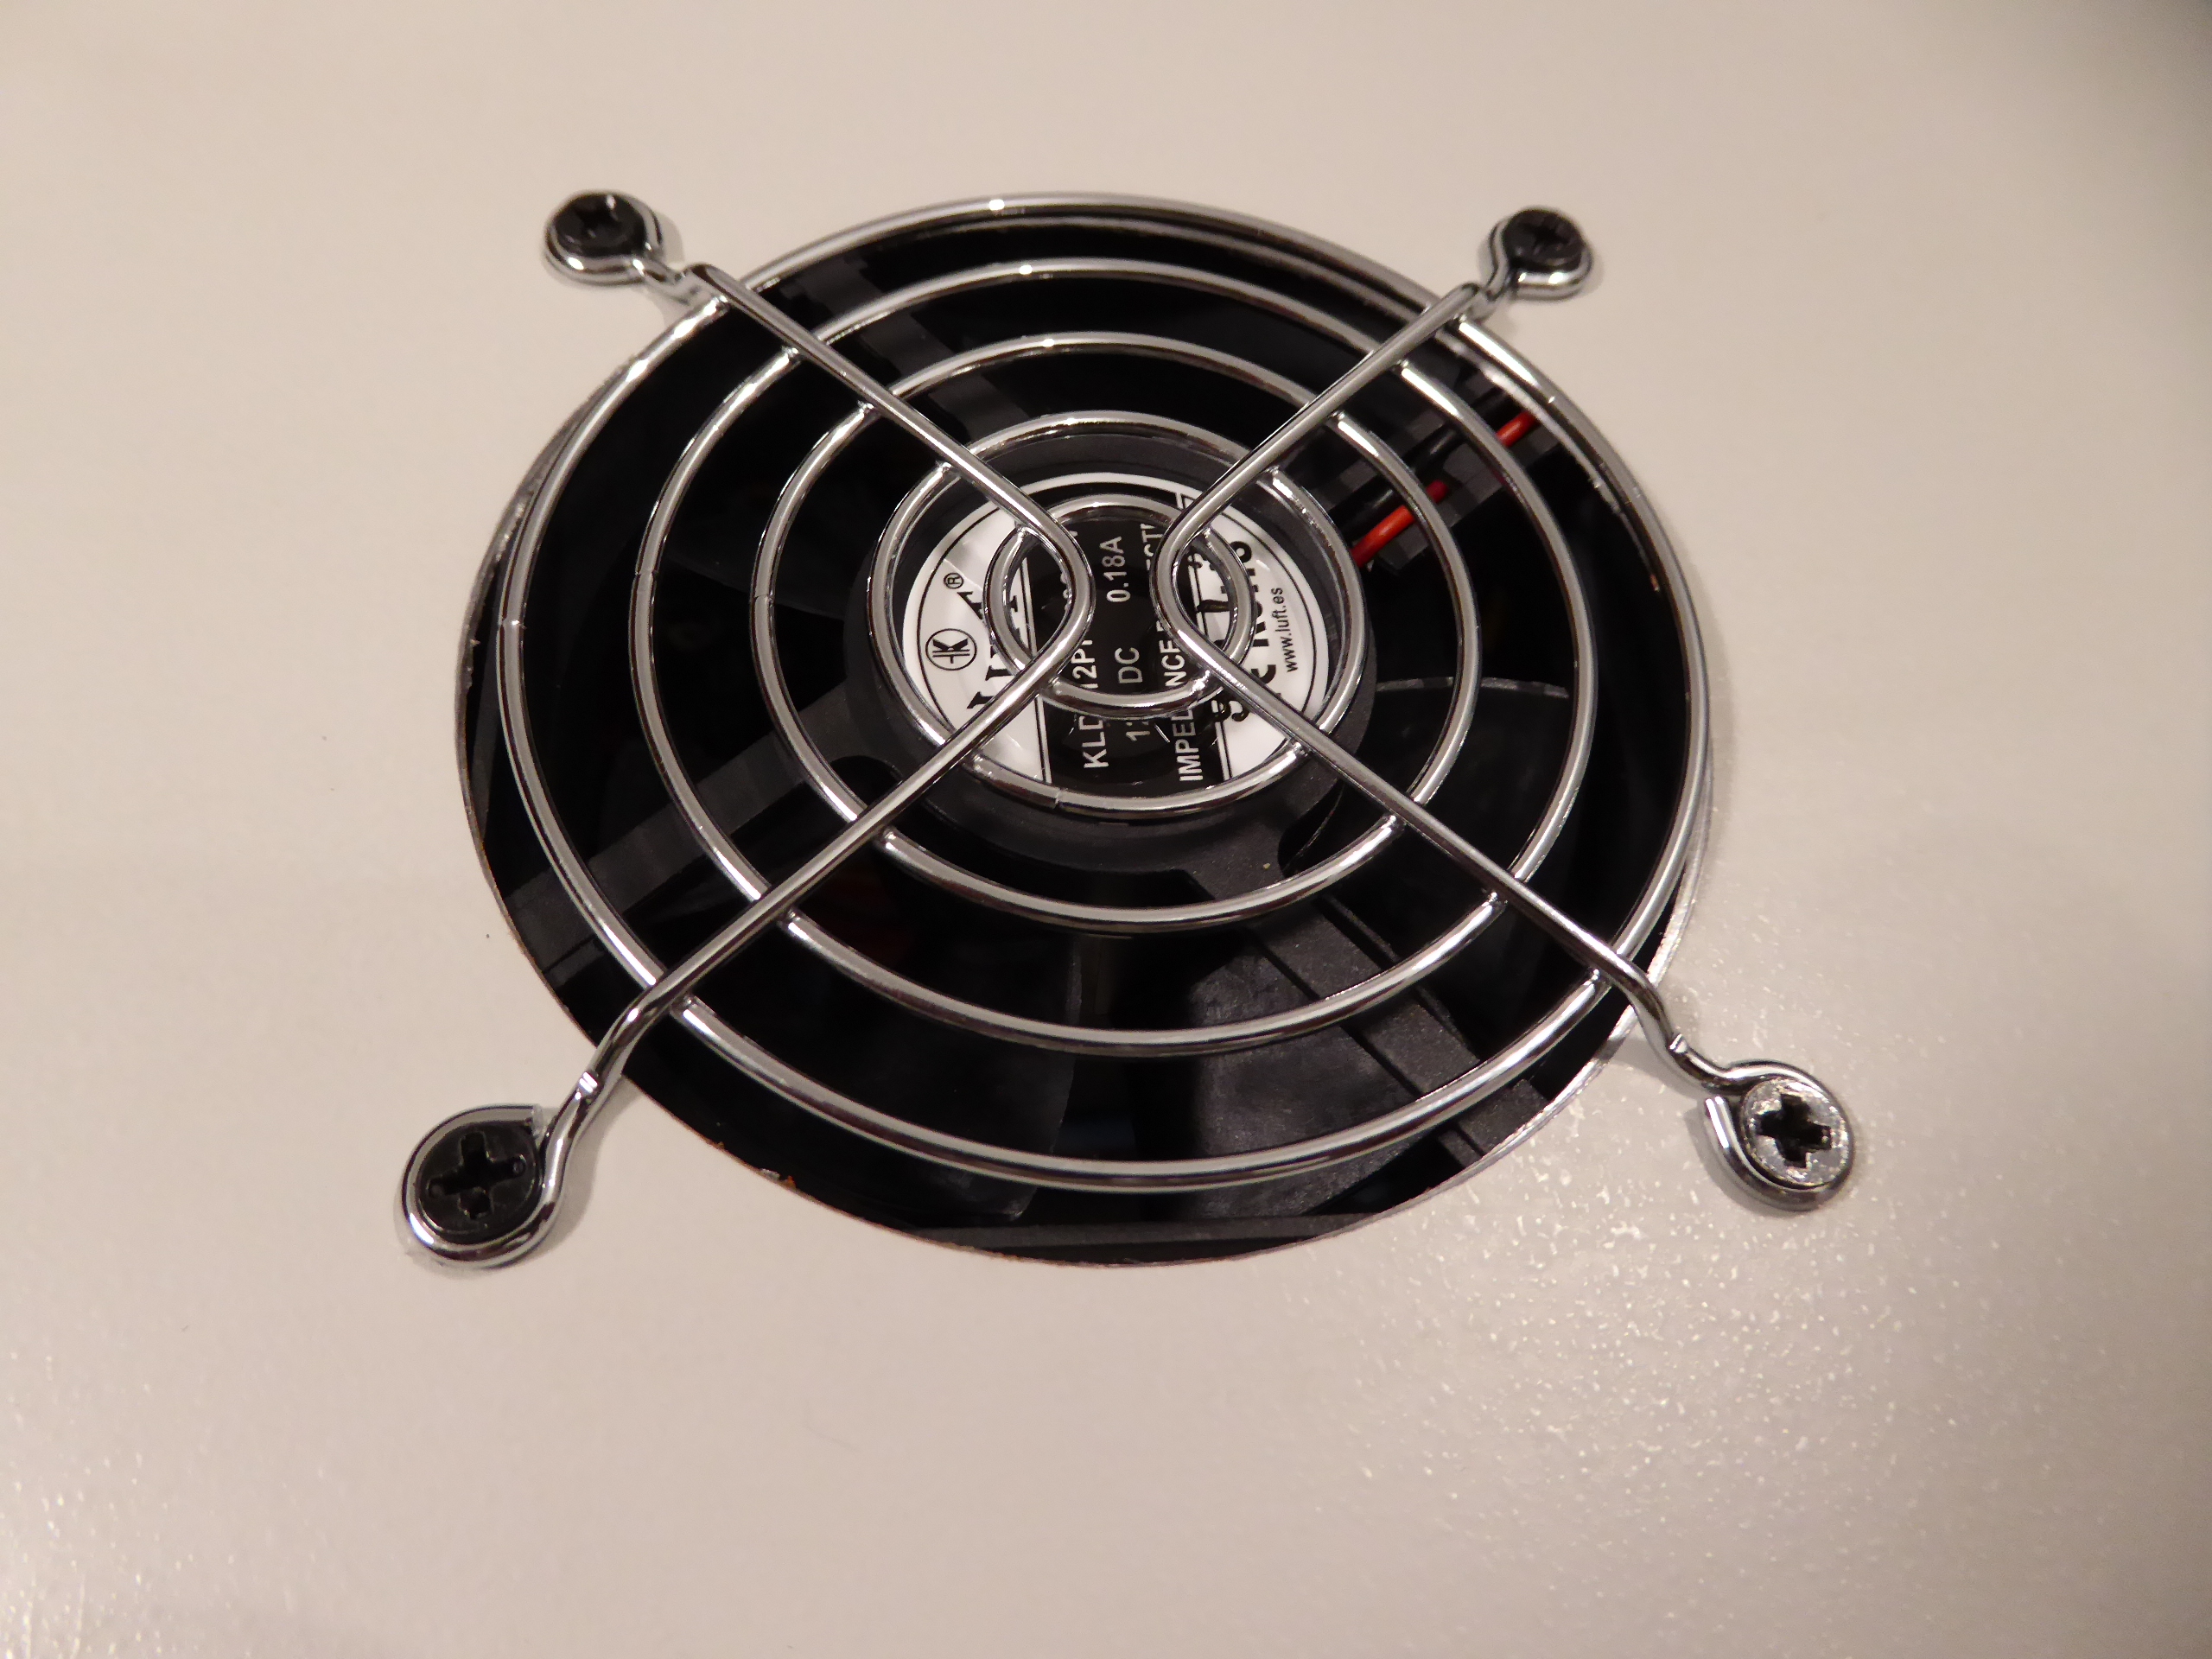
Taking advantage of the current impasse situation at Gpugrid, I've calmly made some pending hardware reforms at several of my hosts. One of these reforms consisted of transferring my highest performance Graphics card, based so far on a GTX 1660 Ti GPU, from a 2nd generation PCIe motherboard host to a 3rd generation PCIe one. 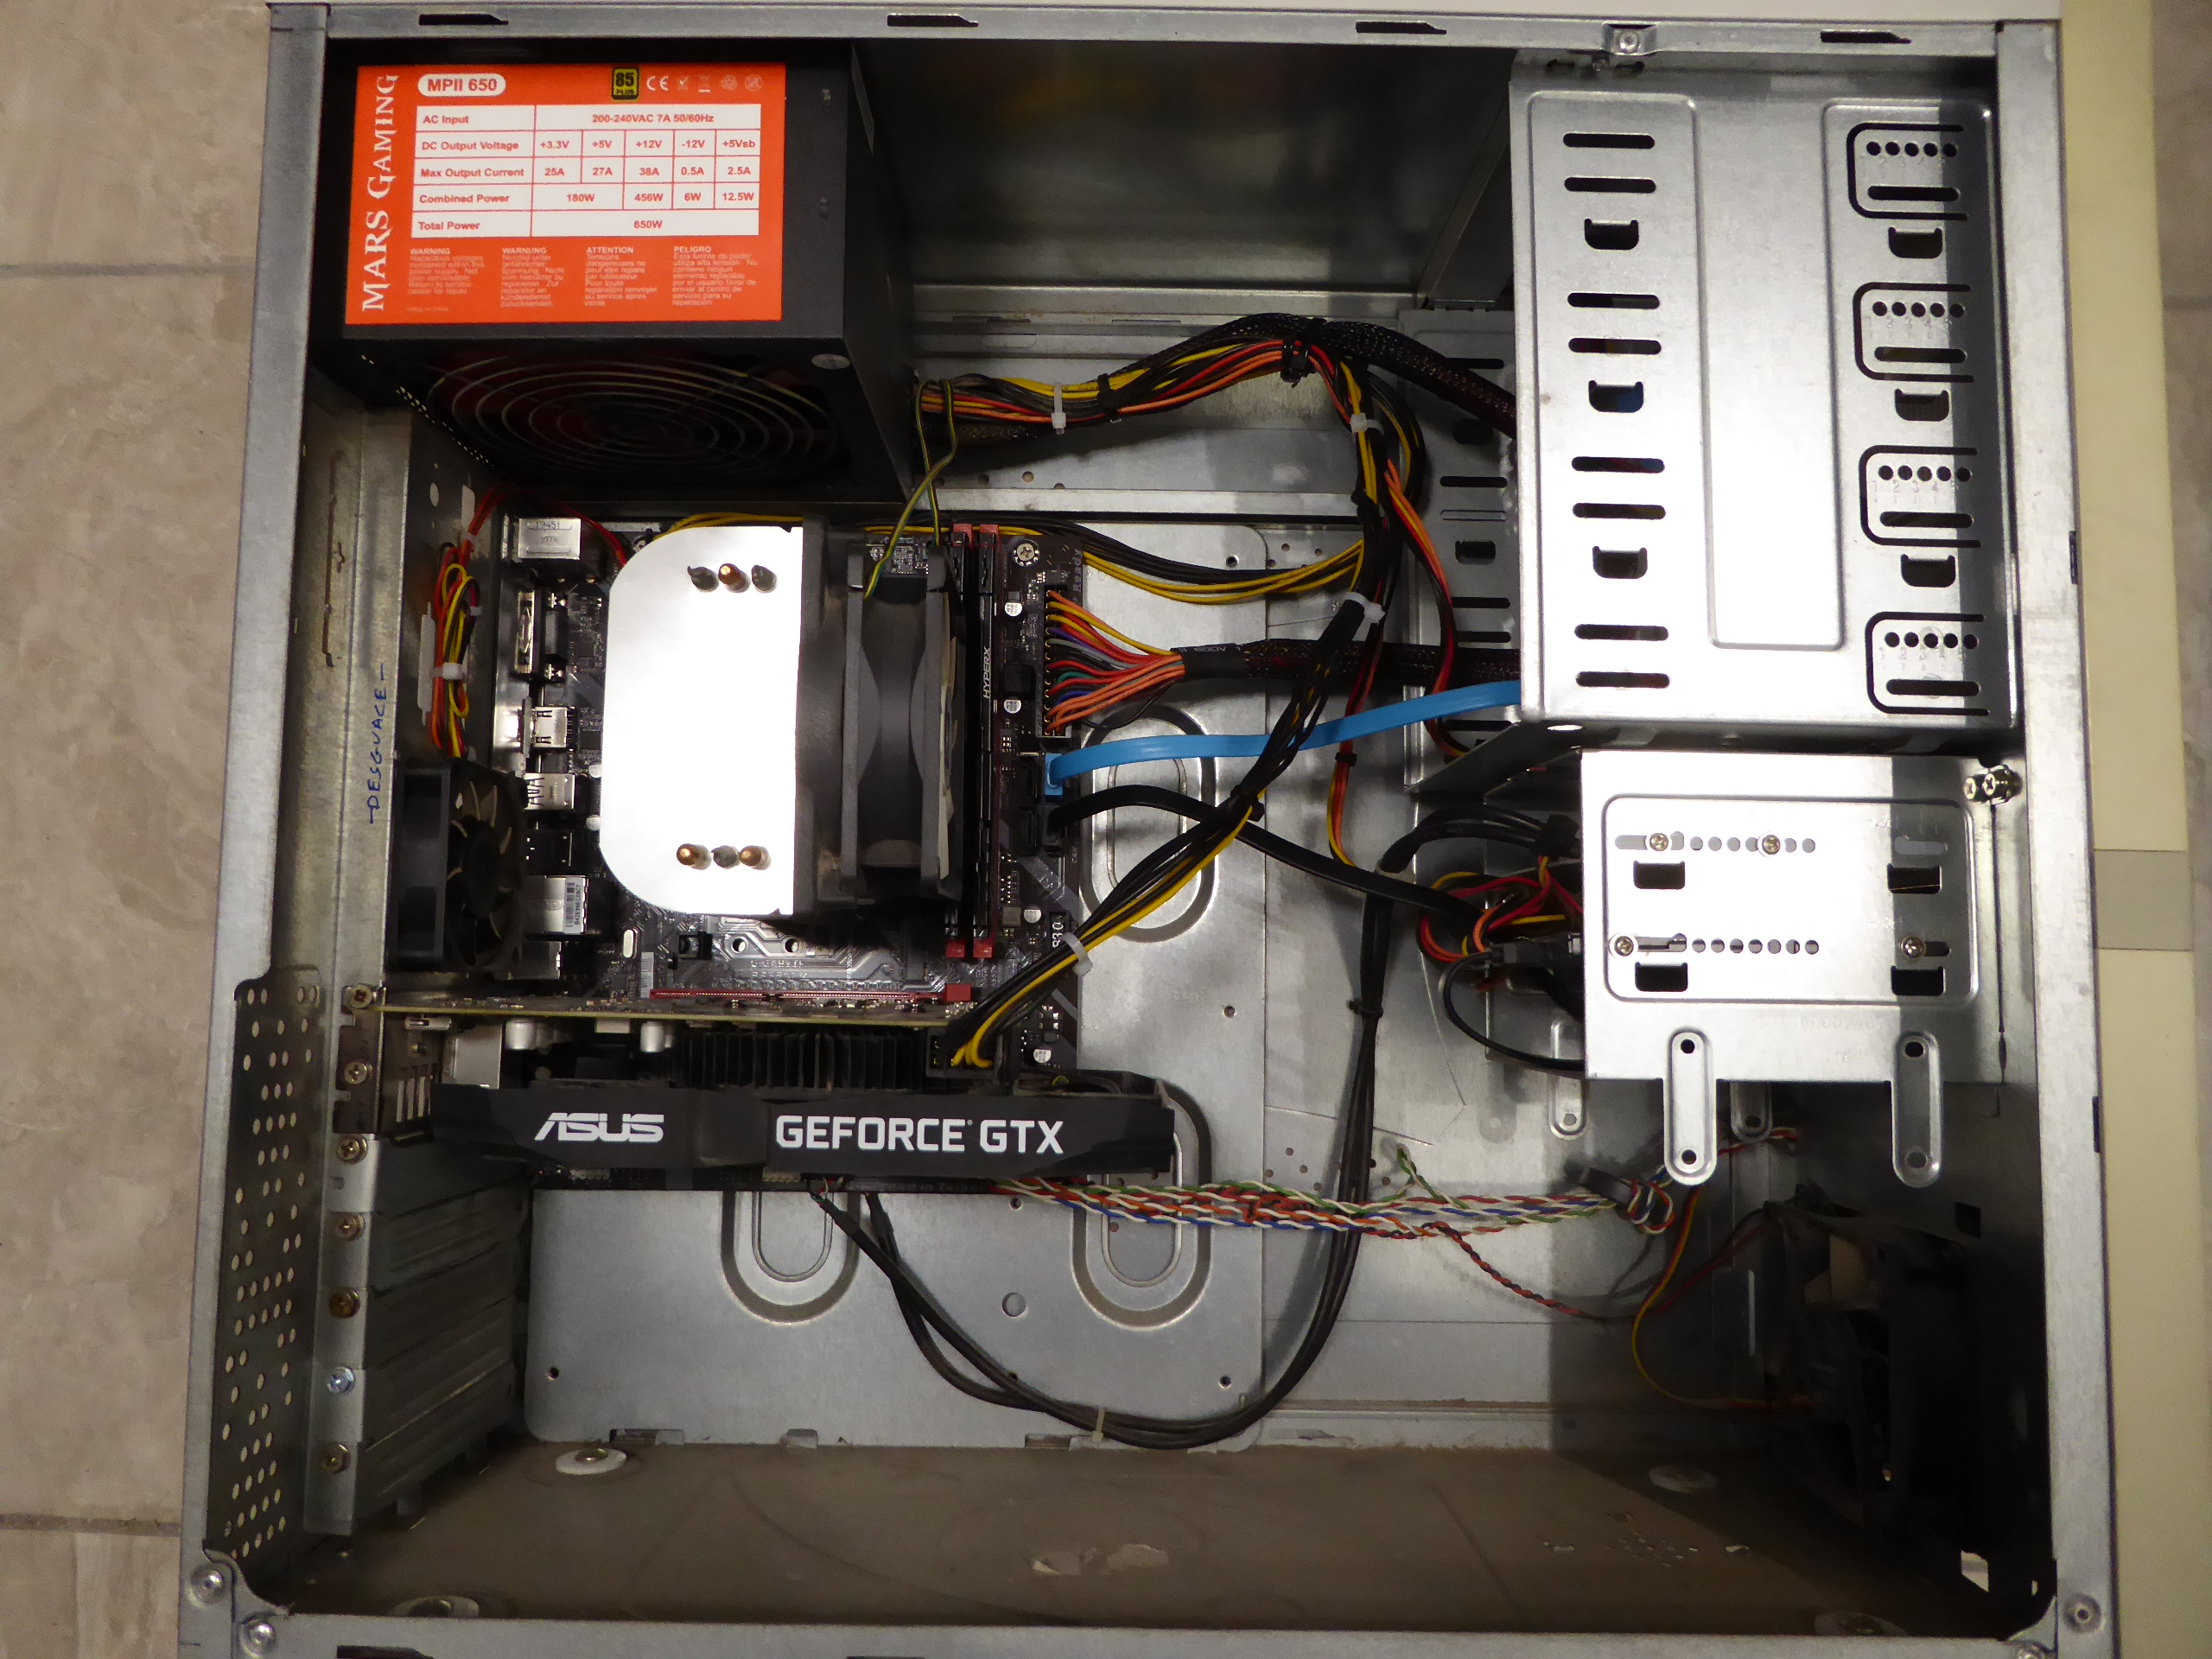 This particular graphics card is very hard to keep cold. I've made an air flow improvement at the receiving host that I'll share next. The chassis for this host had not any other upper air exhaust than the opening for PSU. It is a physical fact that hot air is lighter, and regular convection makes it tend to accumulate at chassis higher zones. Adding a new air exhaust helped by a fan at the top, will better evacuate hot air from top, and improve cold air circulation from bottom. - How can we perforate a proper opening to fit an 80x80x25 mm fan? The easiest way I've found is by means of a 79 mm bi-metal crown drill. It is suitable for drilling aluminum or mild steel alloys that computer chassis are generally made of. - Is it safe to perforate a computer chassis with hardware mounted in it? Normally it is a very risky manoeuvre, because any metallic splinter or leftover will for sure short circuit the most expensive component (if Murphy's law is applied ;-) I've developed my own technique for this. I squint looked this vegetable cream 140 mm diameter plastic container... I'll first cover the inside top of chassis with american tape. We call it american tape (cinta americana) at spain. I don't know how it is called at America (?) Then, I'm attaching the same way the (ultratech) leftovers container at inside, directly below the fan selected placing. I'm starting by opening a 6 mm guiding hole at the center, using a common 6 mm drill for metal. Then, the 79 mm crown drill comes into action. Slowly, and taking several pauses, because at low revolutions the electric drill might overheat! Special care and low pressure must be taken at the end, when perforation is near to detach the inner circular plate. Here we have it. Now I'm presenting and centering the fan on place, and I'll mark fan fixing holes positions by means of a long pencil lead. I prefer to firstly perforate these holes with a 2,5 mm drill for metal. This way, it is easier to maintain the original marked position. And then, enlarging with the 6 mm drill. After every drilling operations are finished, we can detach our protective fixture and all its adhesive fixings. And now the fan and its protective grid are fixed in position, air flux oriented outwards. This is the final look for the resulting host. 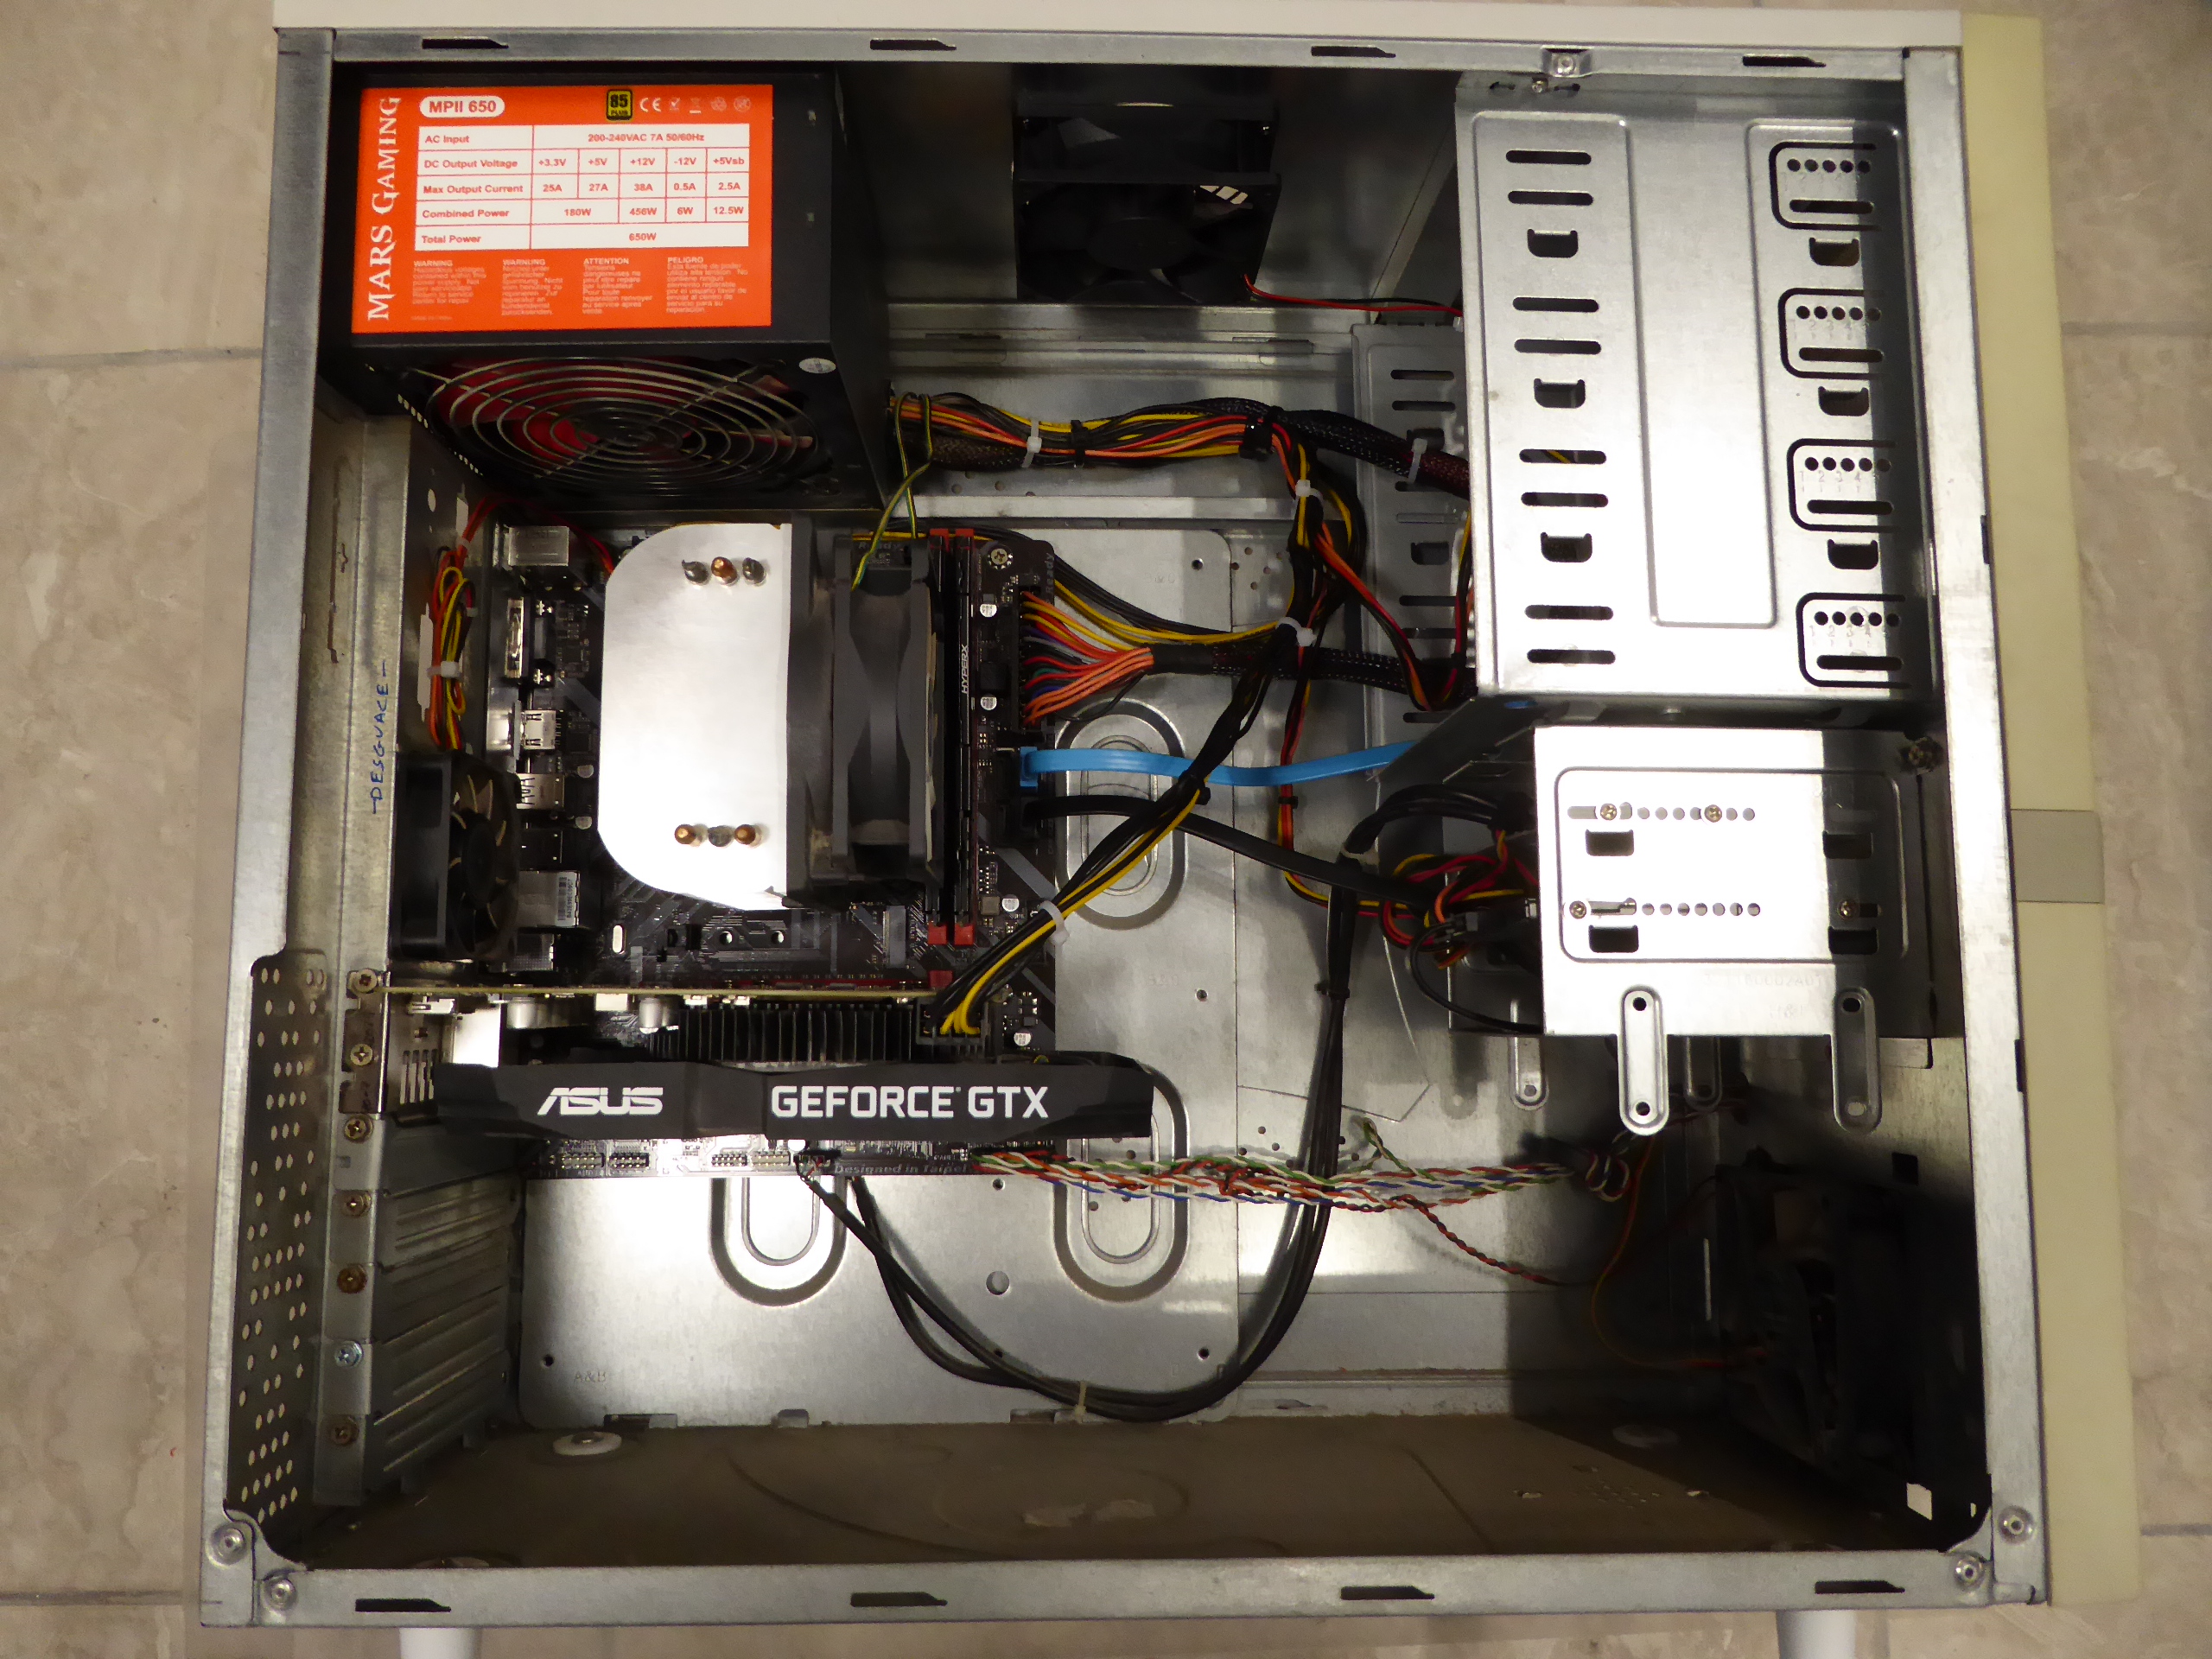 It is prepared for the new Gpugrid WUs to come... 🤔️ |
|
ServicEnginIC Send message Joined: 24 Sep 10 Posts: 595 Credit: 13,083,686,510 RAC: 745,928 Level Scientific publications |
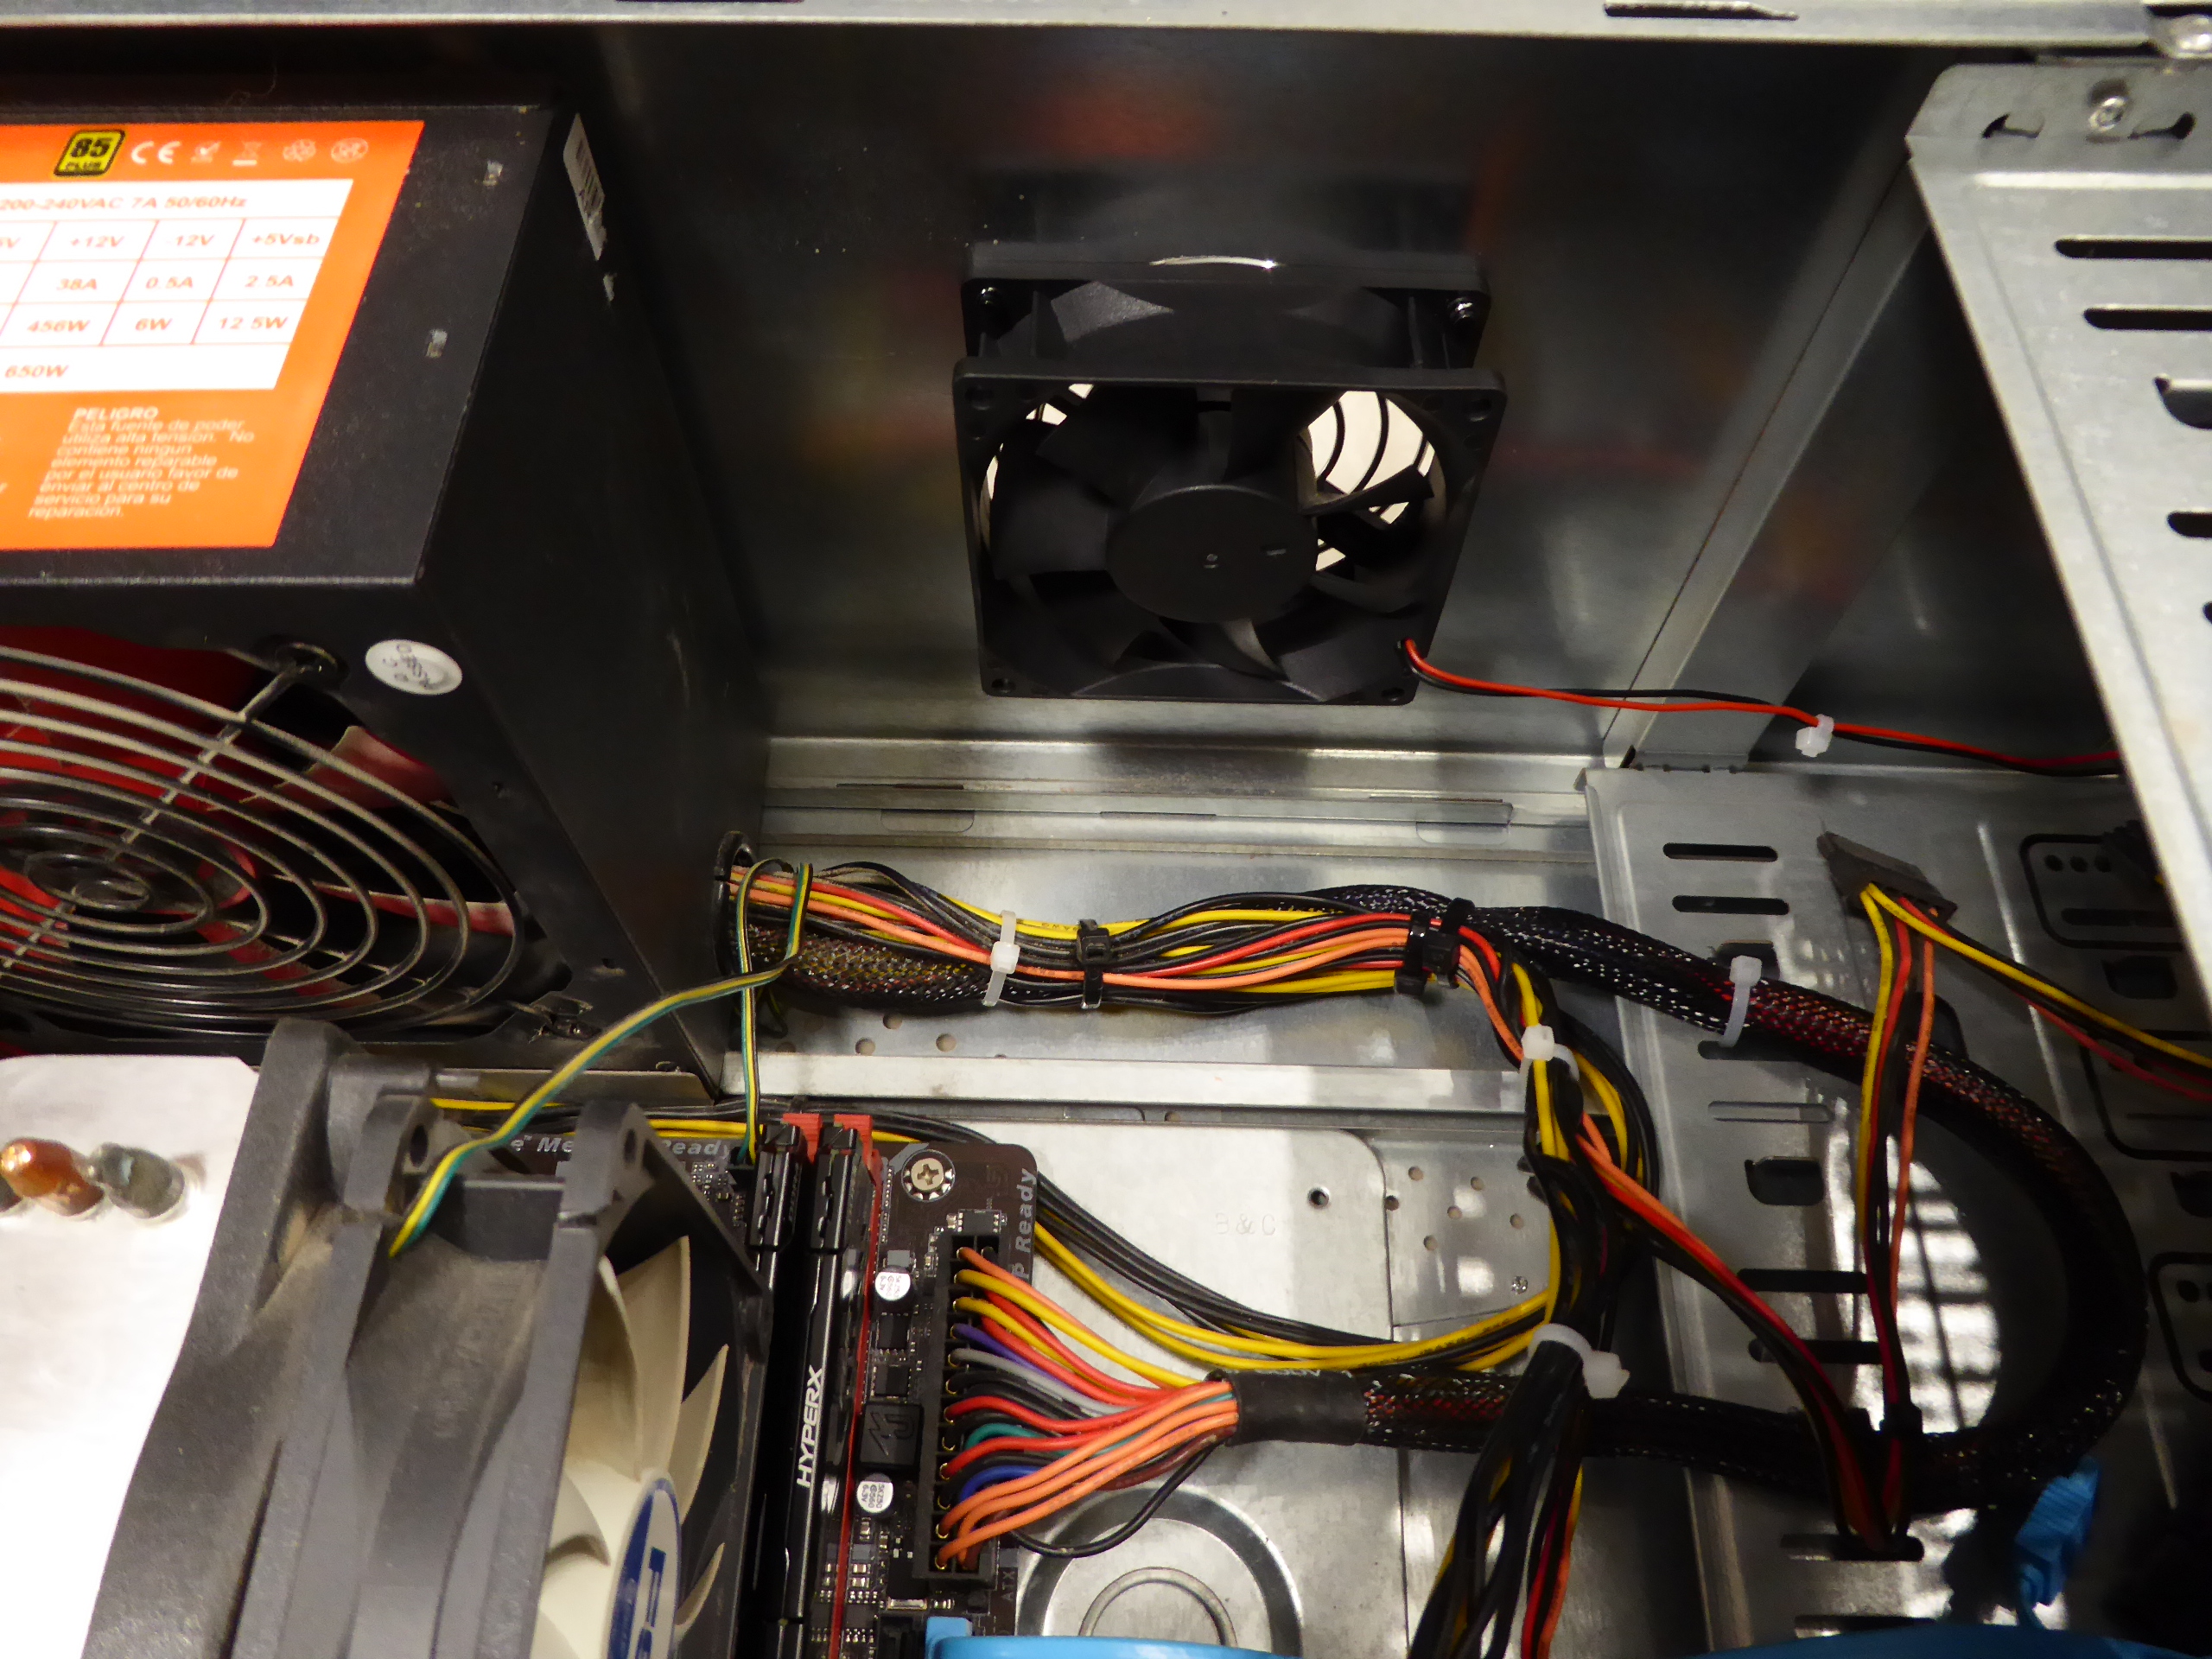
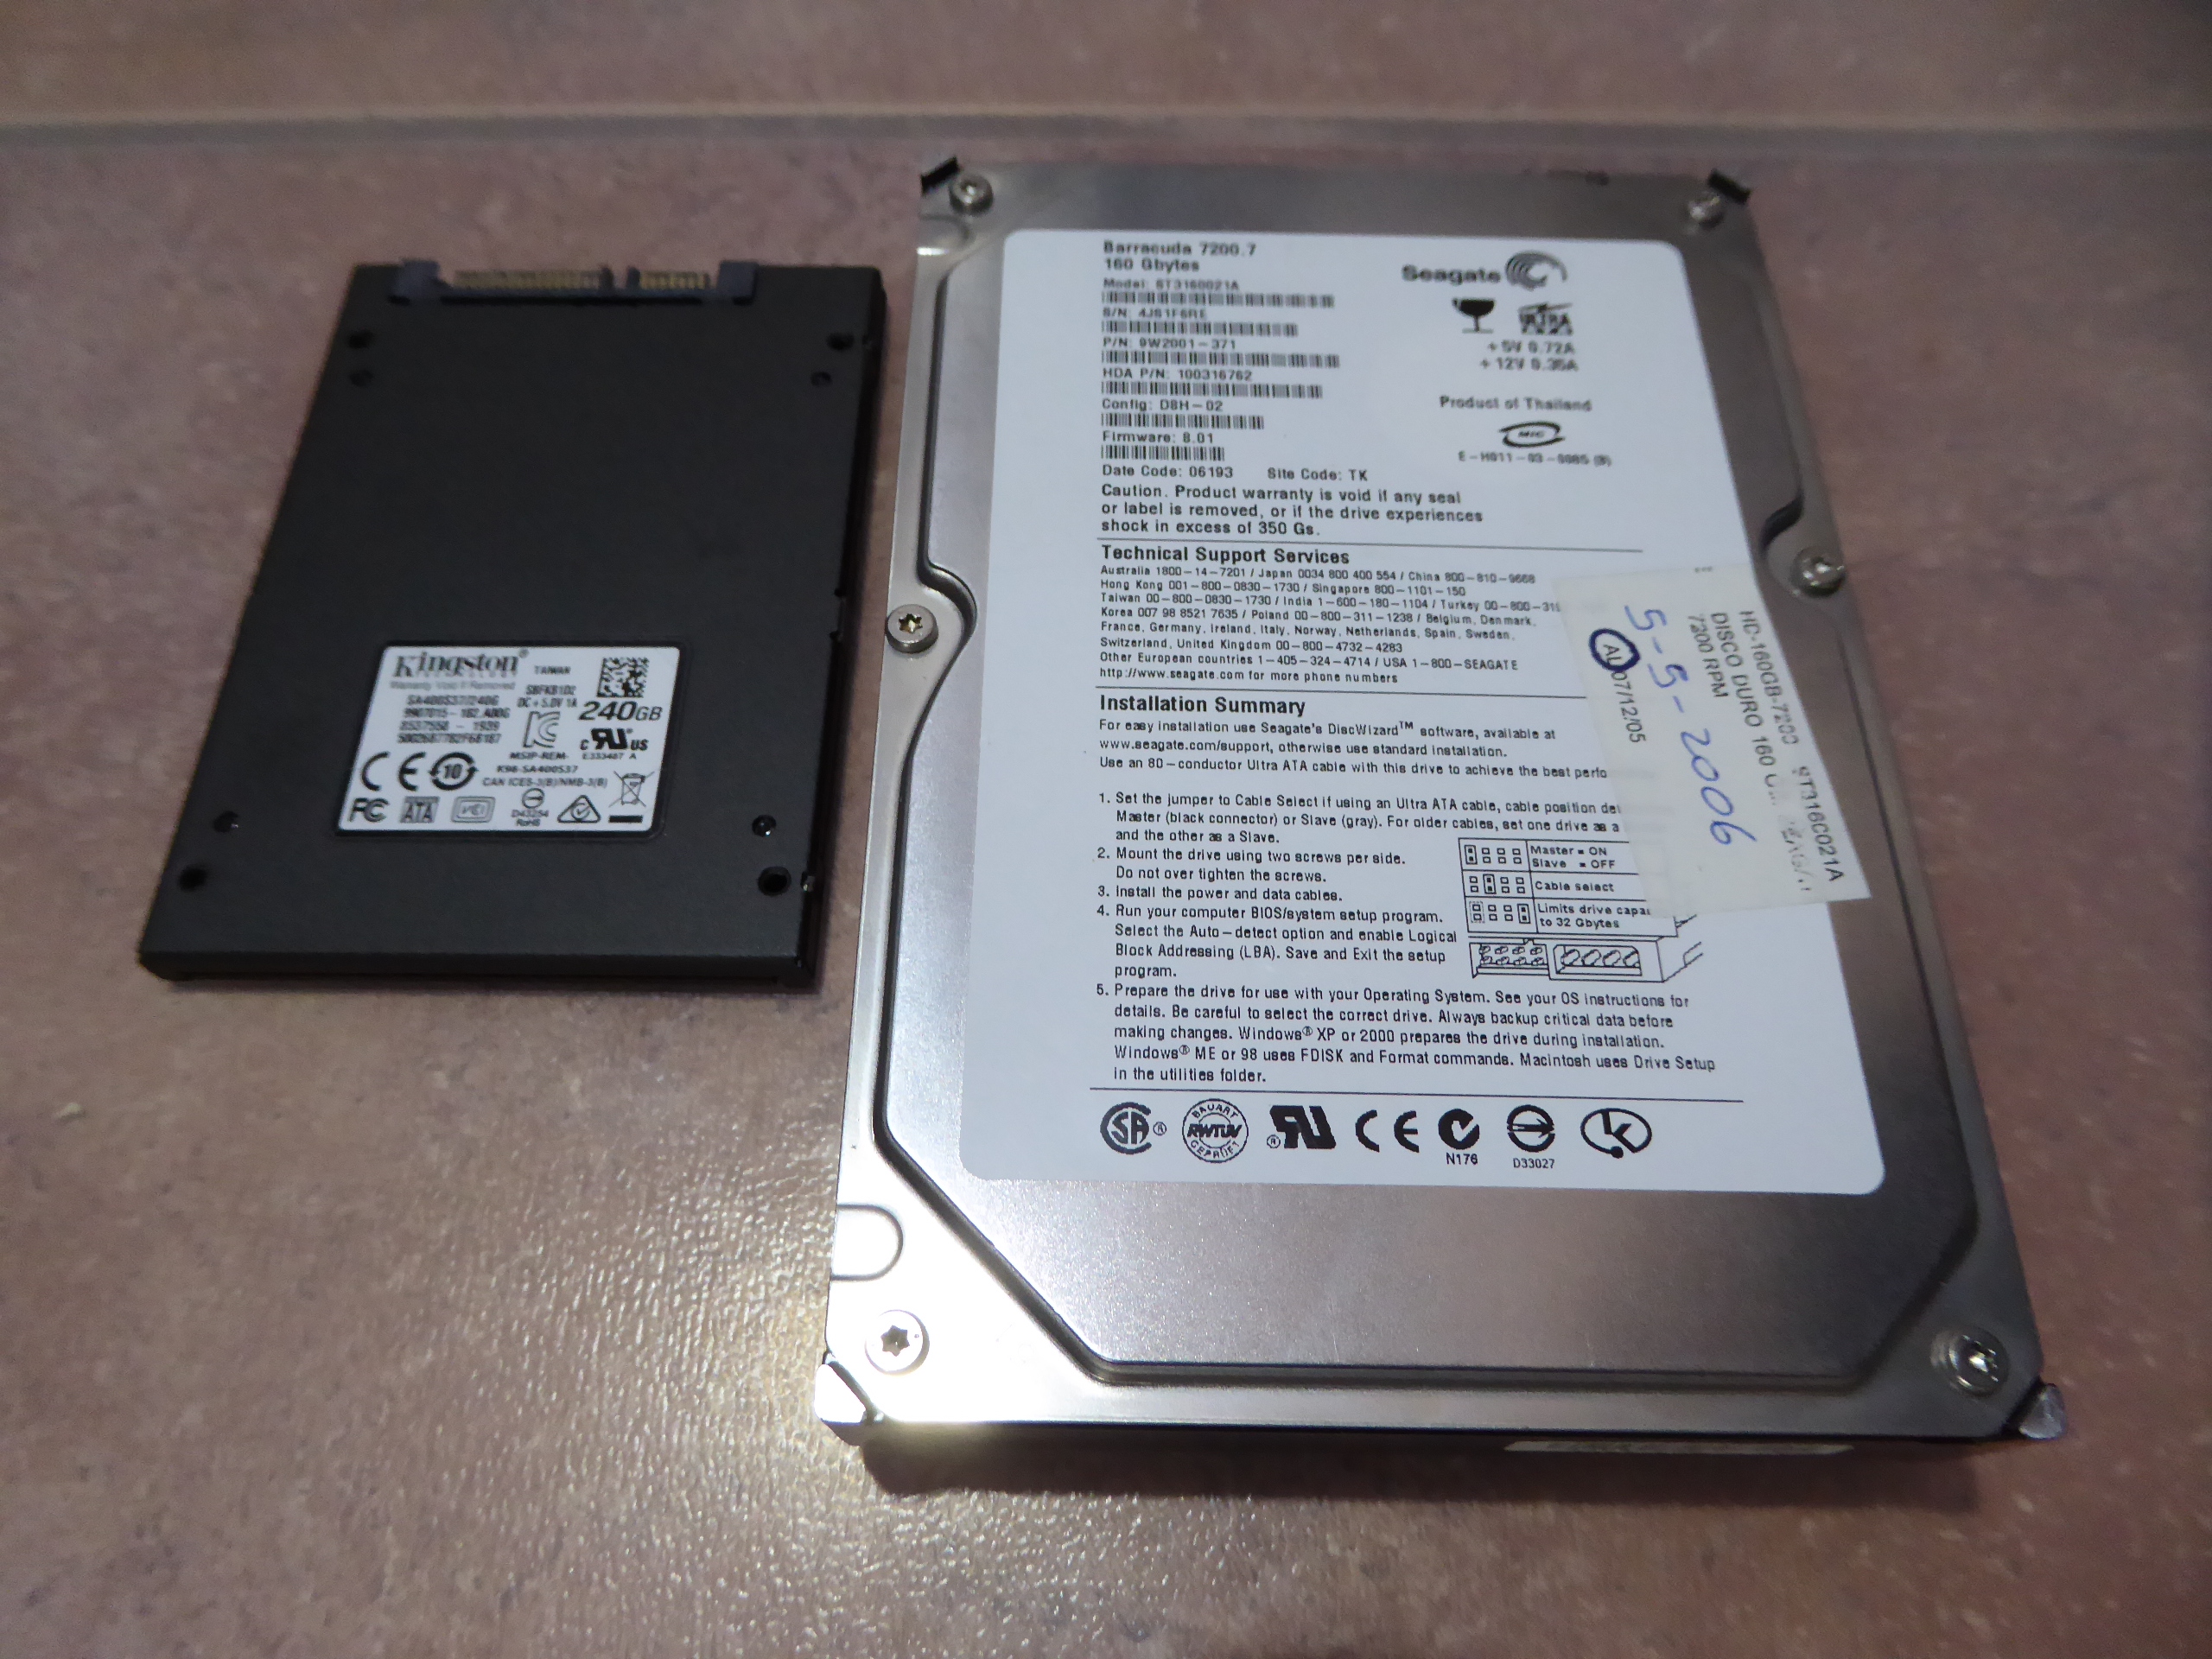
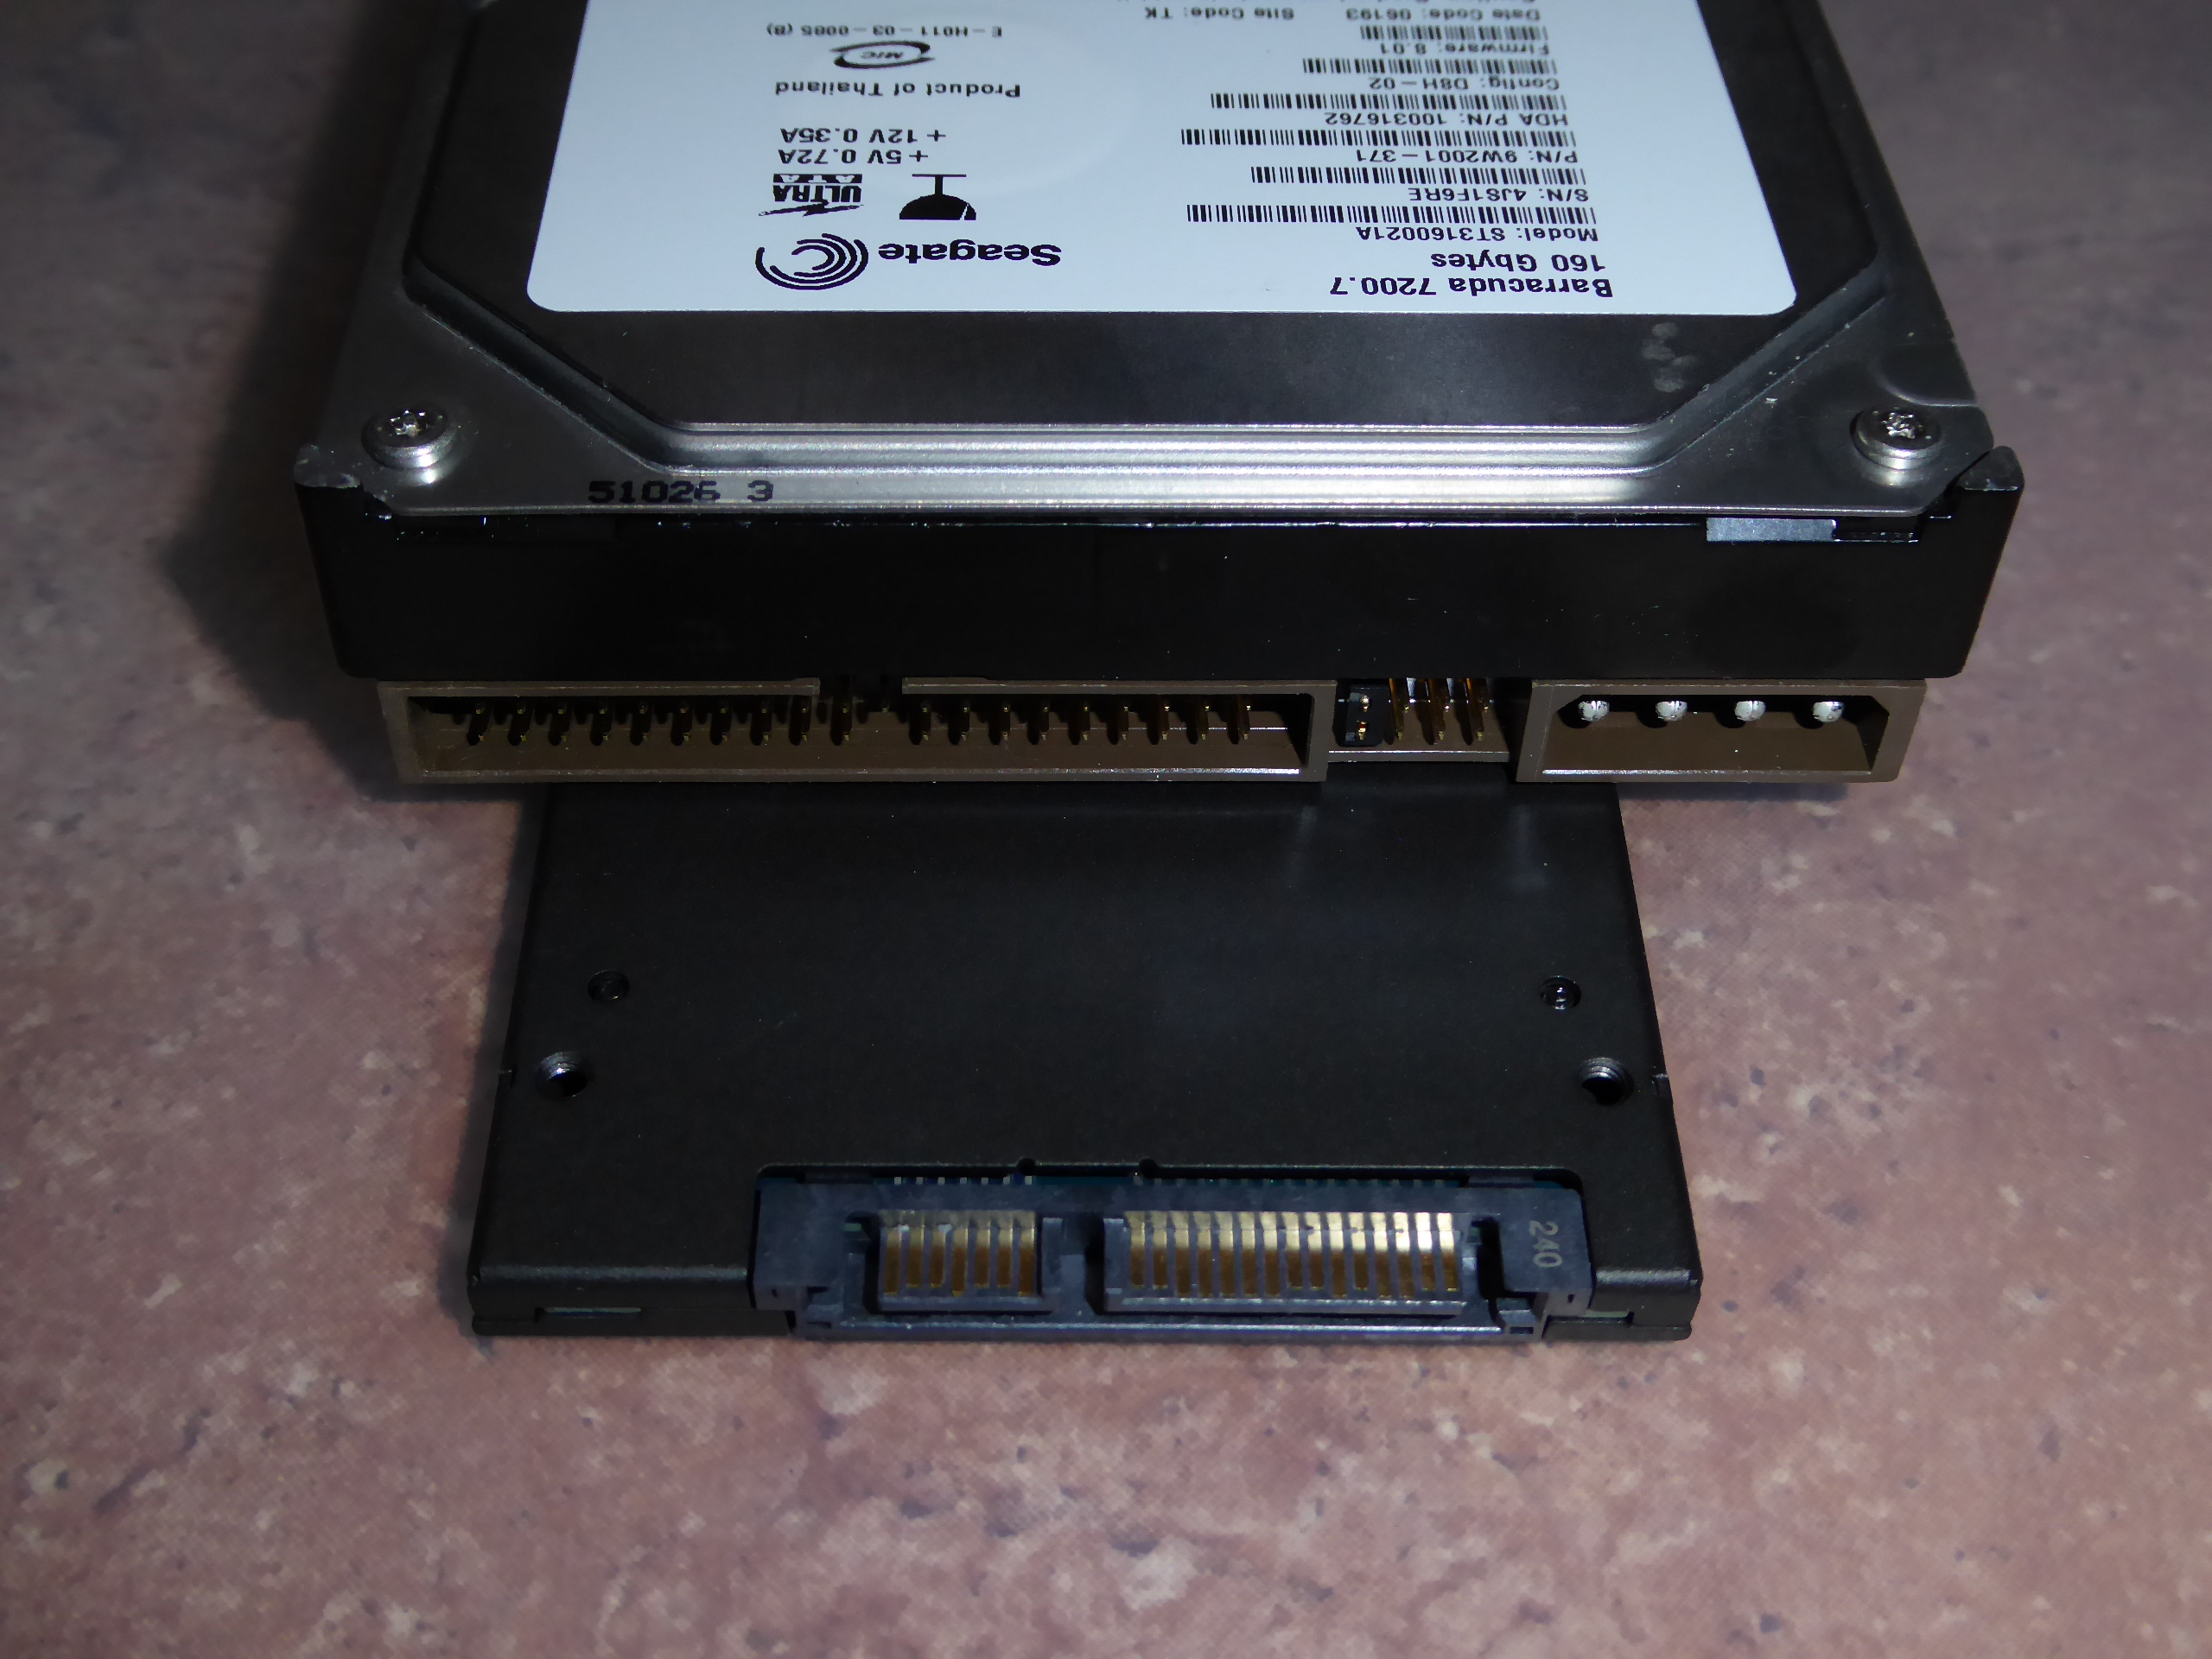
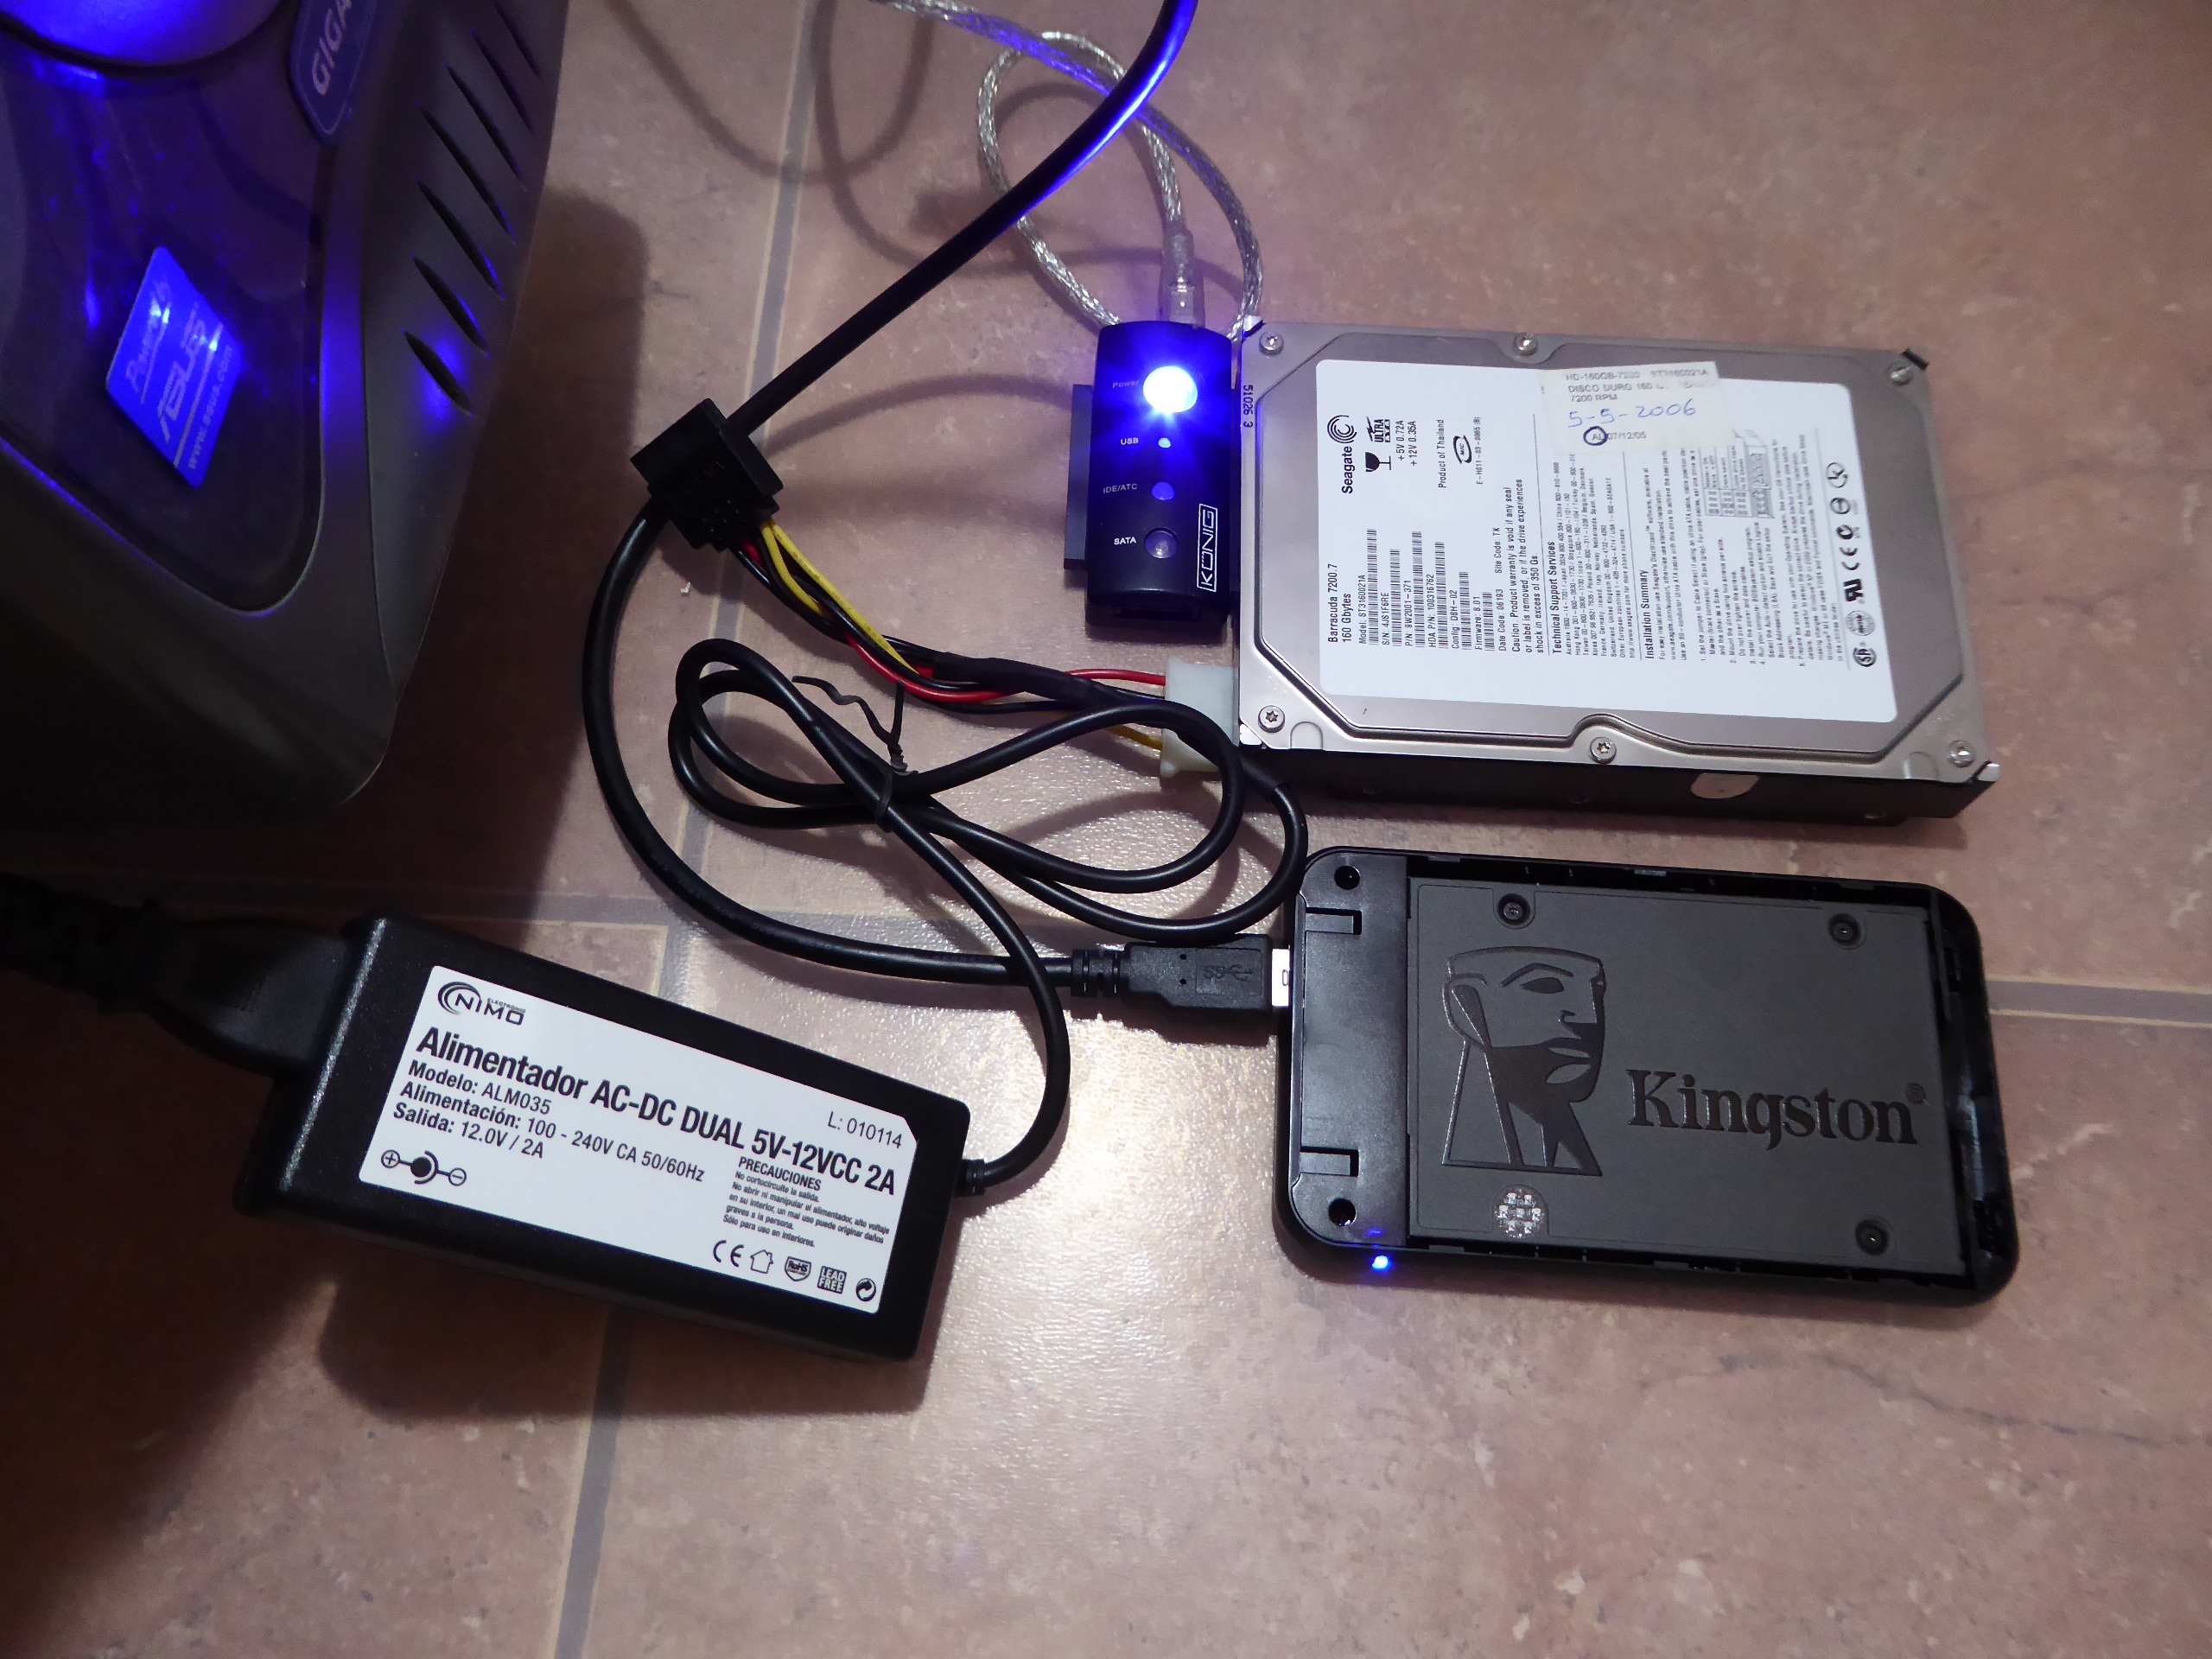
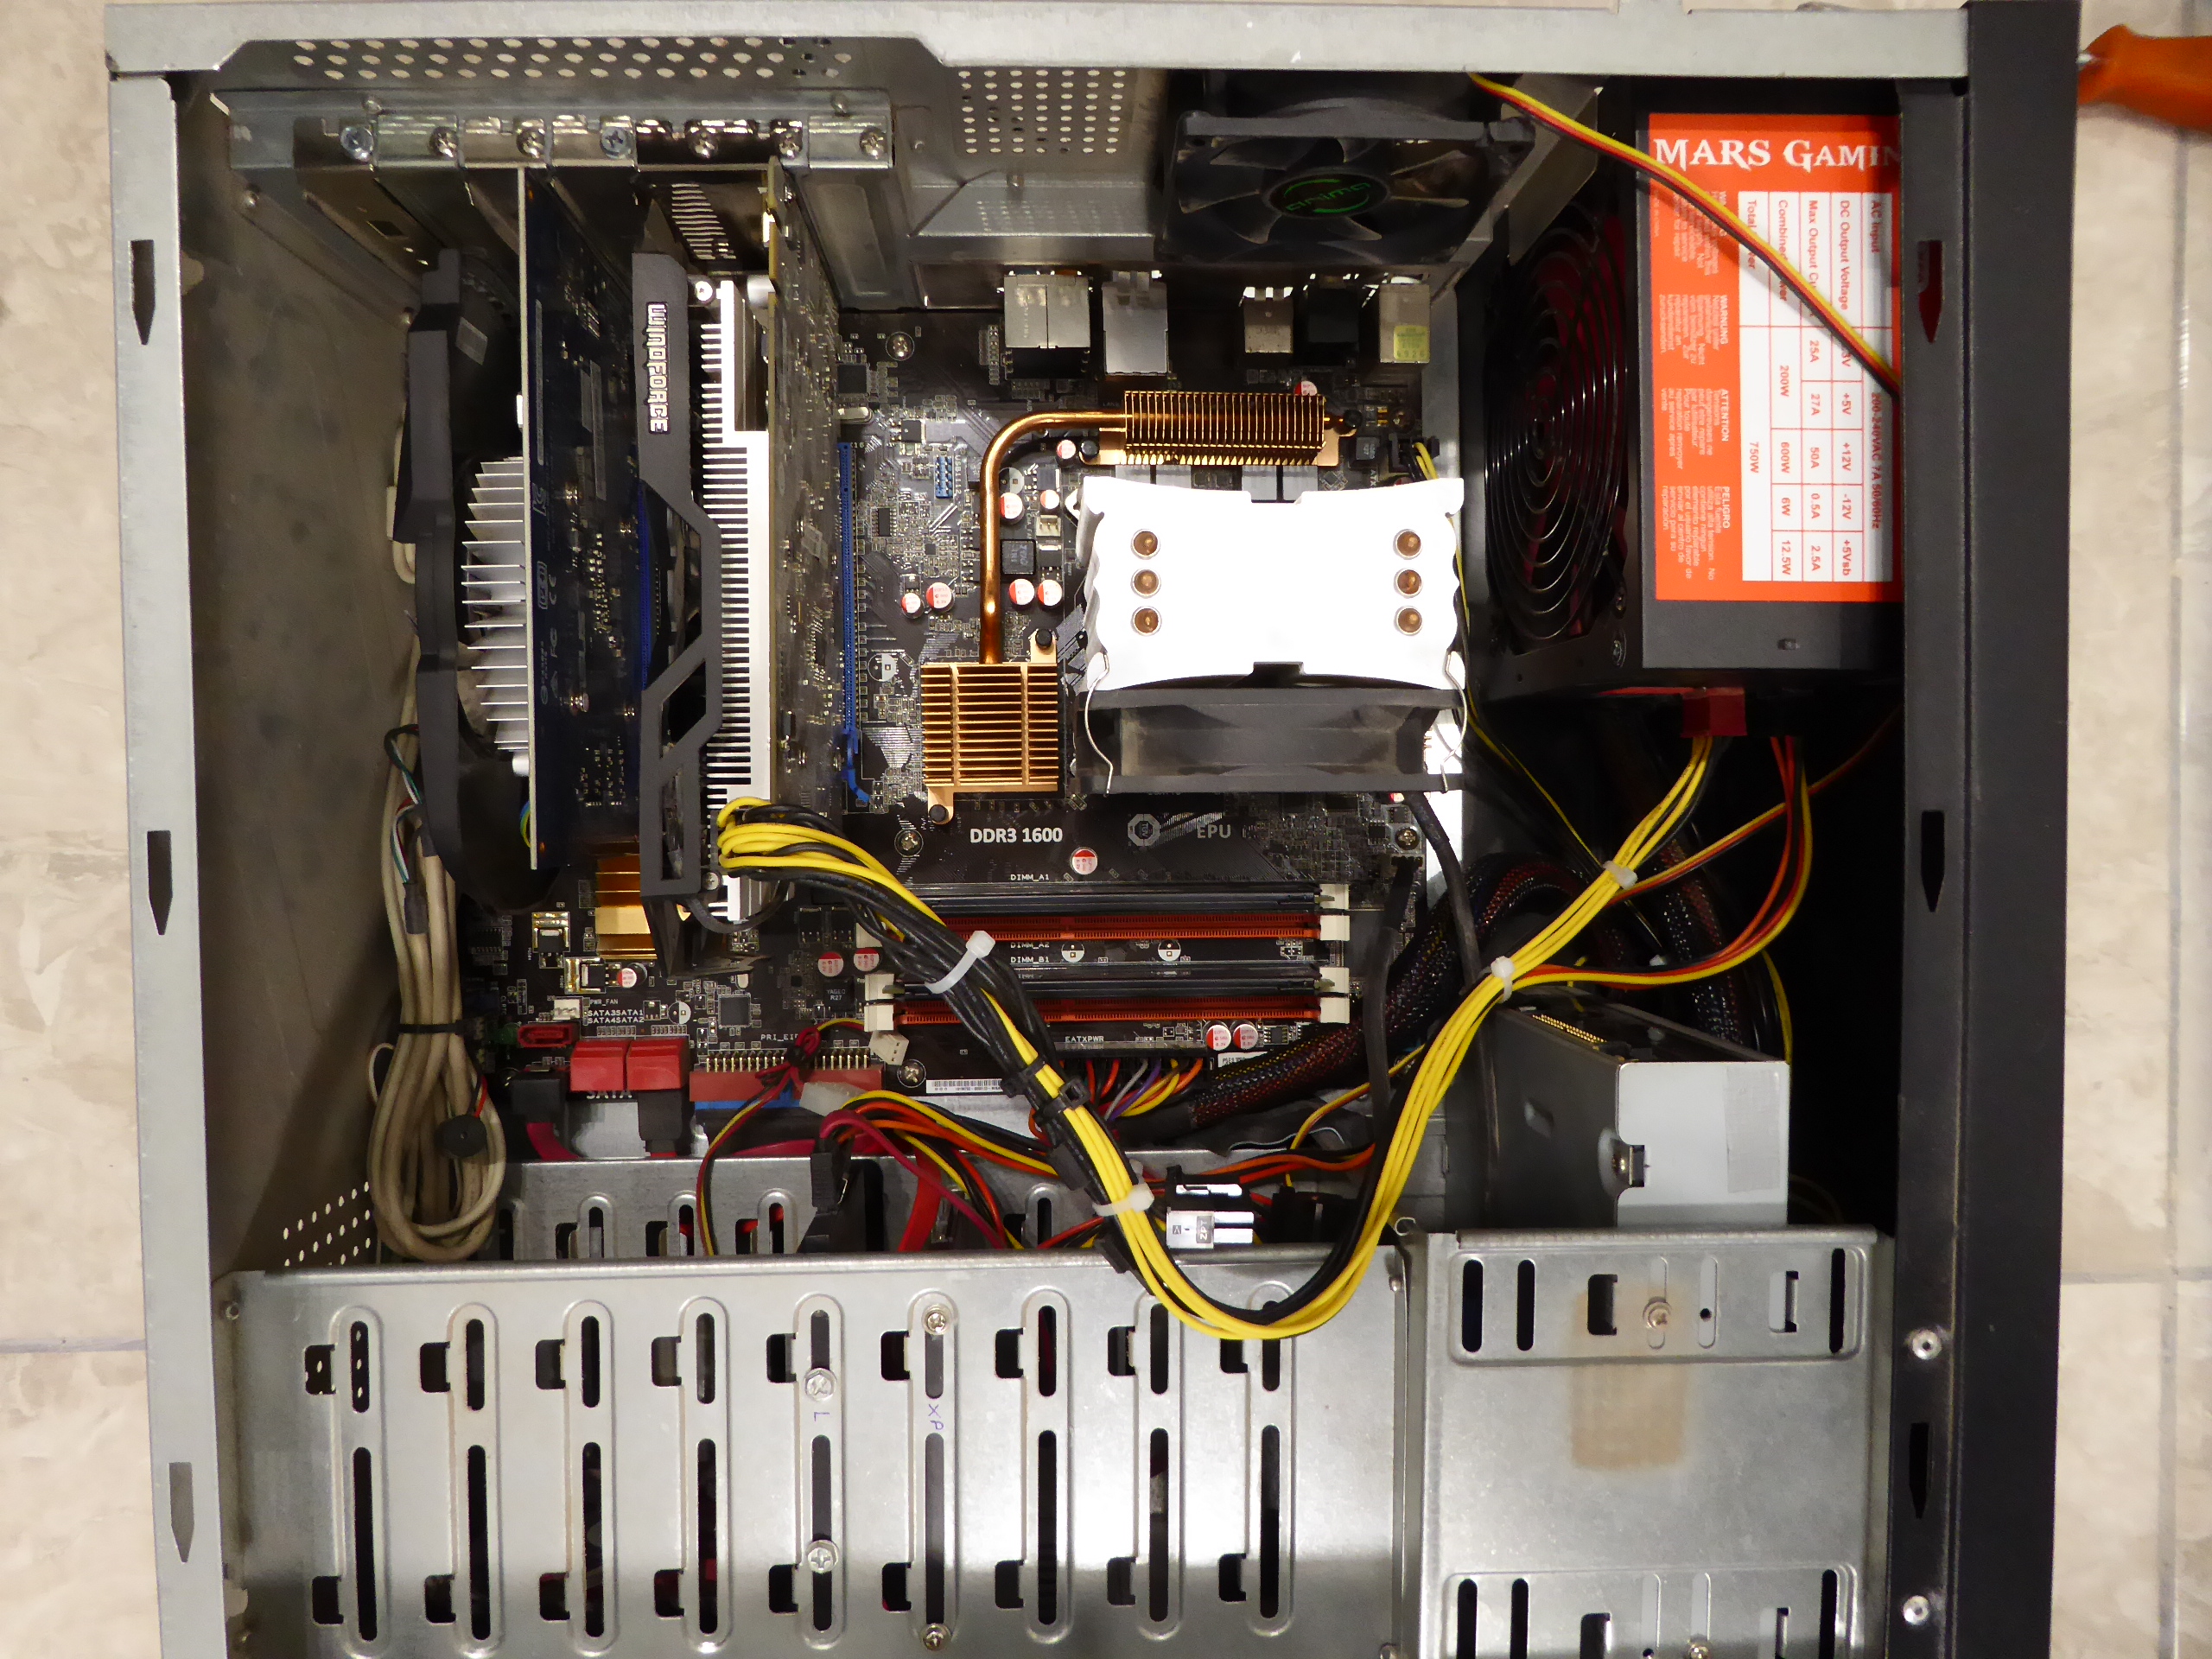
Another reform consisted of: - Replace the motherboard with a failed SATA controller on one system. - Clone previous IDE mechanical HDD for this host by a much more agile SATA SSD unit. - Replace graphics card from a GT 1030 to a GTX 750. Here are pictures of this system: Before 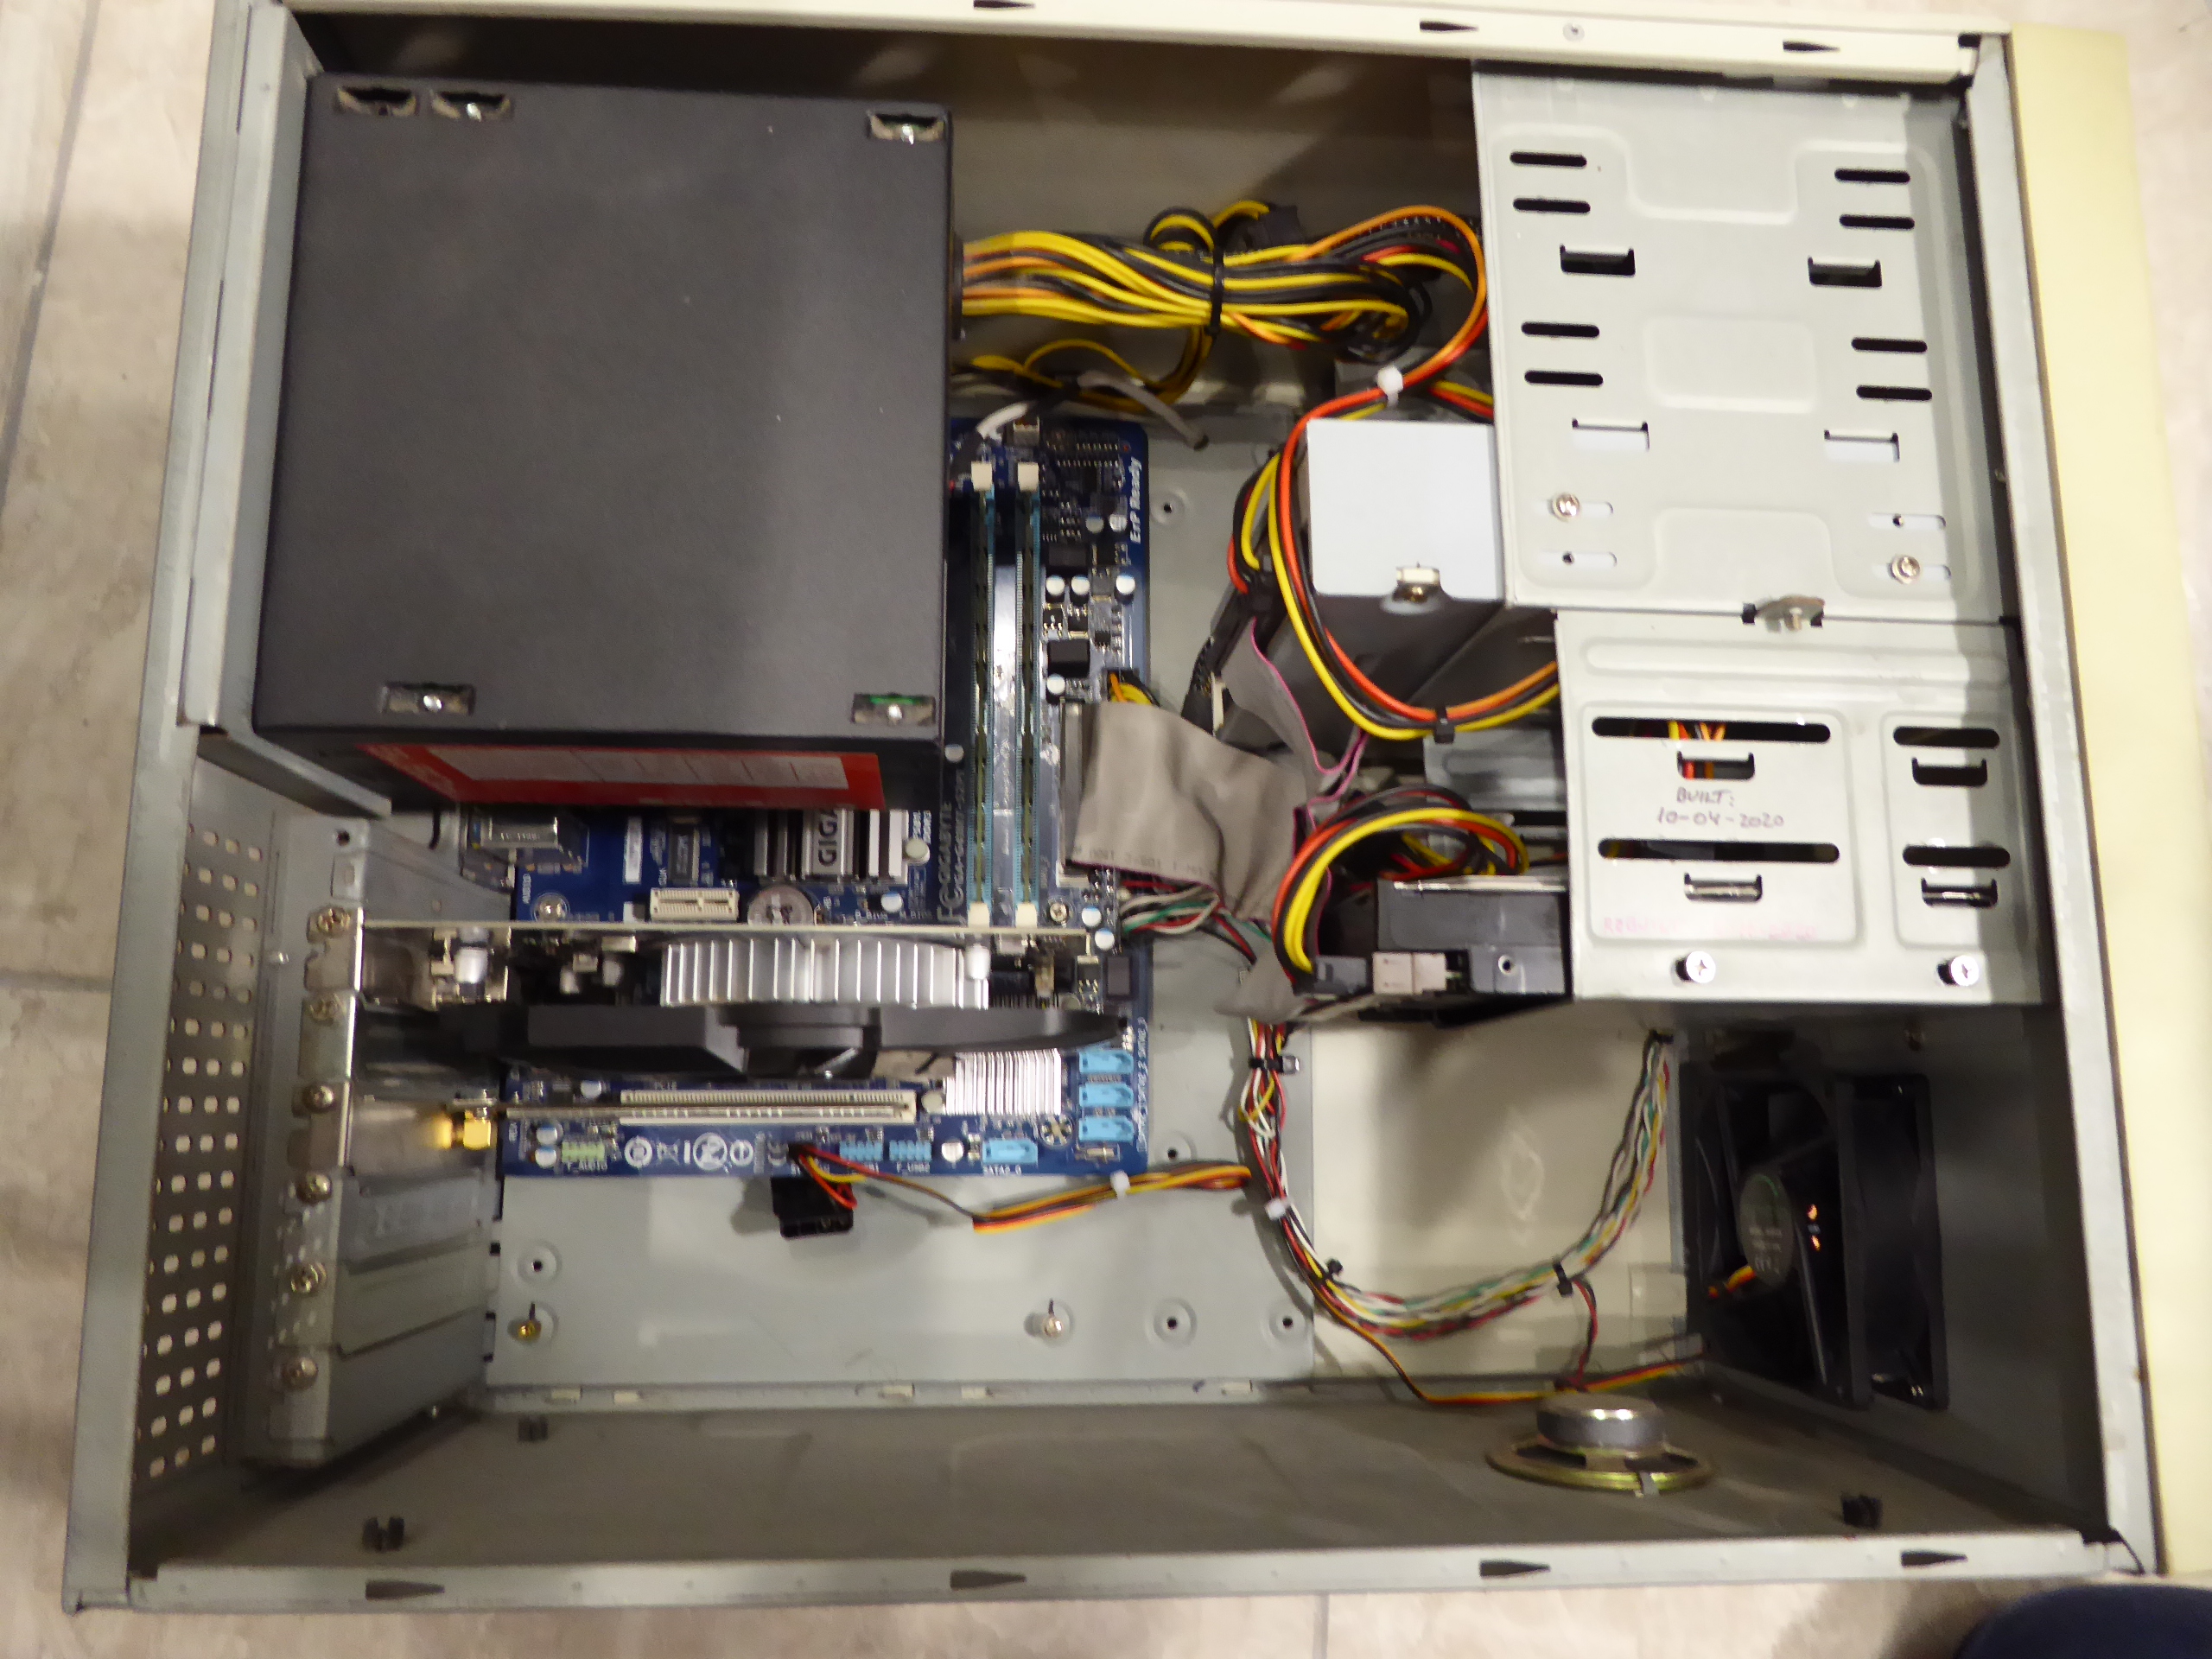 and After 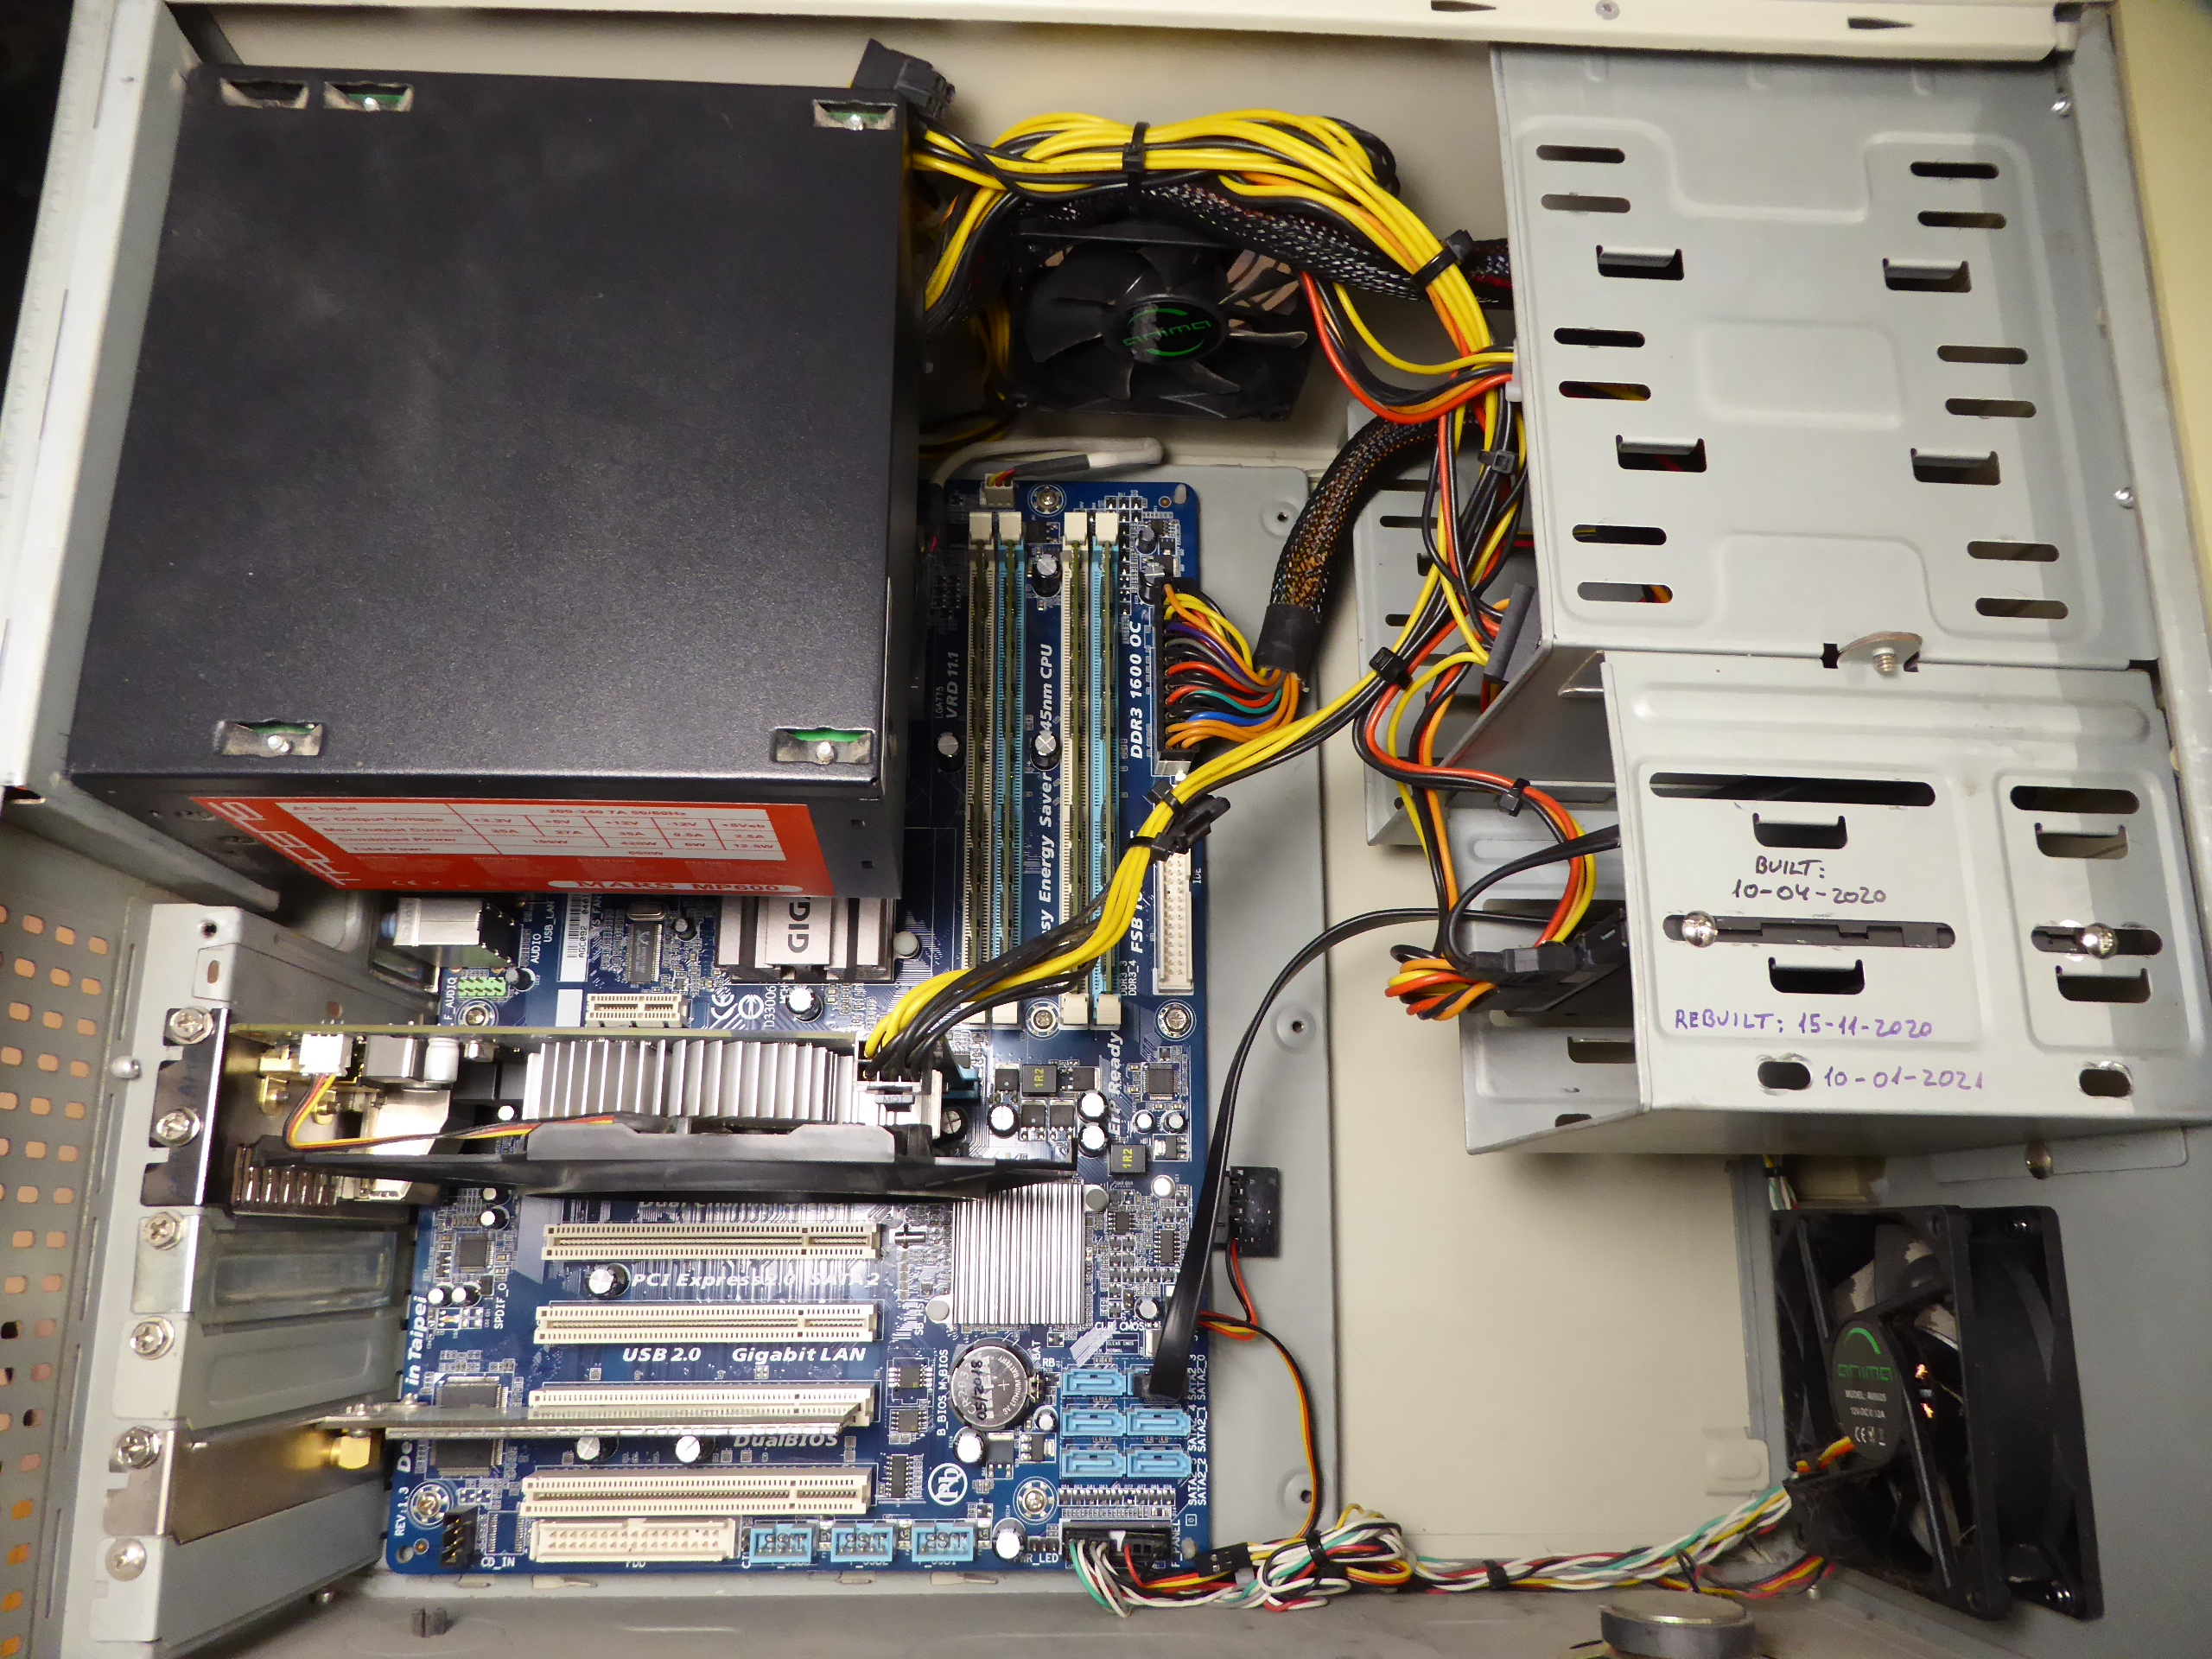 Some considerations that may be of interest: - I've found Linux OS te be very resilient for this kind of refurbished, usually adapting to the changes with no need for further actions. - I've discovered a very useful Linux native command to clone an old drive to a new one. Taking this as an example: Here we can see the old (year 2006) 160 GB IDE drive, and the raplacing new 240 GB SATA SSD. In detail, here can be seen the differences between IDE (parallel) and SATA (serial) connections. And here is a picture of the drives arrangement employed to the cloning operation. The SATA 2,5" SSD is installed into a SATA to USB external enclosure, while the 3,5" HDD is connected to an IDE to USB adapter and an external PSU. HDD (source) is assigned by Linux to be /dev/sde unit, while SSD (destination) is assigned to be /dev/sdd At this situation, the following terminal command was used: sudo dd if=/dev/sde of=/dev/sdd bs=1M There is no any progress indication. Patience and waiting is required, but after about one hour, the following message was obtained: 160041885696 bytes (160 GB, 149 GiB) copied, 4090,62 s, 39,1 MB/s And after that, SDD was used to successfully replace the old HDD at the refurbished system. Notes: - Please, be extremely careful to adapt the indicated command to your particular source (if) and destination (of) drives. Otherwise, unwanted data overwriting might happen if improper destination is chosen. - Destination drive will be an identical copy of the source one, so an equal or greater size than source has to be used. - If a greater size is chosen for destination drive, partition resizing tools can be used afterwards (GParted, for example) to gain the extra space available. - Not only Linux OS drives can be cloned, this tool is useful to gain storing space with no risk (source drive remains unchanged as a backup) also for other Operating Systems. |
|
ServicEnginIC Send message Joined: 24 Sep 10 Posts: 595 Credit: 13,083,686,510 RAC: 745,928 Level Scientific publications |
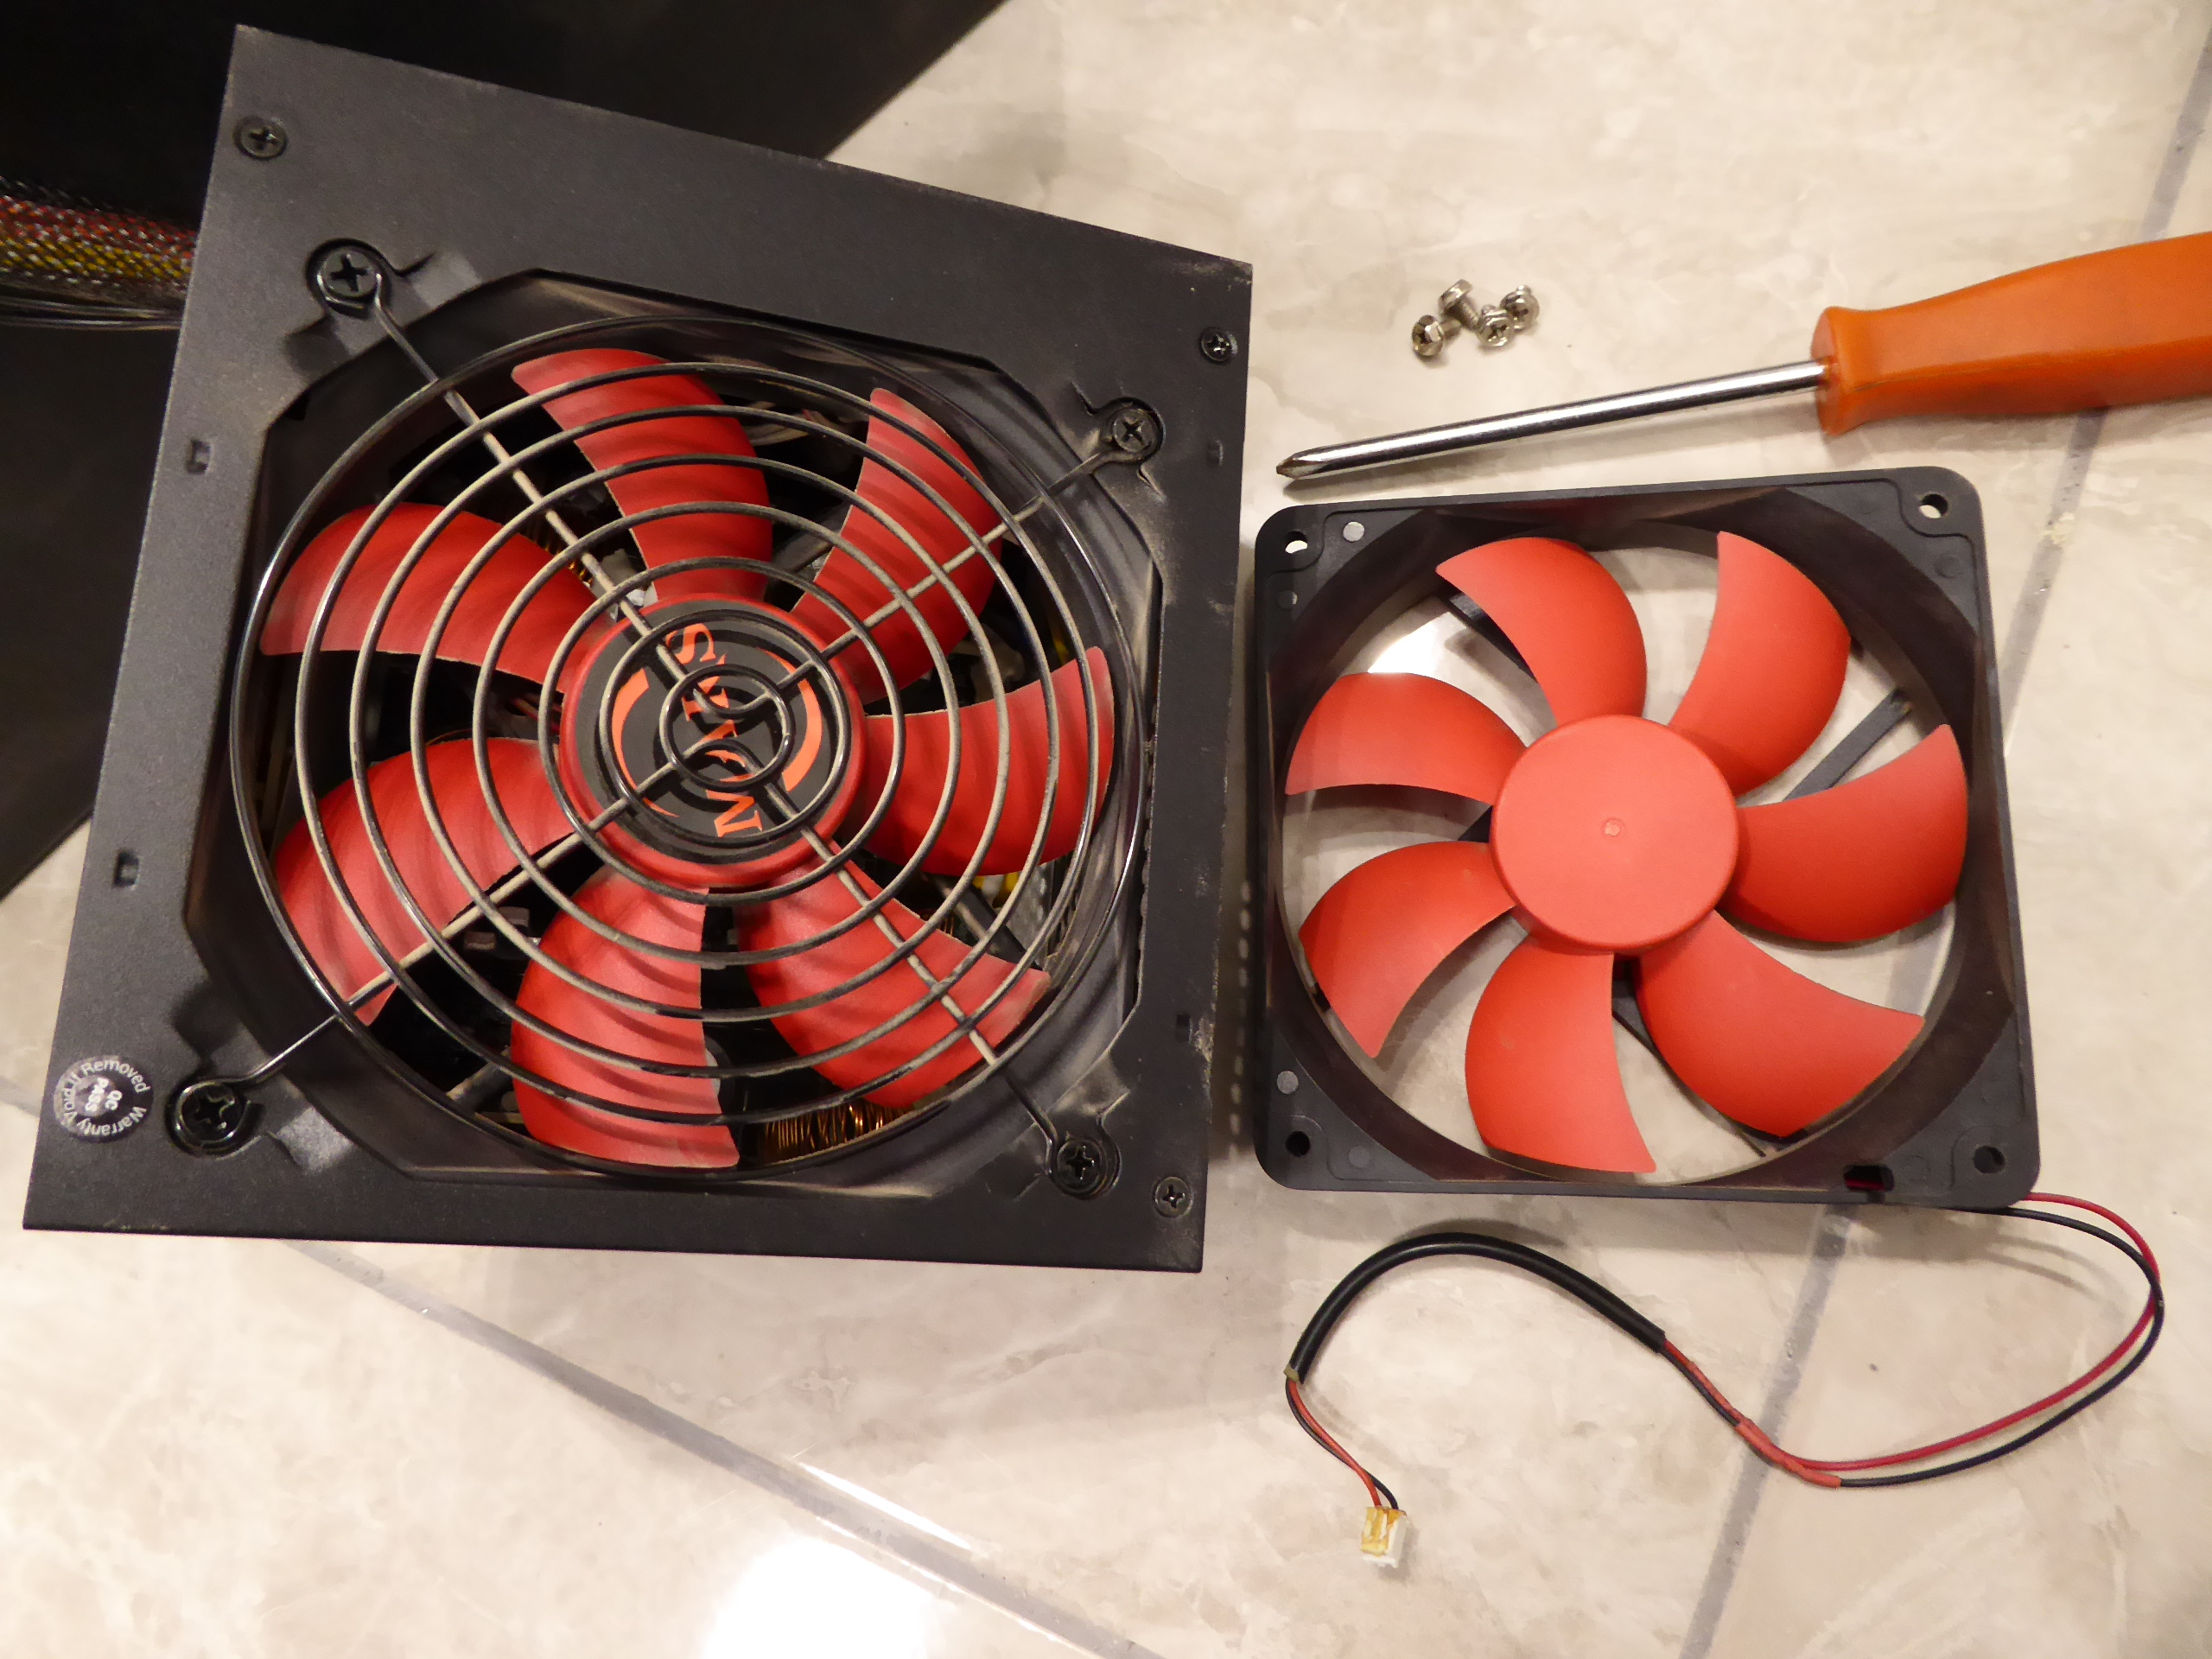
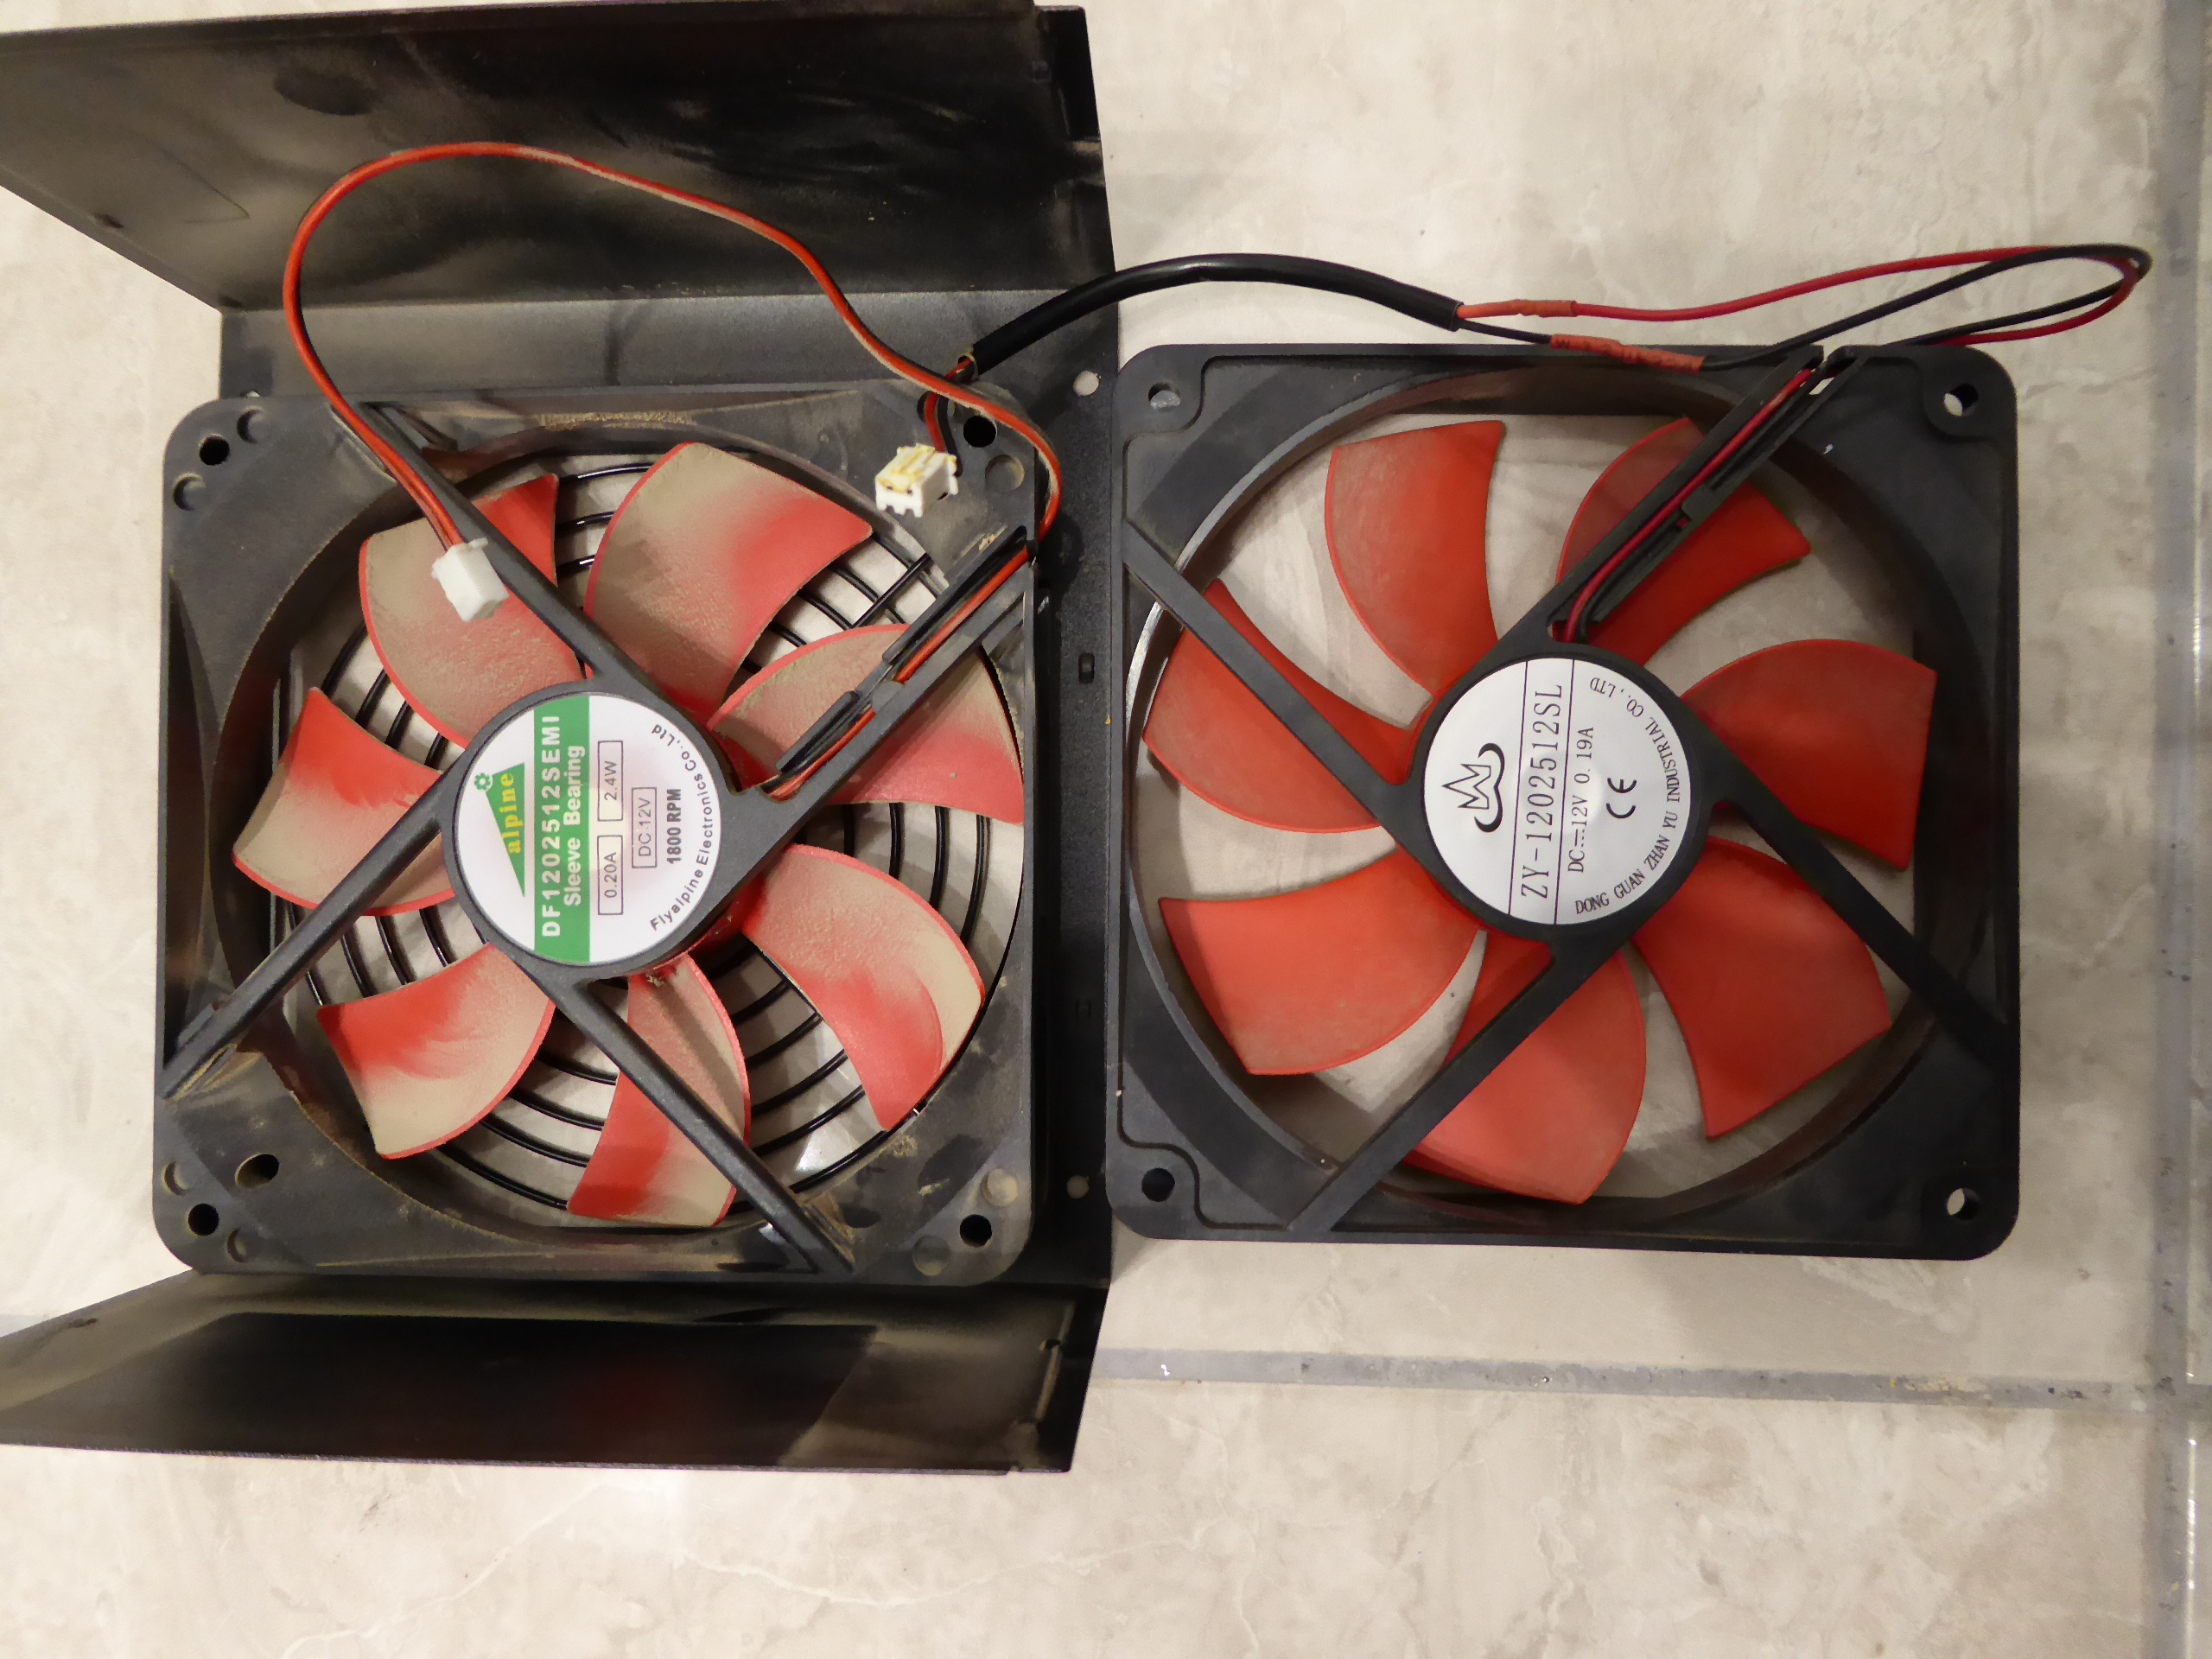
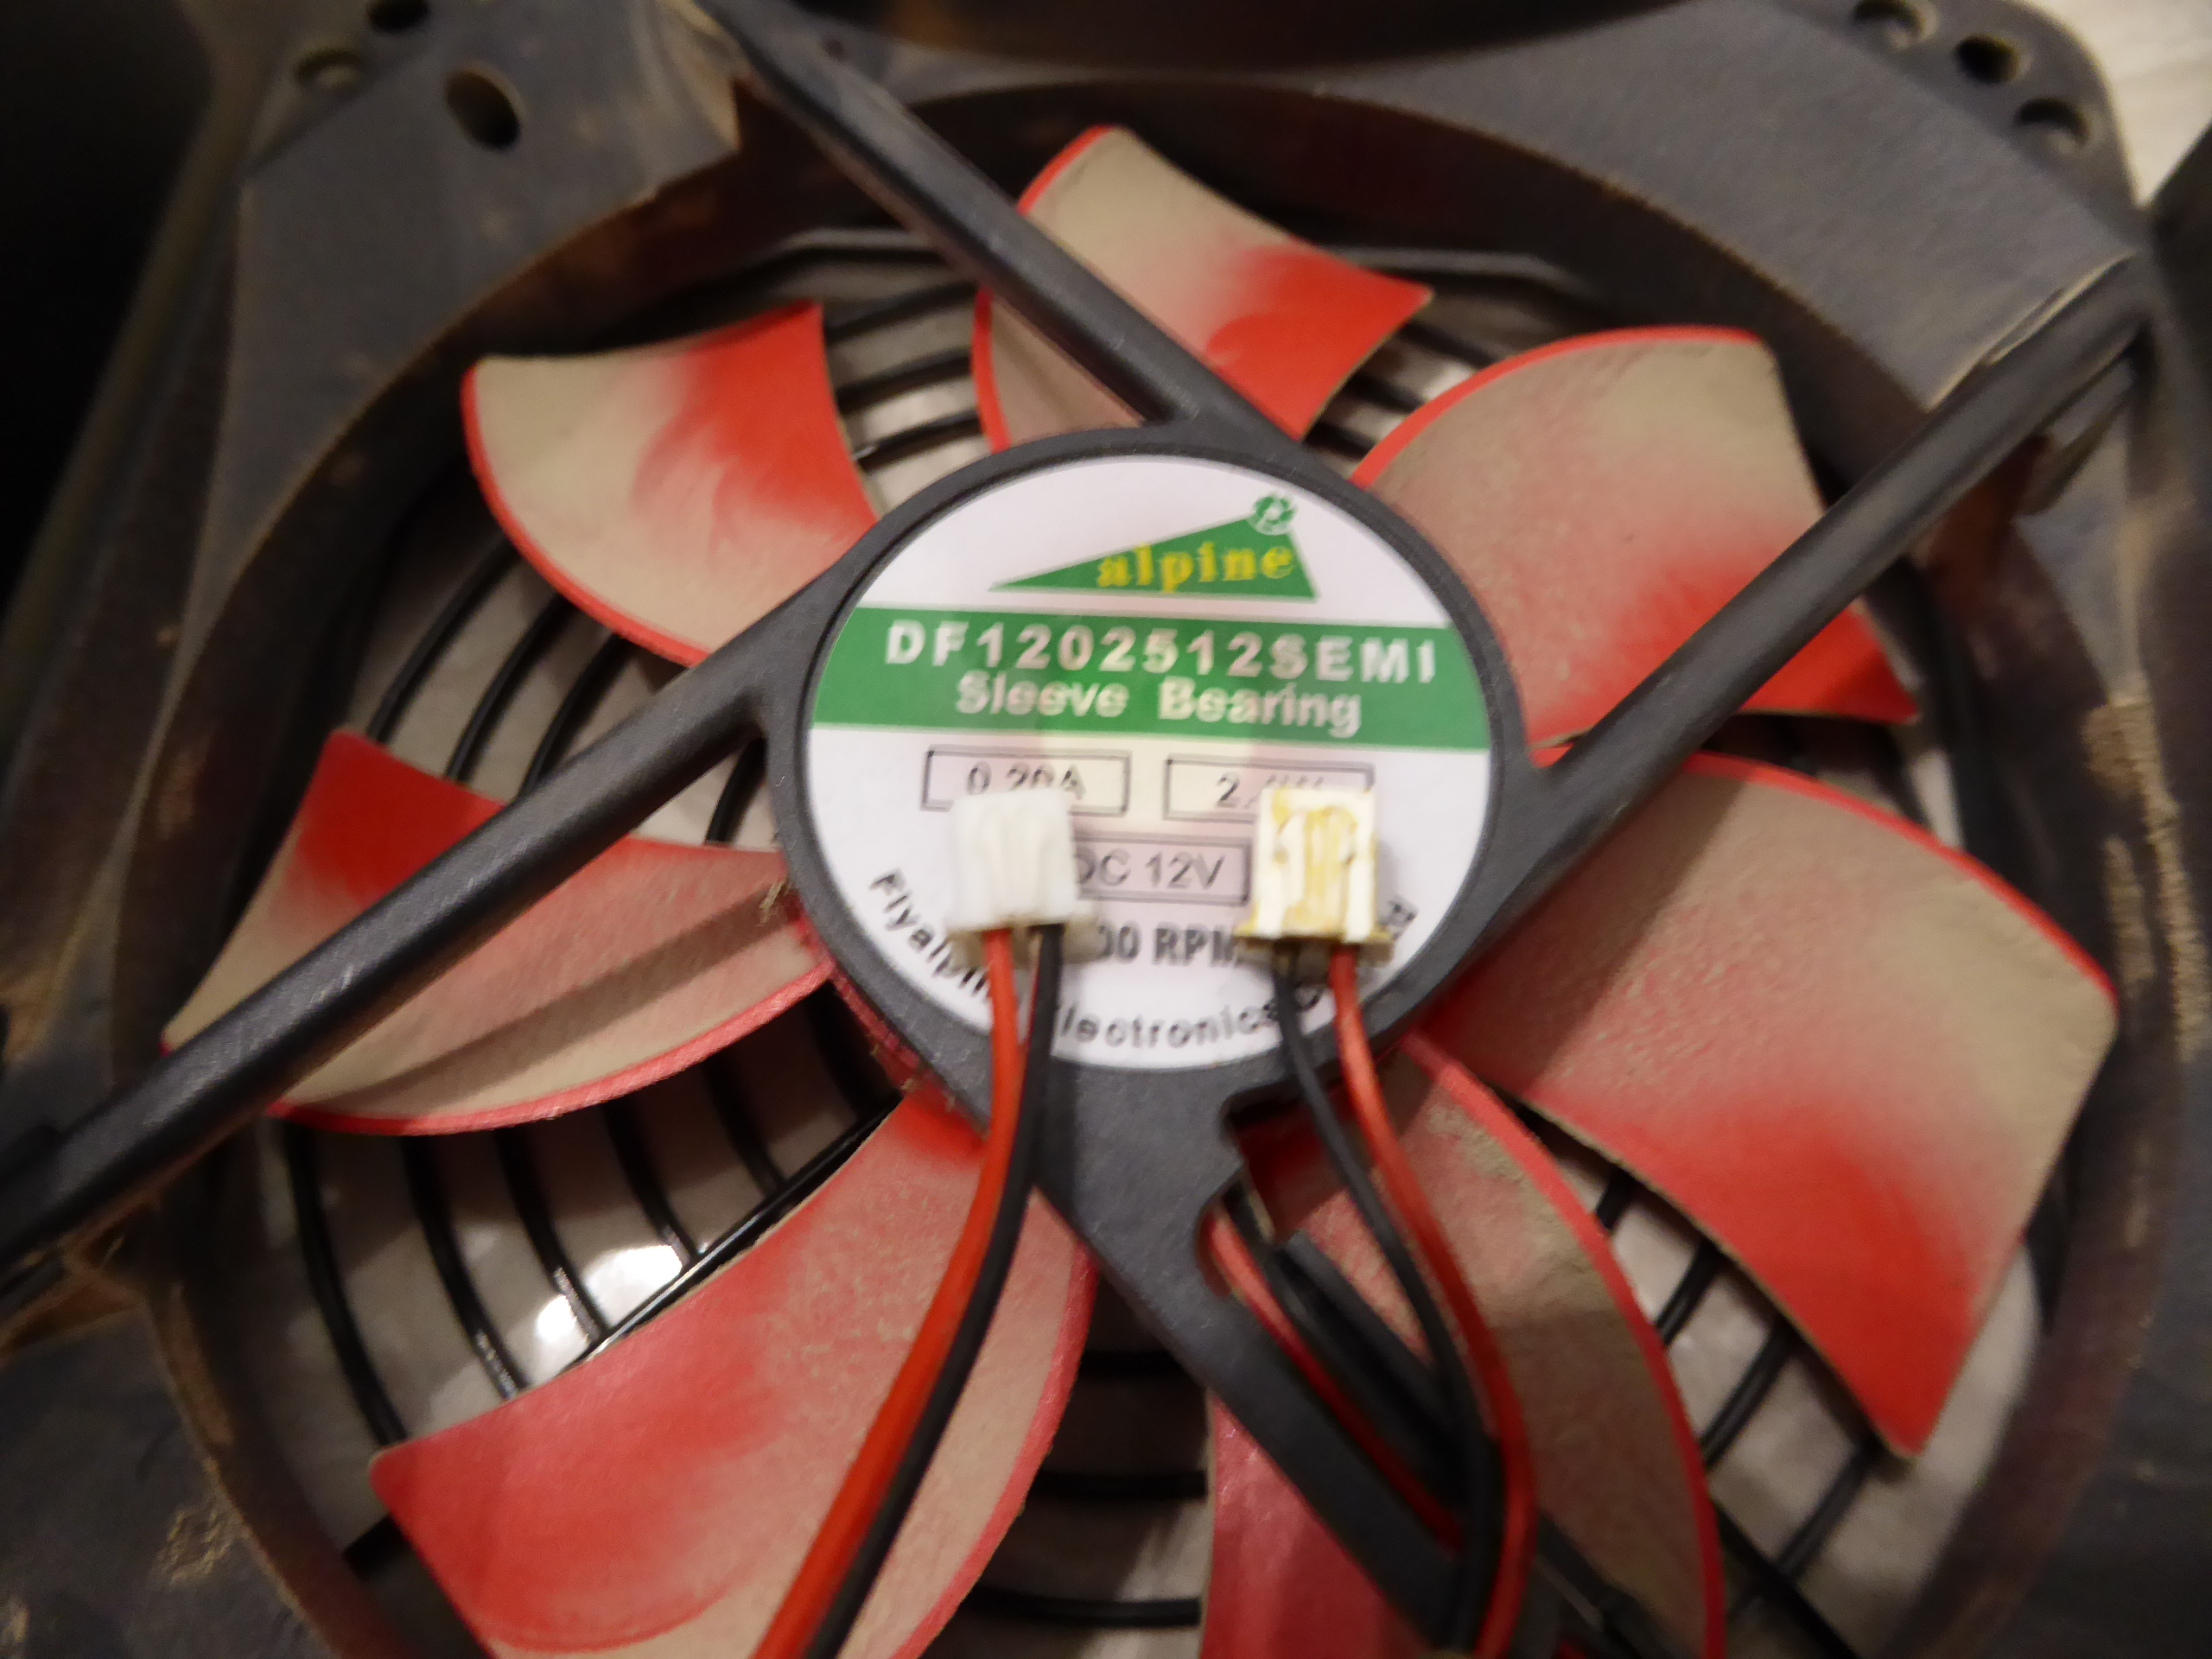
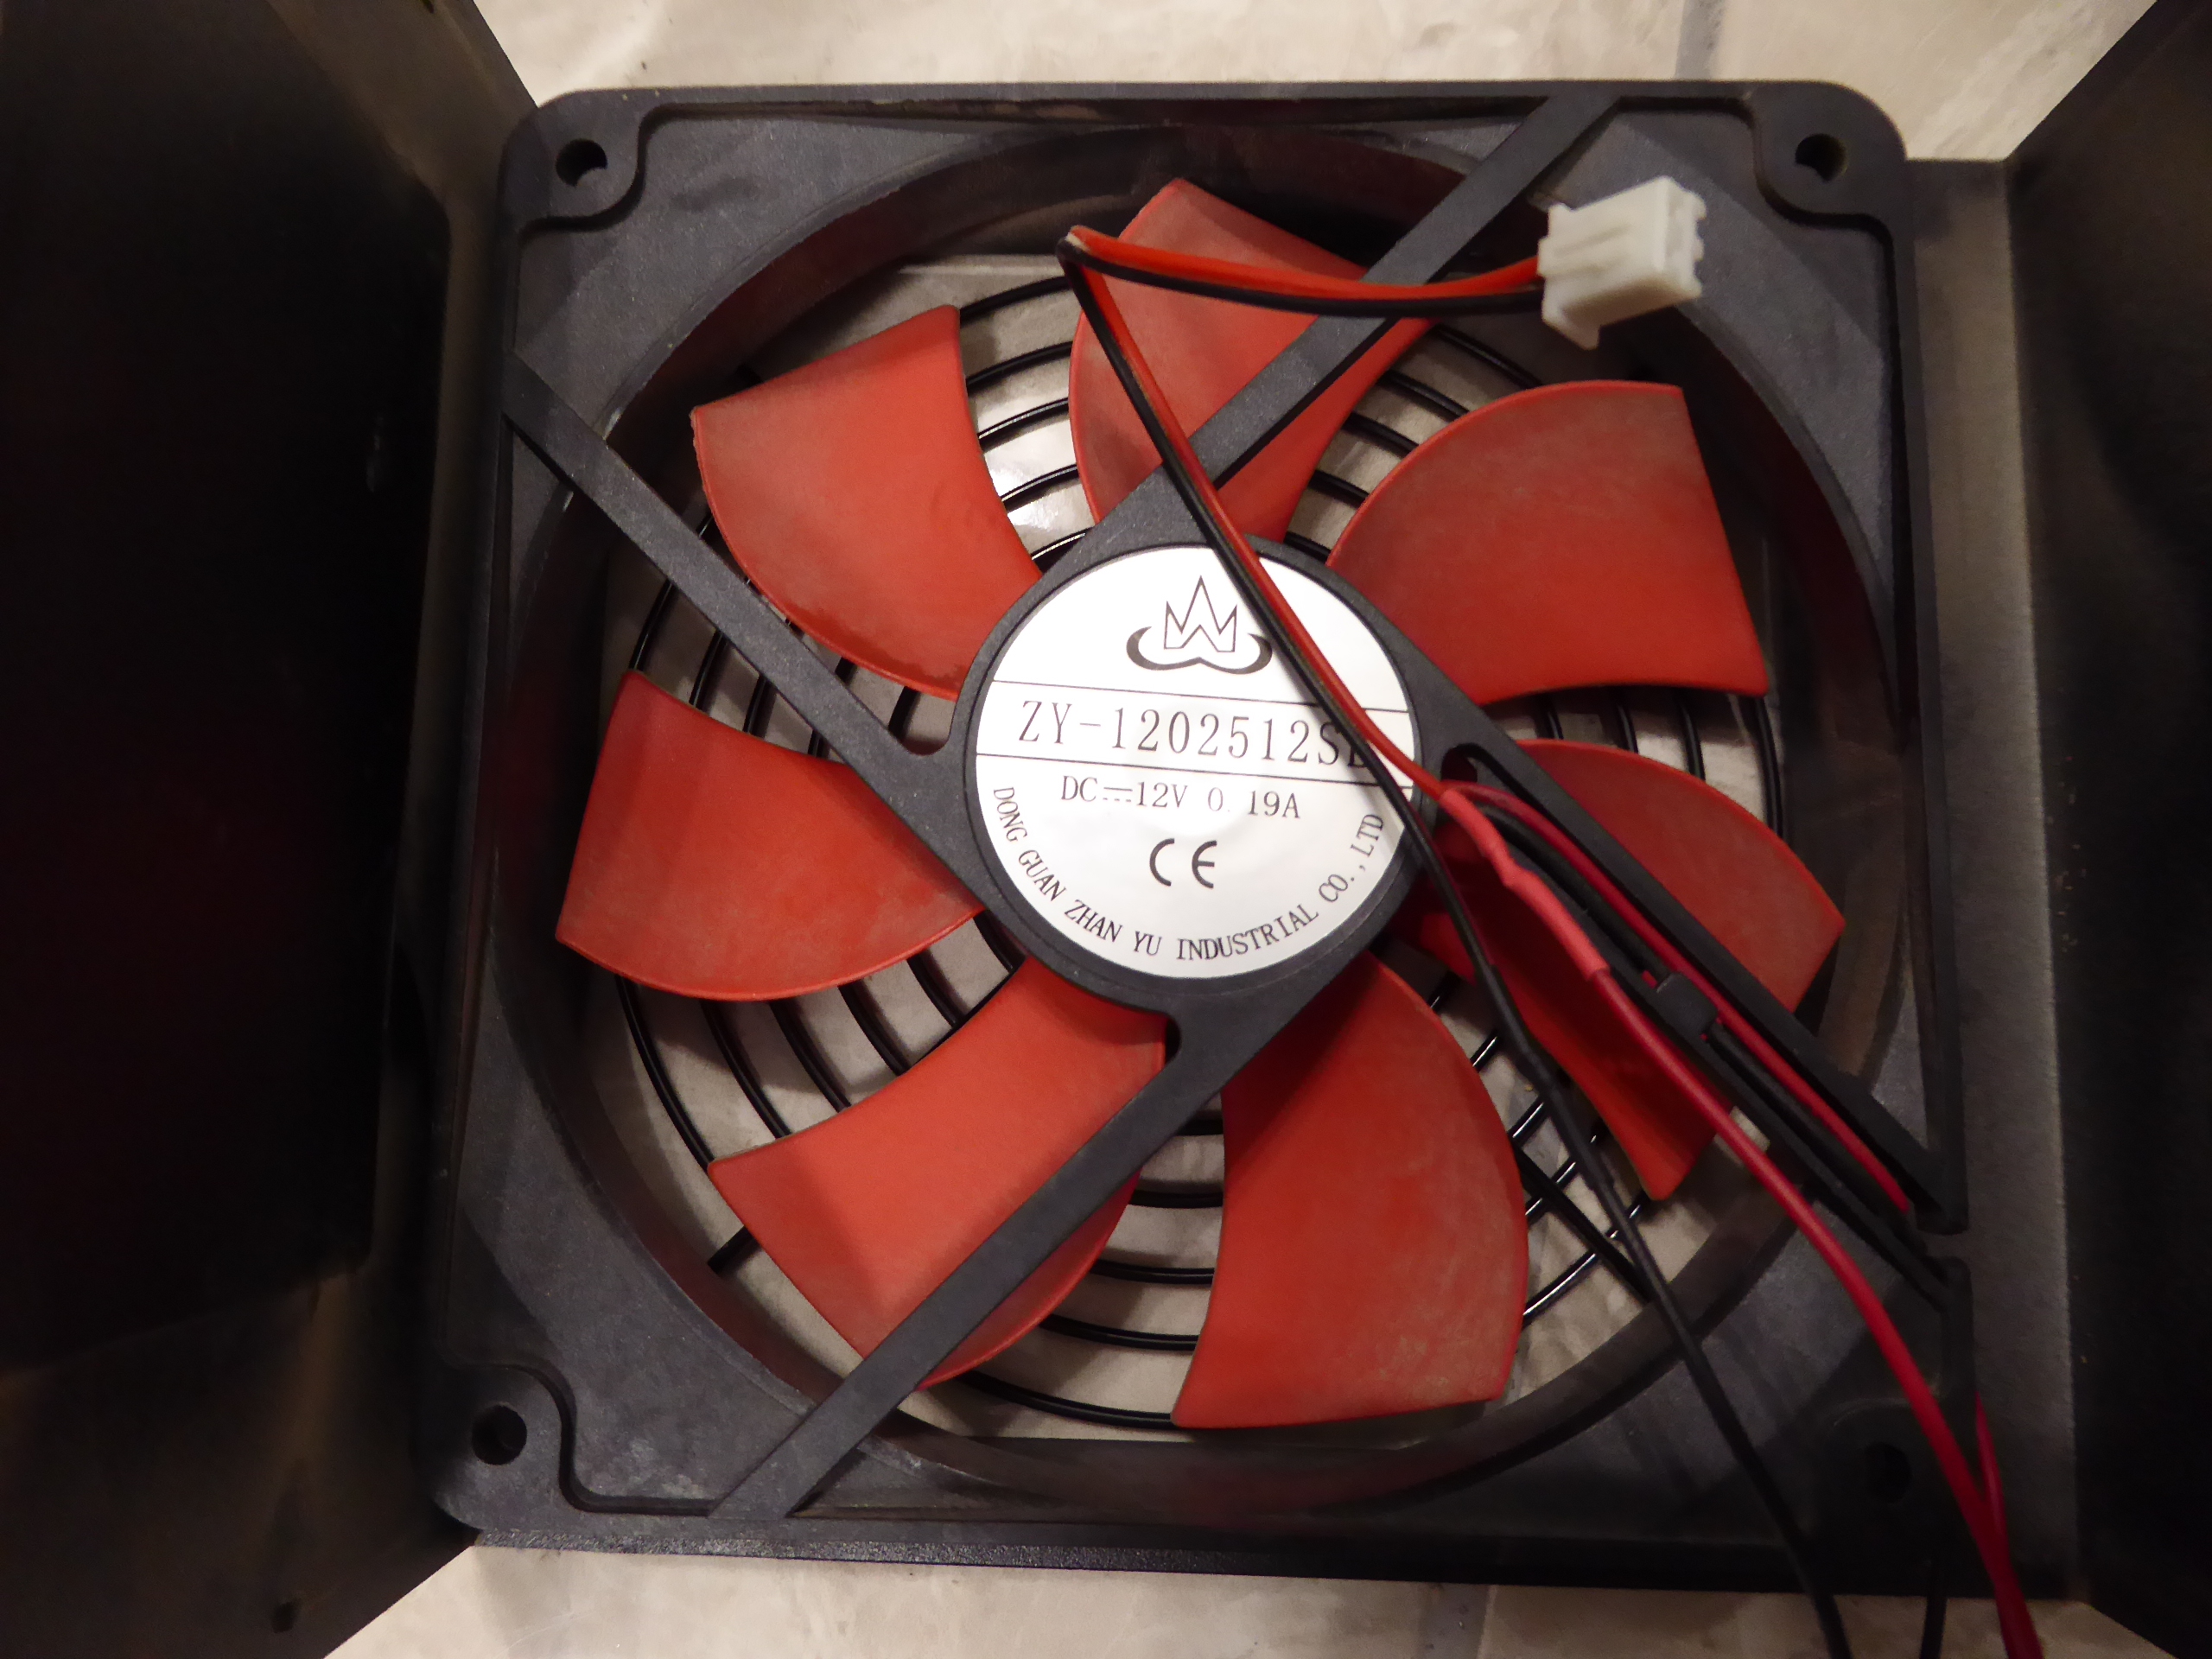
Re-Turning to the origins I started publishing this thread on November 2nd 2019, with an article regarding fans and their affairs. Yesterday, I switched on one of my hosts for a Linux kernel update, and a typical loud noise started to sound. This time, I took a short video with the method I usually employ to diagnose what fan is to be replaced. Diagnosing defective fan - Video When it is not clear which of the fans is the origin of the noise, I get it certain by stopping the suspect ones in sequence. Please, use a soft tool for this, if you want to keep your fingers count up to ten! I'm using a cotton swab at present video. Near to noise source, I first stopped rear chassis fan, then CPU heatsink fan, and noise finally ceased when stopping PSU fan. That's it! Here is a picture of dissassembled PSU and replacement fan candidate, 120x120x25 mm. So far, replacement candidate Pass Now, you can see at this picture the specifications for original and replacement fans, both checked to be very similars, and even supply connectors are the same: Replacement candidate Pass But a closer look to both supply connectors... And supply poles red (+12 V) and black (Ground) are inverted: Replacement candidate Doesn't pass! Please, be very careful. Different manufacturers may employ different conventions, as in this case. Connecting a fan with inverted polarity may cause a non-turning fan, or even a permanent damage if the fan is not reverse-polarity protected. Also, before disassembling the original fan, please, take note of the air flow direction and respect it when replacing. No problem. At this new image, reversed polarity is solved after a "cut and paste" operation to the supply wires. Now, fan's supply connector is replaced to its original position at inside the PSU. And after reassembling in reverse order, this system is ready again. |
|
Send message Joined: 13 Dec 17 Posts: 1424 Credit: 9,189,946,190 RAC: 2 Level Scientific publications |
I would have just swapped the pins in the connector. Faster than firing up the soldering iron. A sewing needle is all that is required. |
|
ServicEnginIC Send message Joined: 24 Sep 10 Posts: 595 Credit: 13,083,686,510 RAC: 745,928 Level Scientific publications |
I would have just swapped the pins in the connector. Faster than firing up the soldering iron. Good annotation, Keith. If you pull the cable while pushing the connection retaining tab across the frame's side window, it is possible to extract it. Actually, that was my first option. But it was not the first time that I did this operation on that old connector, and one of the metallic retaining tabs broke. I then preferred to plug in the soldering iron, and recover the original, newer connector. |
|
ServicEnginIC Send message Joined: 24 Sep 10 Posts: 595 Credit: 13,083,686,510 RAC: 745,928 Level Scientific publications |
|
|
Send message Joined: 28 Jul 12 Posts: 819 Credit: 1,591,285,971 RAC: 0 Level Scientific publications |
I have found that placing a small-size socket wrench over them works too. But they are all gone, thank goodness. I have only metal ones now. |
|
ServicEnginIC Send message Joined: 24 Sep 10 Posts: 595 Credit: 13,083,686,510 RAC: 745,928 Level Scientific publications |
But they are all gone, thank goodness. I have only metal ones now. I keep employing them at non-chassis-matching holes, as a reinforcement ;-) |
|
Send message Joined: 22 May 20 Posts: 110 Credit: 115,525,136 RAC: 0 Level Scientific publications |
Don't know if this is a fitting place to get advice with my current issue: My computer doesn't start/boot. Background: Having built my first PC back in December, I was quite thrilled that my system did post right off the start and has been running smoothly ever since. It was mostly used for light programming stuff and running BOINC in the background. Never noticed any issues. Last Friday, I was working late and noticed that my Win 10 OS didn't report the right time. It occasionally happens, so I just went into the settings and synced with the time server (as I have done multiple times so far). While still showing the "greyed" sync field as in still processing the sync command, I headed into another program. That's when my computer froze. As BOINC was running in the background, I can only assume that the CPU and RAM was under heavy load at that point in time. I'd describe my troubleshooting skills as mediocre, so I went online and researched various ways of handling this issue. As nothing helped "unfreezing" it, I wanted to just shut it down. But it didn't react to my desperate attempts to do just that. Then the PC didn't let it power down. My mouse still worked fine and could click as did my keyboard, but task manager did not respond. Windows didn't let me pull up the terminal to try shutting it down via cmd line. Even a "hard" shutdown by pressing the power button didn't work. I went to bed and let my PC powered on in this "stuck" state. The next morning, nothing did change. As I needed to drive away over the weekend, I didn't know my around "pulling" the power cable from the wall. Now, after coming back to my apartment, I had to discover that my PC won't power back on. I checked every cable. I made sure that the power supply cable was plugged in correctly and was not sitting too sluggish. Switching my power supply on from 0 to - only lights up the power LED of my GPU, but the PC doesn't power on by clicking the power button. Checked another power supply cable. Nothing. Pulled all PSU cables and reconnected them. Nothing. No fans spinning, no input detected on monitor... I don't see any indication at all that the computer is reacting to me pressing the power button. I only have clearing CMOS left, but only would like to proceed if this might be the right next step to do. I kind of fear that I damaged the PSU or other parts by having pulled the plug. Can you advice how to proceed troubleshooting my PC not powering on. By the way, I haven't changed anything hardware-wise since the initial build in December '20. This is the said host if it helps at all: Troubled host |
|
Send message Joined: 13 Dec 17 Posts: 1424 Credit: 9,189,946,190 RAC: 2 Level Scientific publications |
Well since I just had to contend with the same issue, computer would not boot past the display of the "Press DEL or F1" to enter BIOS, and not respond to any keyboard input, I thought I would suggest what it ended up being the reason for my failure to boot. I chased red herrings for a while until I pulled all my drive data connections. That got the computer to boot, and I plugged each drive back in until it failed to boot again. Turned out my oldest SSD was preventing the computer to boot. So with basic troubleshooting, reduce down to cpu, 1 stick of RAM, 1 gpu and no data drives to see if you can at least get into the BIOS. |
|
Send message Joined: 22 May 20 Posts: 110 Credit: 115,525,136 RAC: 0 Level Scientific publications |
All right, thanks. I‘ll try it that out next. Just have 2 nvme SSDs installed on the mobo and 1 SATA SSD. |
|
ServicEnginIC Send message Joined: 24 Sep 10 Posts: 595 Credit: 13,083,686,510 RAC: 745,928 Level Scientific publications |
So with basic troubleshooting, reduce down to cpu, 1 stick of RAM, 1 gpu and no data drives to see if you can at least get into the BIOS. +1 |
|
ServicEnginIC Send message Joined: 24 Sep 10 Posts: 595 Credit: 13,083,686,510 RAC: 745,928 Level Scientific publications |
If not starting anyway with the remaining hardware, try again by swapping it with the retired one. If this second try succeeds, you may suspect for any defective element of those laying on the table... |
|
Send message Joined: 22 May 20 Posts: 110 Credit: 115,525,136 RAC: 0 Level Scientific publications |
So far nothing... Still going through the process of elimination. However, I do notice a light "buzzing" sound as if a fly would be caught in one of those electric fly traps every time I switch off the PSU. Definitely a very nerve wracking process. I am starting to suspect some failure with the PSU. Can a PSU really have such a short lifetime? Hasn't been 2 months ... Should I remove the SATA drive only or also the NVMEs, one of them being the boot drive? |
|
ServicEnginIC Send message Joined: 24 Sep 10 Posts: 595 Credit: 13,083,686,510 RAC: 745,928 Level Scientific publications |
I am starting to suspect some failure with the PSU Me too |
|
Send message Joined: 22 May 20 Posts: 110 Credit: 115,525,136 RAC: 0 Level Scientific publications |
Finally, .... it booted directly into the OS. That elimination process worked like a charm. It turned put that the culprit was one of my 2 RAM sticks. (?!) Strangely, it didn't boot up with either sticks in slot 4, but once I tried out all combination and plugged the first retired module (from slot 4) back into slot 2, it did boot up. I have no clue how that could have gotten corrupted. As I couldn't believe that, I changed the prior slot 2 stick to slot 4 and I did boot up as well. (???) Kind of afraid now that this can/could happen again the parts aren't easily accessible under my massive CPU cooler, but glad it worked out fine in the end. Thanks for your hints! |

©2026 Universitat Pompeu Fabra